
Category Archives: General
Digital Footprint Assignment
1. How might your digital footprint affect your future opportunities? Give at least two examples.
If I made an inappropriate post or comment without thinking then that could come back to me later in my life when I’m trying to get a job. On the opposite of that if I had said something positive or something good related to that job then that could possibly help me to get accepted.
2. Describe at least three strategies that you can use to keep your digital footprint appropriate and safe.
Don’t overshare your personal life, don’t give people every detail about you. Don’t post just because you feel like posting, only post if you have something important or interesting that’s still appropriate. Personally I don’t have any spam accounts but, some people use them so that they can post what ever however those accounts are still yours and will be traced back to you if you say something that you shouldn’t have.
3. If you could go back in time, is there anything that you would do differently online? Think of what advice you would pass on to your younger self or other students.
I don’t remember doing anything that I would change as my younger self but I would warn my self to be more cautious and not to believe everything that i see on the internet.
Training Post
You are now going to create your very first post. In a separate tab or browser window, go to your Dashboard on the left and go to Posts -> Add New.
1) Title – Create a title for your blog post. Your title will be: Digital Footprint Assignment
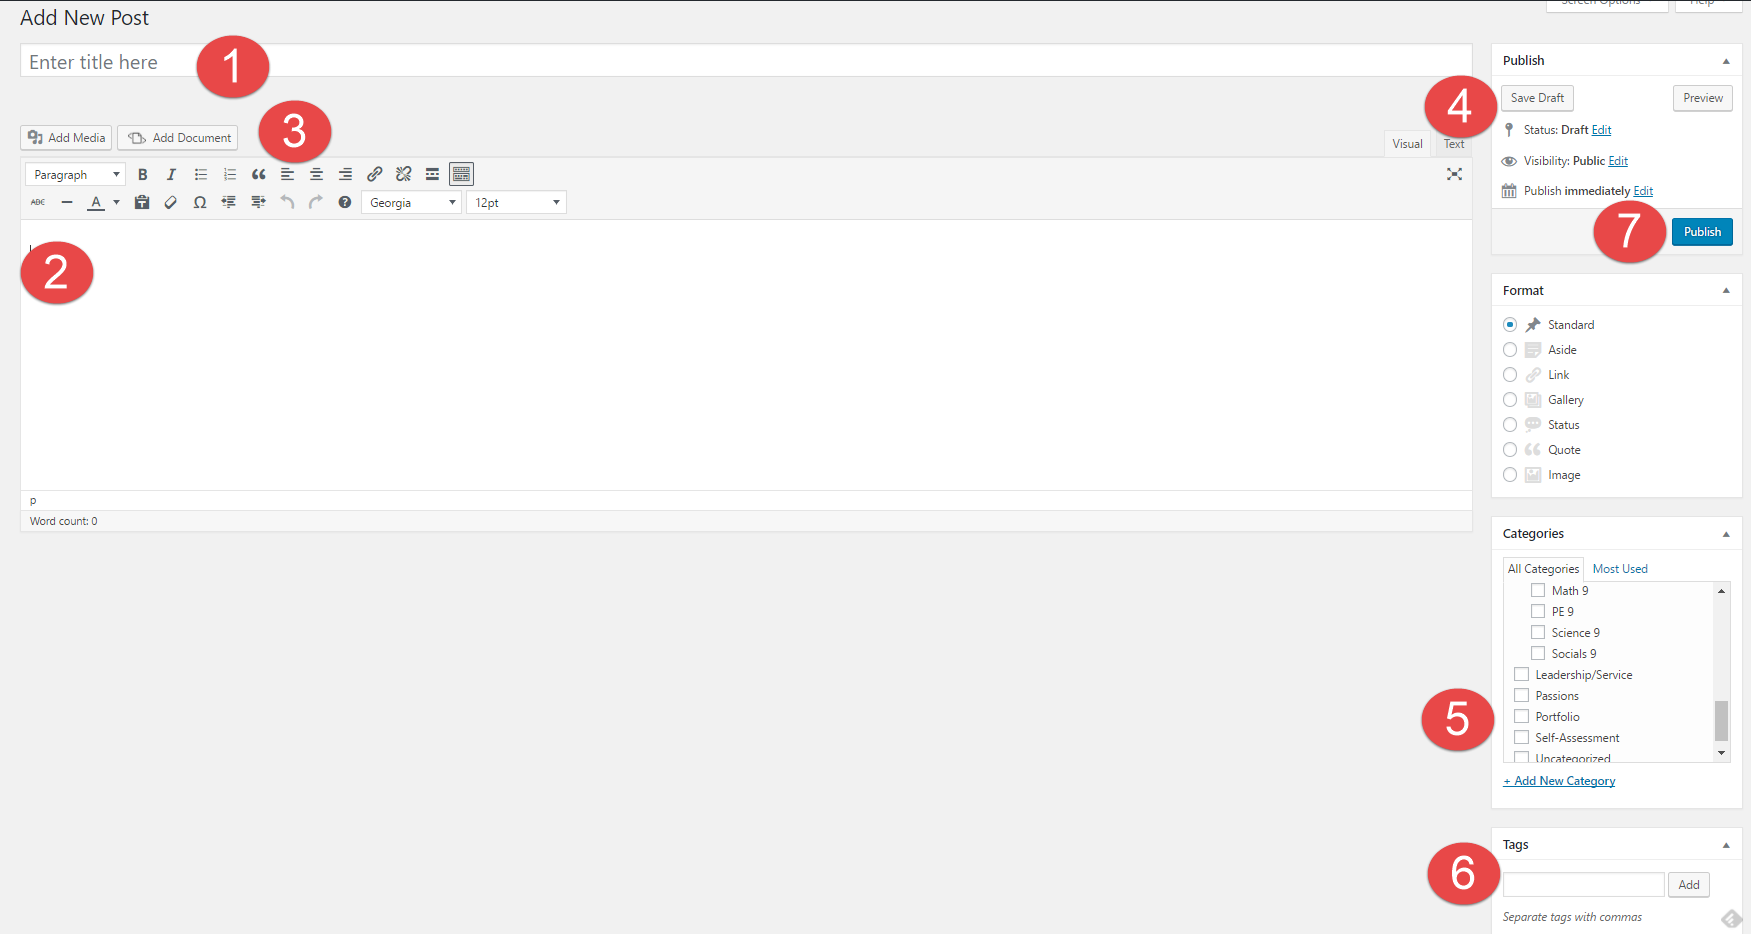
2) Body – This is where you place your content of the post – text, videos, pictures, etc. Follow the instructions on the Digital Footprint Assignment page to see what questions you need to answer here.
3) Tool Bar – In your toolbar you can “Add Media” and “Add Documents” into your posts, this is the best way to create visual representations. You can also change fonts, hyperlink, etc.
4) Publish – Here is where you control what items are public and private. You can also control when they are published to your website.
5) Categories – Here is where you choose where you want your post to go. This is your digital binder with all of your subjects. Make sure to categorize each post with the relevant subject. E.g. Categories -> English
6) Tags – Here is where you tag posts with one or two of the most readily applicable Core Competencies. These tags can help you find things quicker on your blog and help you stay organised. E.g. Tag -> creativethinking
7) Publish – When you are done, simply “Publish” it. If it has been edited, press “Republish” to update with the latest version of the content.