In-Depth Night 2021

Hello everyone and welcome to In-Depth Night!

My name is Simran and for my In-Depth project this year, I pursued jewelry making and focused specifically on making rings. Ring making was a skill that I had never played around with prior to In-Depth and it proved to be a challenging but very enjoyable experience. I would like to thank my mentor Himali for providing me with jewelry-making knowledge and support throughout my In-Depth journey.

For my final project, I have put together a YouTube video and a PowerPoint gallery.

Here is the video tutorial/process video on how to make spoon rings!

For a PowerPoint gallery of some of the rings I have created, click here.

Please feel free to leave any questions or comments you may have about my In-Depth project.

Thank you for visiting my presentation and enjoy the rest of your evening!

In-Depth Post 6

Over these past four weeks, I have had a meeting with my mentor and have continued to work on jewelry making using different gauges (thicknesses) of wire. The smaller the number, the thicker the wire. Throughout experimentation, I have found that that higher gauges/thinner wire is a lot easier and more flexible to work with but is also weaker and more breakable. Using wires and pliers, I made a snake ring, moon ring, heart ring, and cactus ring (all pictured below). The snake ring was the most difficult and time-consuming to make, as it required two different gauges of wire and to attach a stone in the head of the snake and hide the ends of the wire.


Concepts in recent sessions with mentor:

  • Materials
  • Creation Process
  • Analysis
  • Experimentation
  • Jewelry making styles

Action alternatives my mentor has offered me throughout this project include using different techniques when it comes to jewelry making. For example, she showed me a wooden necklace that was created using wood bending. She talked about how to bend materials. The equipment can be quite expensive to purchase so looking at other alternatives are a better option. An alternative would be heating up material by boiling water in order to bent materials easier without spending lots of money. She has mentioned finding creative ways to substitute for equipment I do not have. I applied this when I needed to bend metal to make a ring. A ring bender would have made the process easier, but I found a round metal object and a hammer to use instead.

A perception alternative my mentor has offered me is in order to progress, look for aspects to improve when analyzing your creations, rather than just focusing on the bad and the good. Then, figure out possible ways to improve the jewelry and put that into action.

An alternative another mentor may have offered me is finding alternative resources to further my learning. Because of different perceptions and ways of looking at situations, another mentor would have had alternative judgements and actions.

For my learning center, I plan on creating a gallery-style PowerPoint with pictures of my favourite jewelry pieces I have created with a short explanation regarding each one, and maybe show a before and after if I made the piece multiple times. I may also create a short video tutorial on how to make a spoon ring or a wire ring. I am thinking that it would be just around a minute because on In-Depth night, there are many learning centers to visit, and people will not have an extended amount of time to look at each one. The aspects that I will be focusing on are mostly the creation process and results. Although there are many details of In-Depth, I could talk about like figuring out what I want to create, finding alternative ways without expensive equipment, the research side of jewelry making, and experimentation, I think the creation process and final results will be best to showcase. Knowing that I cannot share everything I have learned, I want to present the pieces I am proud of and the process it took to get there. I hope the audience will take away how trying a new skill can be a lot of fun and there are many people and resources you can find to teach you along the way. I also hope they can learn that the first attempt is not going to turn out exactly how you want it to, but practice makes progress. Through experimentation and multiple attempts, you will definitely see improvement. To make this learning center interactive, I will most likely create a video tutorial. This creates engagement, rather than just having a static presentation of just words. Additionally, everyone will be able to add comments and questions to the learning centers which I will be replying to.

Until In-Depth Night!

In-Depth Post 4 & 5

For the past while, I have been focusing on making rings out of wire and stones. My supplies arrived and once I got wire from Michaels, I got to work. I have been learning how to bend wire with different types of pliers. The three types I am using are round-nose pliers, side cutters, and needle-nosed pliers. Round-nosed pliers are ideal for forming loops and curves easier, side cutters are great to cut wires, and needle-nosed pliers provide precise crimping, bending, and holding for jewelry making.

For background info, wire gauge refers to thickness. The higher the gauge, the thinner the wire. The first ring I made was using 18-gauge wire. It did not turn out how I wanted it to due to messy wrapping, the unevenness off the bottom of the ring, and the overall look. After analyzing the ring and figuring out what I needed to do to improve, I tried a couple more times. The ring in the middle is an improvement from the first, but still not quite how I wanted it. The middle ring used 20-gauge wire, meaning thinner than the previous ring. The thinner wire made wrapping easier and more precise. Although it was better, I wanted the wrapping of the stone to be nicer, and the bands on each side to have the same number of loops. The ring on the right is one that I am proud of. After many attempts, I got to where I was happy with how it turned out. This ring was completely circular, the stone was secure and wrapped well, and there were three even loops on each side. Through lots and lots of trial and error, I was able to show improvement.

Through conversations with my mentor, I have been practicing my listening skills. Some new information I have been getting is about recognizing room to improve through analyzing my creations, ways to use different tools and materials, and how to remain creative through the process. A question I asked was about how my mentor comes up with the ideas for the jewelry she has made, which probed further discussion about finding my own jewelry-making style as time goes on. A new point of view I developed while talking with my mentor was how it really is not 100% necessary to have all the equipment, but it is more important to equip yourself with the mindset that you can find different ways of doing things without all the right equipment. Questions I asked to check on facts and details were, “what is the name of the technique you used for this piece?” and “how long did it take for you to create that necklace?”

I have focused on asking questions with a purpose. For example, when asking how my mentor comes up with ideas for jewelry, the purpose was to get insight into how I could become more creative through my jewelry-making process. A multiple-choice question I asked was, “what type of jewelry do you enjoy making the most; earrings, necklaces, or rings?” I think it was useful because not only did I receive insight on jewelry making itself, but it also furthered the discussion and learned about different types of jewelry.

De Bono talks about the six hats, and how we incorporate them into discussions. Here is a short conversation I had with my mentor, and the identification of the hats present in the discussion.

“It’s always great to be experimenting with new stuff and new designs. But some of the pieces were made kind of by accident…” This indicates the yellow hat as it led to me trying to take meaning away from what she said.

“So sometimes it’s not what you were planning, but in the end, it turns out good, kind of like a surprise? This is a slight indication of the black hat. Not exactly in a “bad” way, but I was thinking critically by using my judgment.

“Yes, you don’t know until you try.” This is an indication of the red hat, specifically intuition.

“Do you think online resources are a good way to learn more about jewelry making?” This falls under the green hat as the question is productive and asks for ideas.

“Yes, places like YouTube, you can learn anything these days. This relates to the white hat as it is information-based.

All in all, In-Depth is going fairly well. For the next while, I think I want to make more rings but using different techniques.

Stay tuned for the next update.
 

In-Depth Post 2 & 3

In-Depth has taken a new course since my first In-Depth post. Originally, I was going to pursue punch-needling, but I could not find a mentor anywhere and the skill focused too much on repetition, rather than building skills through the learning process. Now, I have switched gears to jewelry making because it is also a hands-on skill that I am interested in.

I have been experimenting with making spoon rings because I saw a video a while back which piqued my interest. Using old, thin, spoons I had at home, pliers, a table clamp, hammer, and round metal object, I was able to create spoon rings.

Here is a PowerPoint outlining a step-to-step tutorial with pictures.

http://https://sd43bcca-my.sharepoint.com/:p:/g/personal/125-schen_sd43_bc_ca/Ef-a0RLzYfJKhTAvL6MmEskBbR9xxXMBRTBpvqm-W6PDdg?e=ANDzkq

My first attempt was not so great, and it turned out more like a triangular shape. By implementing different techniques, I was able to get it looking closer to a round circle on my second attempt. I was content with this, but I felt that I could do better. By integrating alternatives and knowledge from my mentor, and learning through trial and error, my third spoon ring looks completely circular and it something I am proud of.

1st, 2nd, & 3rd Attempts (left to right)

I have been making an effort to focus on de Bono’s advice on how to agree and how to disagree. Agreement comes fairly easy to me, especially in a mentorship setting. Though agreeing can come easy, I need to remember that agreement must be completely genuine and not because you feel an inclination to do so. I have focused on agreeing while adding my own ideas and thoughts to conversations with my mentor.

I find disagreeing to be a bit more difficult than agreeing. Through reading How to Have a Beautiful Mind, I have grasped the idea that disagreeing is critical, but it needs to be done in an effective way. For example, you need to disagree politely. Disagreeing in a rude way just drives tension between you and the other individual. While talking with my mentor, I have made efforts to politely disagree and differ. I have tried my best to communicate why I disagree or why I am not completely following with the ideas she is expressing to me.

De Bono tells us how to be interesting is important and interest can arise from meaningful conversations. Through conversations with my mentor, I think I have been able to practice some of De Bono’s tips on this topic. A connection made that generated interest was talking about how her jewelry-making journey began, which connected to my interests. I tried to engage in the conversations with my mentor and focus on the topics that I was most intrigued by.

Through conversations with my mentor, I have also tried my best to ask clarification questions. I have learned that if I am not completely understanding something, it is important to stop and address that, or else my mentor will think I am following along. I have also been incorporating my own experiences/stories into conversations, which has helped the flow of discussions. Although she is my mentor and I am the mentee, there are ideas we can both learn from each other through meaningful conversations.

After creating rings out of spoons, I want to still create rings but out of different materials. Now, I am looking to make wire rings with stones. I have ordered a few supplies that should be arriving very soon, and I also need to drop by Michael’s to pick up some wire.

More updates to follow!

In-Depth Post 1

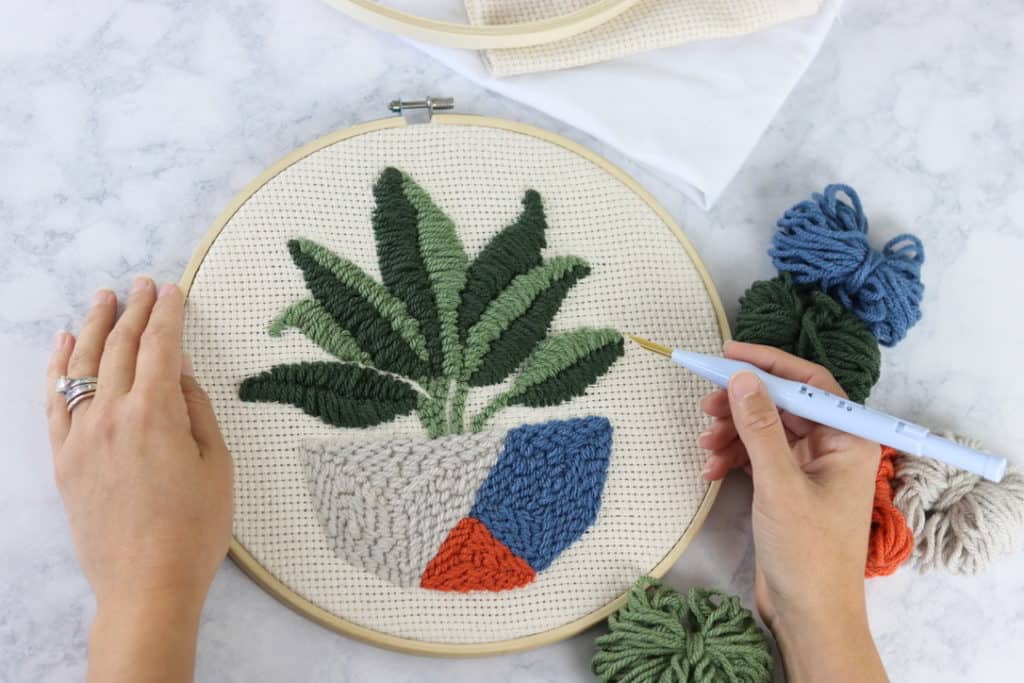
For my In-Depth project this year, I have decided to explore punch needling. Punch needling is a craft related to rug hooking. When using a punch needle, you push the needle into the fabric while keeping the needle on the surface. This motion forms a series of loops that can form a rug or embroidery piece. I chose punch needling as my topic because it is a skill that I have recently found interest in. I enjoy hands-on projects and punch needling seems like a fun passion that can be done to pass time. By learning this skill, I hope to have gained a new hobby that I can continue after the in-depth project period. 

Learn Punch Needle Embroidery: A Beginner's Guide - Raising Nobles

To learn the basics of punch needling, I will use various resources such as YouTube videos/tutorials, blogs, websites, and books. I have found that there are many online resources and specifically many videos on how to get started with punch needling. Additionally, I will also receive assistance and support from a mentor. With the help of a mentor and online resources, I feel that I will be prepared to learn how to punch needle and gain experience in many techniques. 

I have done some searching online but I currently do not have a mentor in place. There are not many individuals locally who are knowledgeable in this specific craft, so I have found difficulty finding a mentor. I am looking to visit Michael’s as there may be someone experienced in punch needling. If I cannot find a mentor quickly, I may have to switch my topic as In-Depth is already rolling. An alternative topic I have in mind is piano. My mother could be my mentor and piano may work out well as I have a piano in my house already.  

As of right now, I have purchased supplies I need online such as the punch needle, monk’s cloth, and an embroidery hoop, but they have not yet arrived. I will also purchase yarn and backing cloth as soon as possible. Although I have not had the chance to punch needle yet, I have been watching many videos and tutorials on how to get started. I have also kept track of some inspiration ideas that I would like to create.  

The In-Depth project will take place from January through May. Throughout these five months, I will be having meetings with a mentor, completing blog posts, and tracking my progressMy goal is to be consistent with working on In-Depth. This means practicing punch needling every week and learning new techniques and information. I want to create punch needle pieces throughout all five months and to present my learning at the end of In-Depth, I am looking to create a large-scale punch needle rug that showcases all the skills I have learned. In addition, I may create a video or presentation on the basics of punch needling.  

I aexcited to embark on this learning journey and hope for an engaging and enjoyable experience!