In-Depth Blog Post #4
Hello and welcome back to my blog. This post will focus on my progress in my in-depth project.
This post covers chapters 6 and 7 of How to Have a Beautiful Mind. The two main topics from the chapters were, “How to listen” and “How to ask questions. When meeting with my mentor this time, I tried very hard to be more engaged and listen to what my mentor was saying with thought. Asking a lot of questions helped me deepen my understanding of the topic.
Hear is one of the conversations that me and my mentor had. I think that it clearly displays this prompt: #6 What were some of the alternative perceptions that are new to you.
Mentor: I wouldn’t make the top or bottom of the front of the shirt double sided.
Me: In the video that I watched the bottom wasn’t supposed to be double sided. Only the ruched top part was.
Mentor: If the fabric was stretchy then you would make it double sided. Otherwise its just useless with cotton fabric.
Me: But won’t it feel nicer against the body if you can’t feel the ruches?
Mentor: I believe you won’t feel a difference with cotton.
Me: Okay.
Mentor: So, nothing will be double sided, we’ll just have nice seams.
Me: Sounds good. Lets take my measurements.
In this conversation you can see that I had a very one-sided opinion on how to sew the shirt because I had only watched one video. I was first hesitant to to listen to my mentor but then I remembered that my mentor has a lot more experience.
After finishing my pyjama pants I began my next project. I had this red-orange-yellow fabric with butterflies on it laying around and I knew had to make something with it. I’ve seen similar prints like this recently become more popular and I think they will be very trendy this summer. Here are some inspiration pictures that I had for this project. Keep in mind that the piece of fabric that I had was quite small, so as much as I wanted to, I couldn’t choose to make a dress. In the end, the piece of fabric was just enough to make the shirt.


This video gave me a very basic idea of how I should begin tackling this project.
The girl in the video has stretchy jersey-like fabric, but I had to work with cotton. The issue that this posed was that 100% cotton isn’t at all stretchy. So, my mentor and I had to come with a way that I would still be able to put the shirt on and still have it tight-fitting. Some options that we had were either a button-down back, a zip-up back, a lace-up back, or a shirred back. For reference here is what a shirring looks like.

I thought that a shirred back would look best with this shirt. With a basic plan in mind, my mentor and I began taking my measurements. Using my measurements we drew an image of the back and front of the shirt and did some math to figure out what should be the dimensions of each piece. This took quite a bit of critical and thinking and collaboration to figure out, as we were coming up with the pattern ourselves. Here is an image of one of the drawn-out pieces.

After cutting out all of the pieces, I began sewing the ruched part of the top. To do this I had to sew two seams on the bottom of the shirt about one centimetre apart. I did the same on the top of the shirt. Then I pulled on the strings that were hanging out from the stitches to make the top the correct length. I would later sew in between the two seams to secure the ruches. Without the two original seams, I would have never been able to create that clean ruche look. I then sewed the rest of the front pieces together. Here is how it turned out.

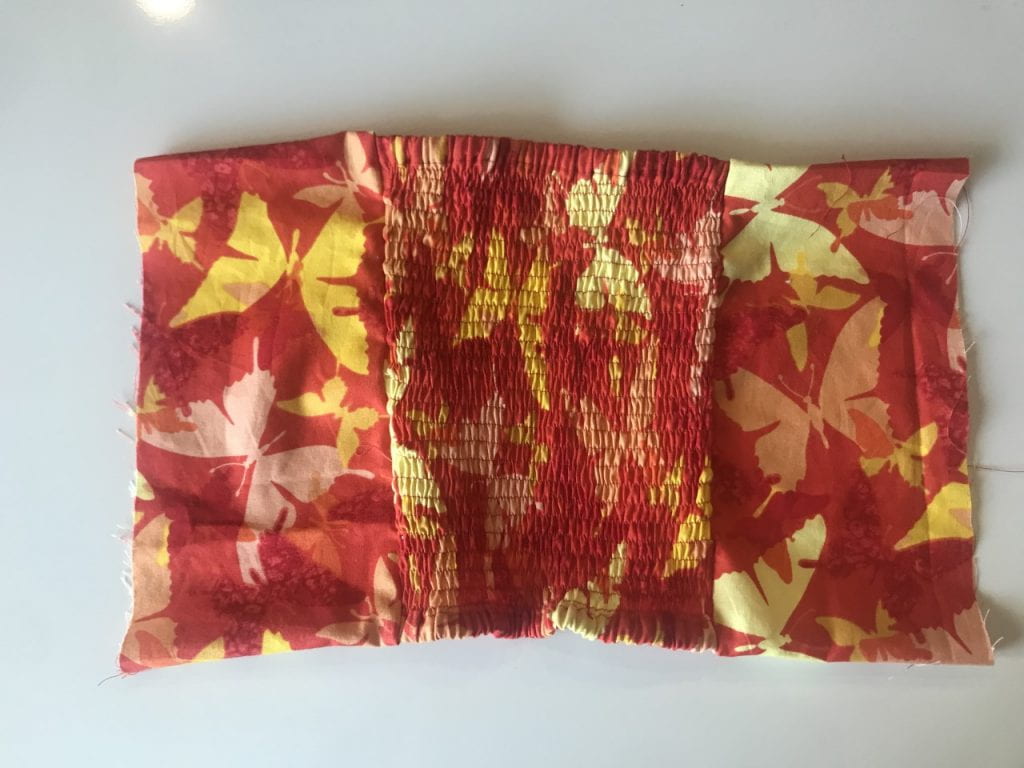
Next, I began on my shirred back. Neither my mentor nor I have ever shirred something before, so it was a learning experience for both of us. This video taught me how to shir something. To do this I had to change out the thread in the bottom to an elastic thread. I practiced a couple of times first on a piece of scrap fabric before moving on to my shirt. The shirring process took a very long time actually as I had to stitch back and forth down the entire length of the back piece. I think it took me a bit over an hour. Then I sewed the rest of the side pieces together. Here’s how it turned out.
I honestly think this one shirt has taught me so much since my last blog post. There were so many complex components that taught me so many new skills and techniques.
I think that this project has been particularly stressful and difficult because my mentor and I were coming up with how to sew the shirt on the go and there were a lot of key details that had to considered when making this shirt. Multiple times I had to rip some seams and resew them because we had sewn them in the wrong order.
Originally, the shirt was supposed to have the entire back shirred however, there was an unfortunate incident. My mentor decided to help me by cutting out the hems, and there was a major facepalm moment when she cut them out of the piece of fabric for the back. However, there wasn’t enough extra fabric to cut out a new piece for the back that could be fully shirred. So, we came up with a solution. I would have a smaller panel in the center that would be shirred and then the sides would be normal. In the end, it actually turned out really well and it ended up saving me a lot of time; now I didn’t have to shir as much.
I will continue sewing this shirt and hope to finish it by the end of my next meeting with my mentor. I will be working on finishing all of the seams on the inside and hemming the raw edges on the outside, as well as sewing the front and back together and creating the straps. I am already very proud of how its turning out, and I’m looking forward to being able to wear it.
Thank you for reading my post and I will see you in the next one.