Hello and welcome back to my blog. Today I will be discussing how my year went concerning technology and the quarter system.
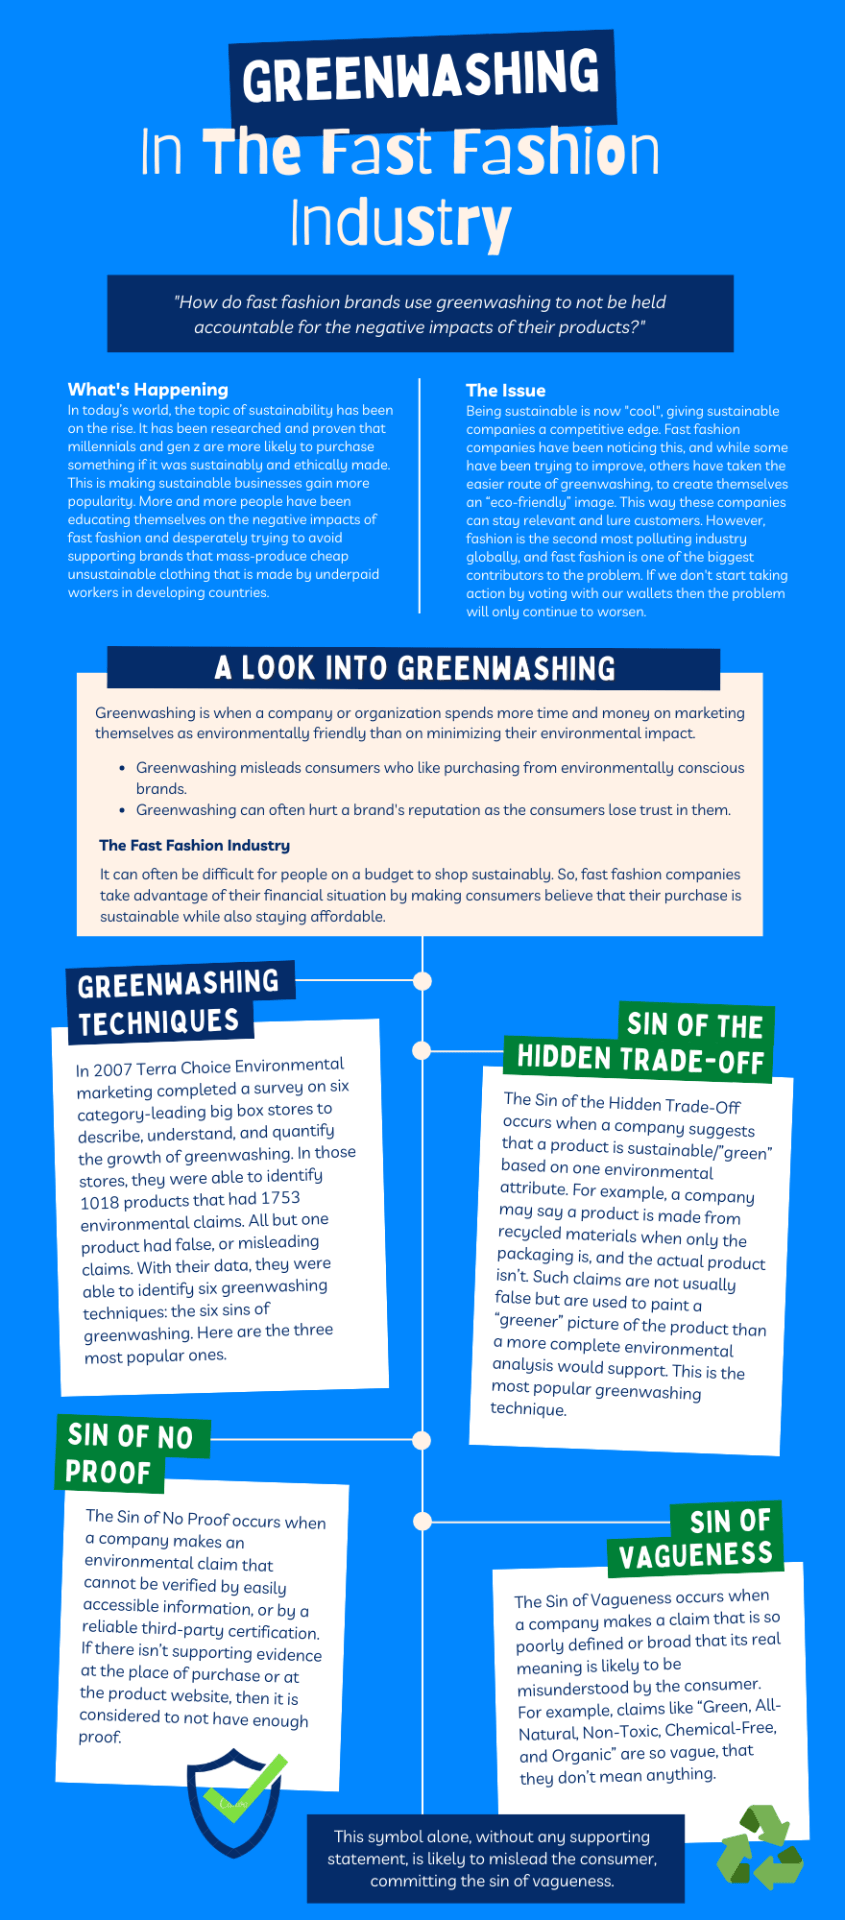
This year we had the quarter system, which split our courses into two parts: hybrid learning and learning groups. In my opinion hybrid learning moved quite slowly in most courses, compared to the learning groups which were moving at an intense speed. Having one of your classes be hybrid was quite nice as it allowed you to relax a bit from your other class. At the same time, hybrid concentrated on teachers having trust in you and your responsibility. Sitting behind a screen at home and doing your work without getting distracted requires a lot of self-control and self-motivation. In the hybrid system, technology was extremely beneficial. Our computer screens were able to connect us together and we could still continue with our learning. Our technology also provided us with endless amounts of information that we could use to our advantage. However, as I have already mentioned technology can be easily distracting, and we can quickly forget what we’re supposed to be doing. Personally, I liked the learning groups more, I just wished they moved at a bit of a slower pace. The one thing that I did like about the quarter system was that it helped me be more organized as there were fewer classes and fewer things going on at the same time. Two great examples of when technology was very beneficial in my studies was my ZIP project and my Eminent project, both were inquiry-based. In my ZIP project, I researched how fashion brands use greenwahing techniques to not be held accountable for the negative impacts of their products. I was able to find a lot of great sources online that helped me answer my question. I also put all of the findings together with the help of a digital media website called Canva. Here is one of the pages from my final infographic.
For my Eminent project, I had to research an iconic person and I chose Coco Chanel. I had a lot of fun doing this project and if you want to see my learning centre from it, click here. I also used Canva on this project to present my learning.
Being exposed to so much information really helped deepen my understanding and knowledge on both of these topics.
I can’t wait to see what new things I’ll be doing next year using technology.
Hello and welcome back to my blog post. This post will focus on my progress in my in-depth project.
This post covers chapters 9, and 10 in Edward De Bono’s How to Have a Beautiful Mind. These two chapters were on “Concepts” and “Alternatives. In chapter 9 De Bono explains the difference between a concept and a practical idea. One of the concepts I was able to recognize from this week was curved stitching.
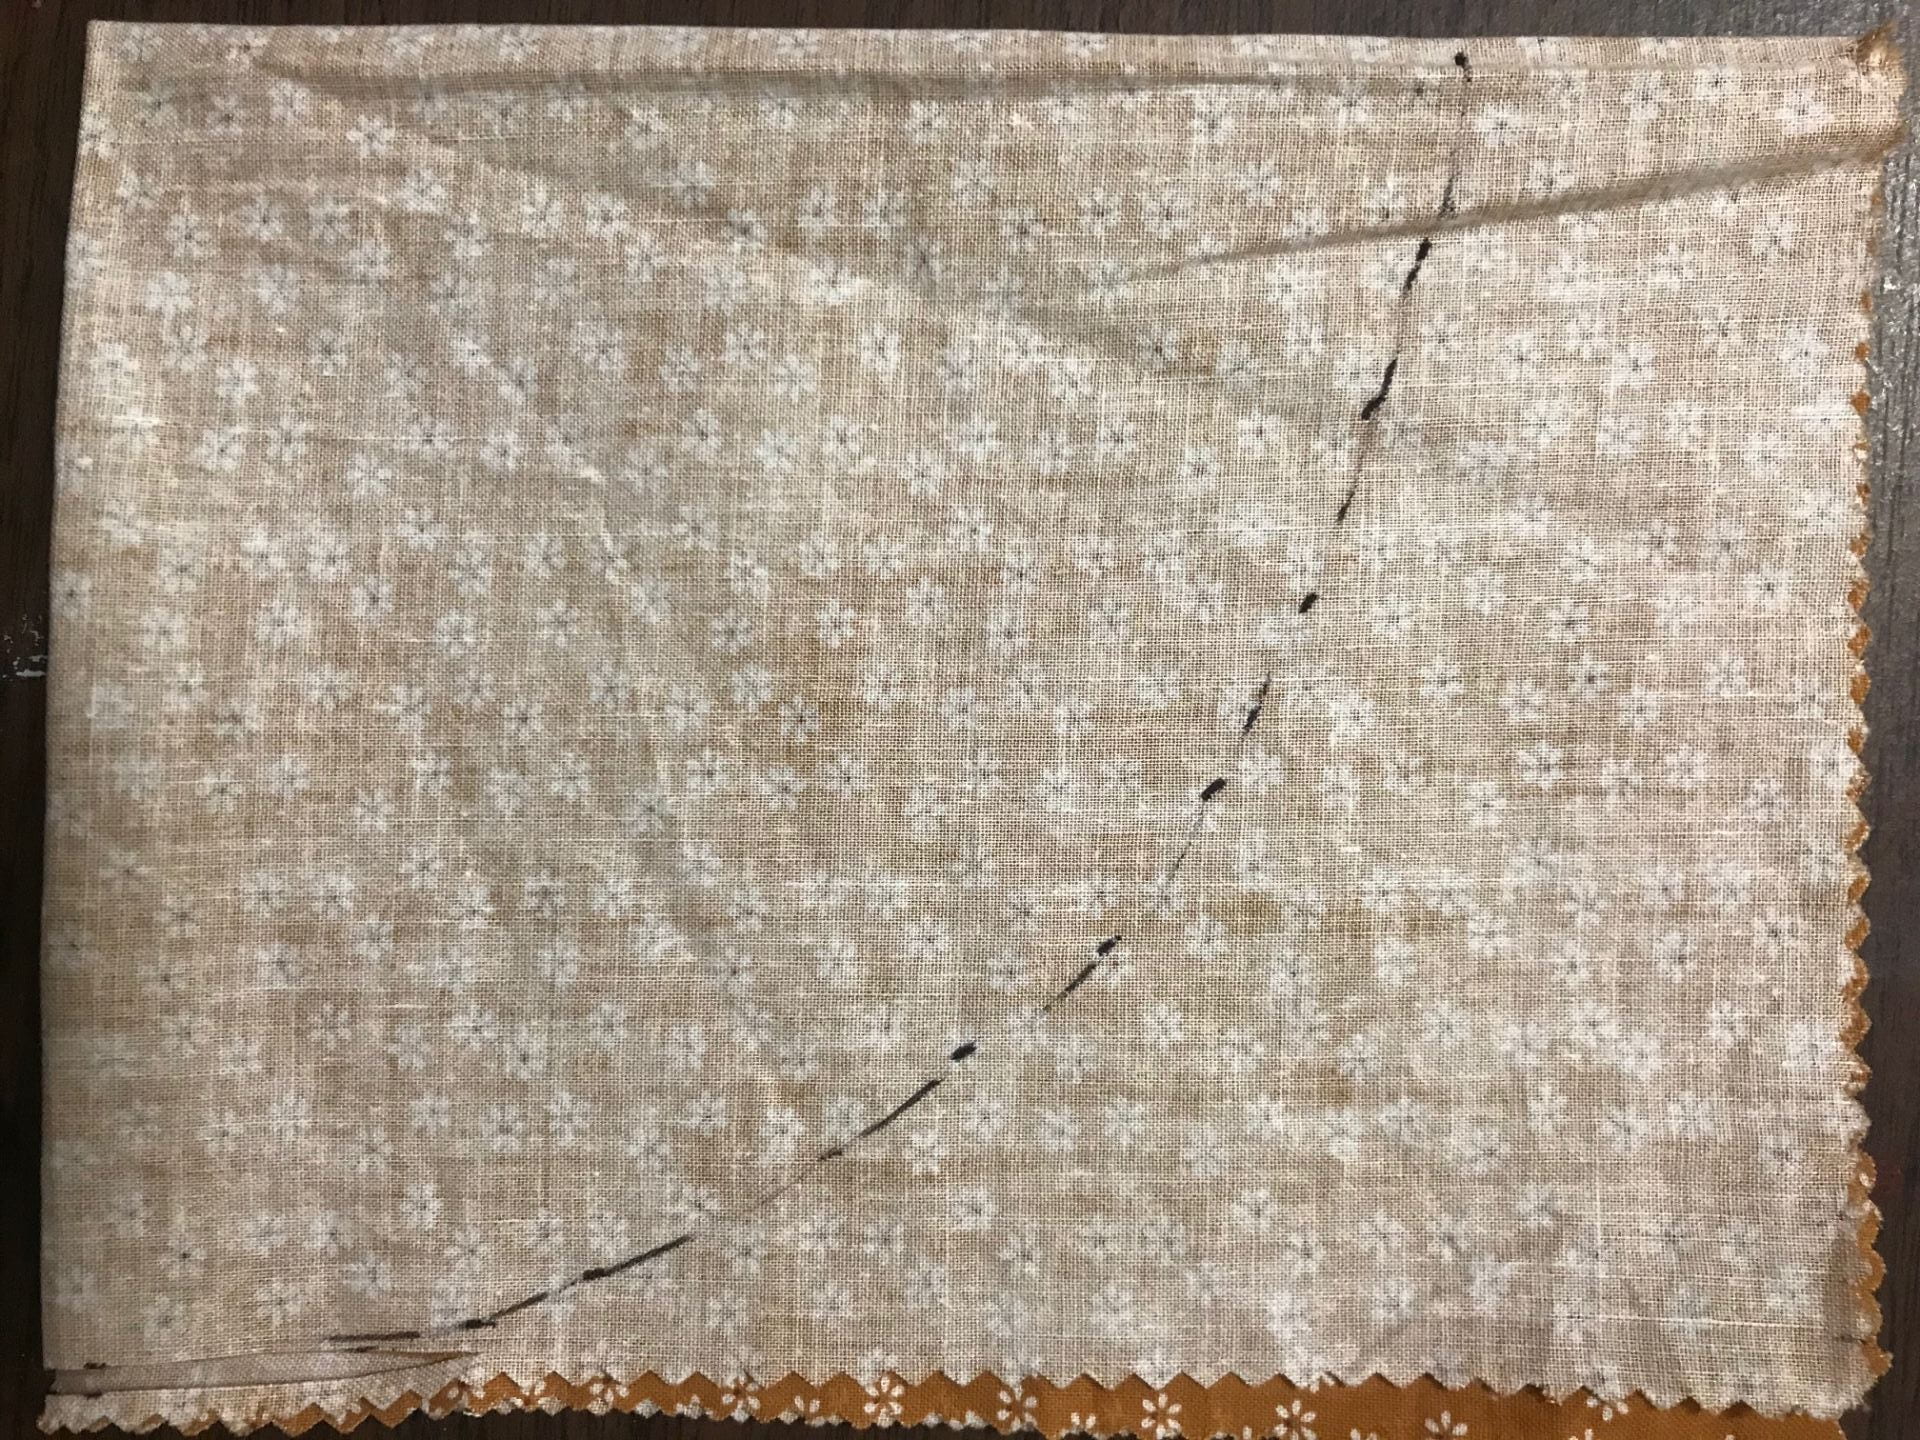
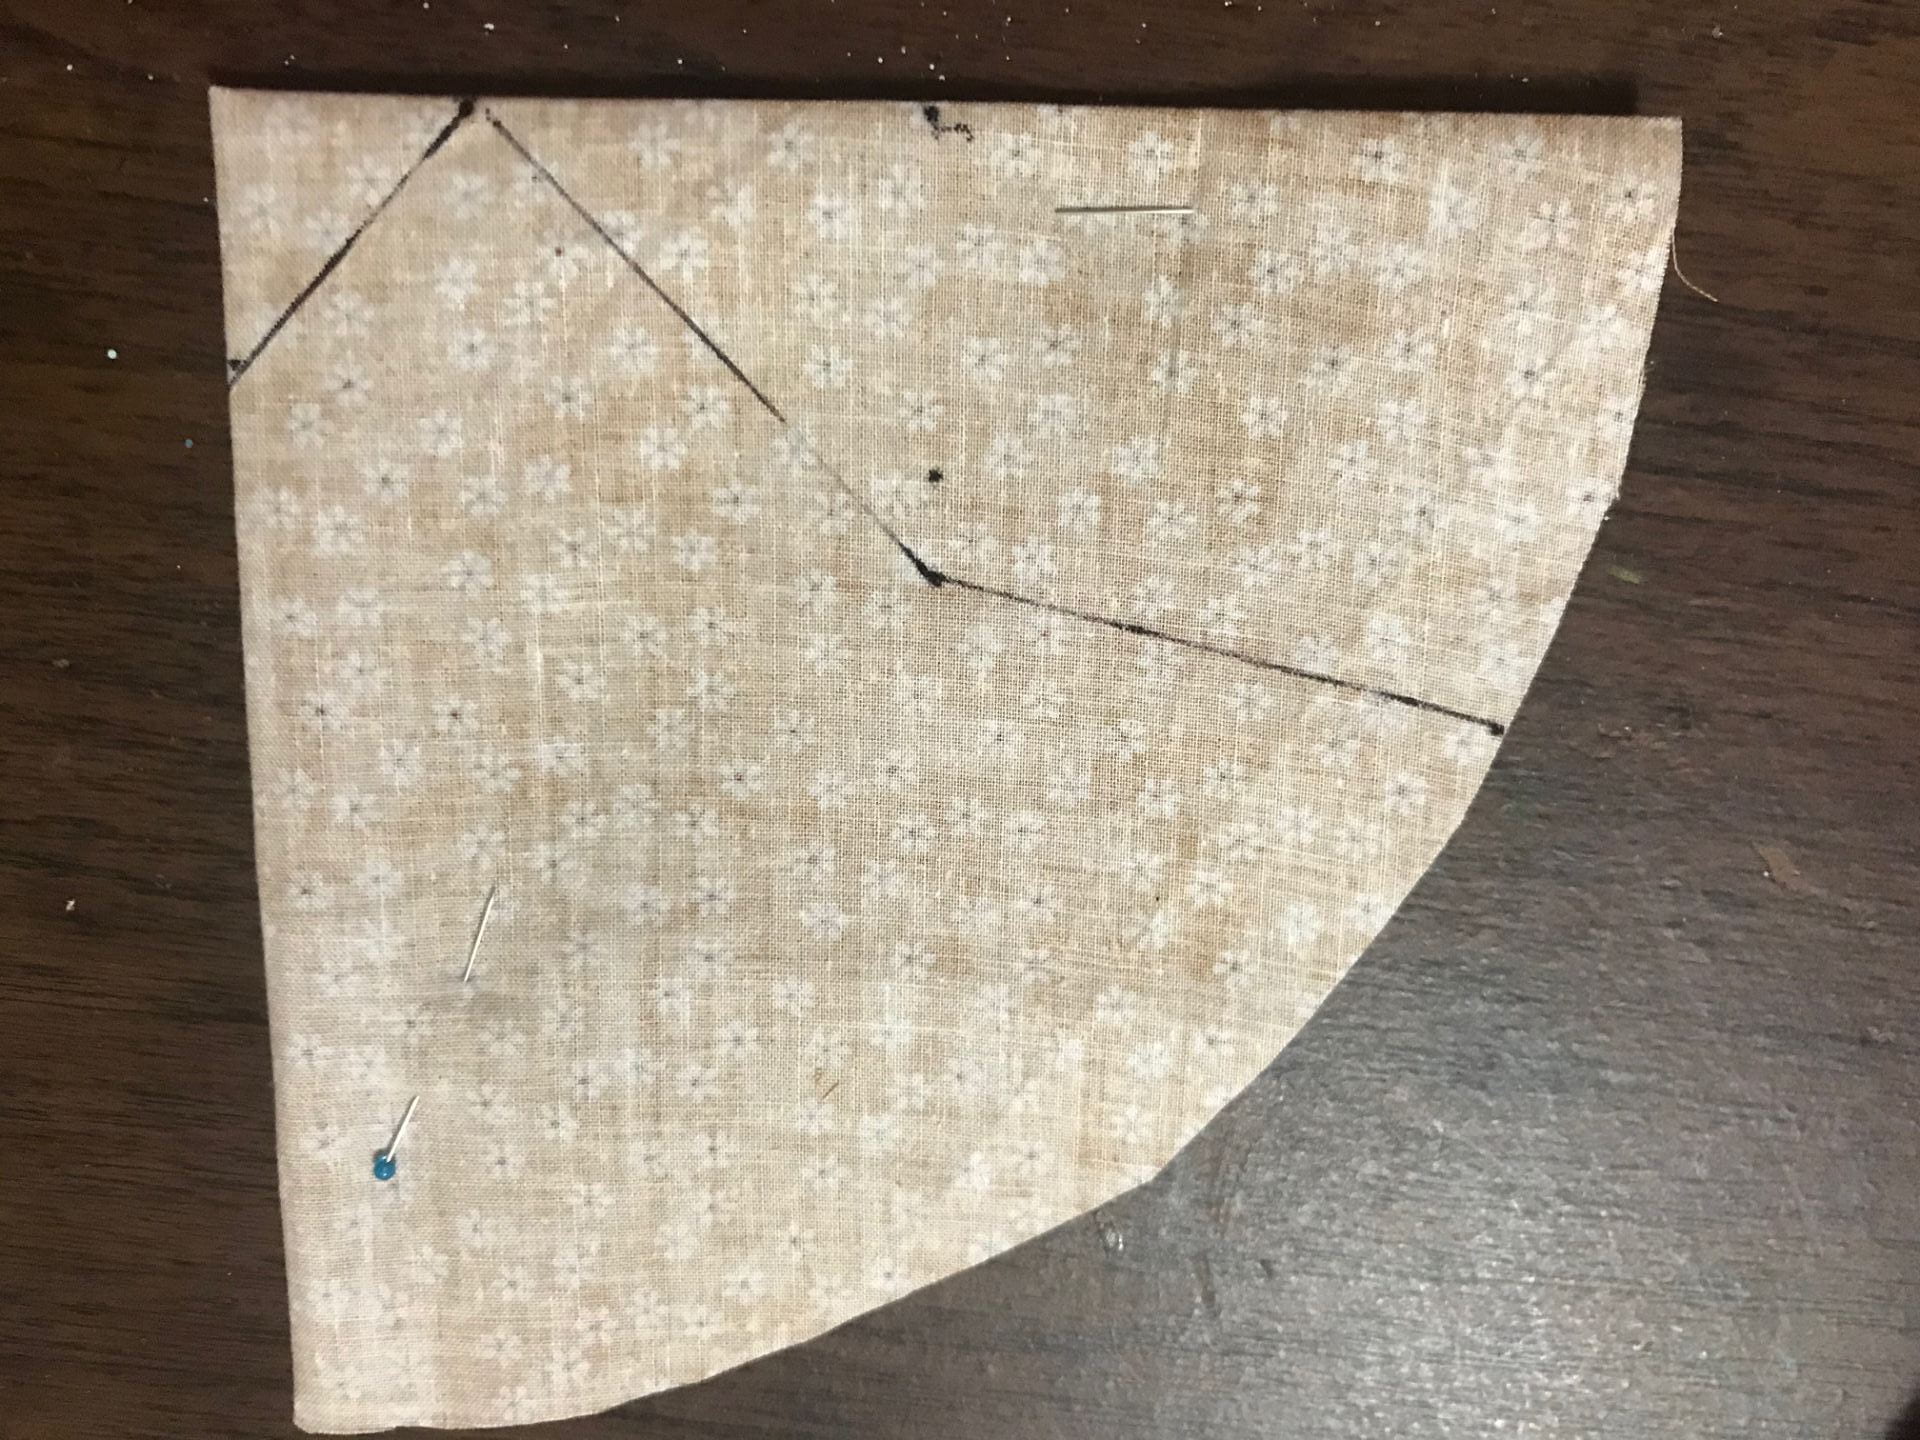
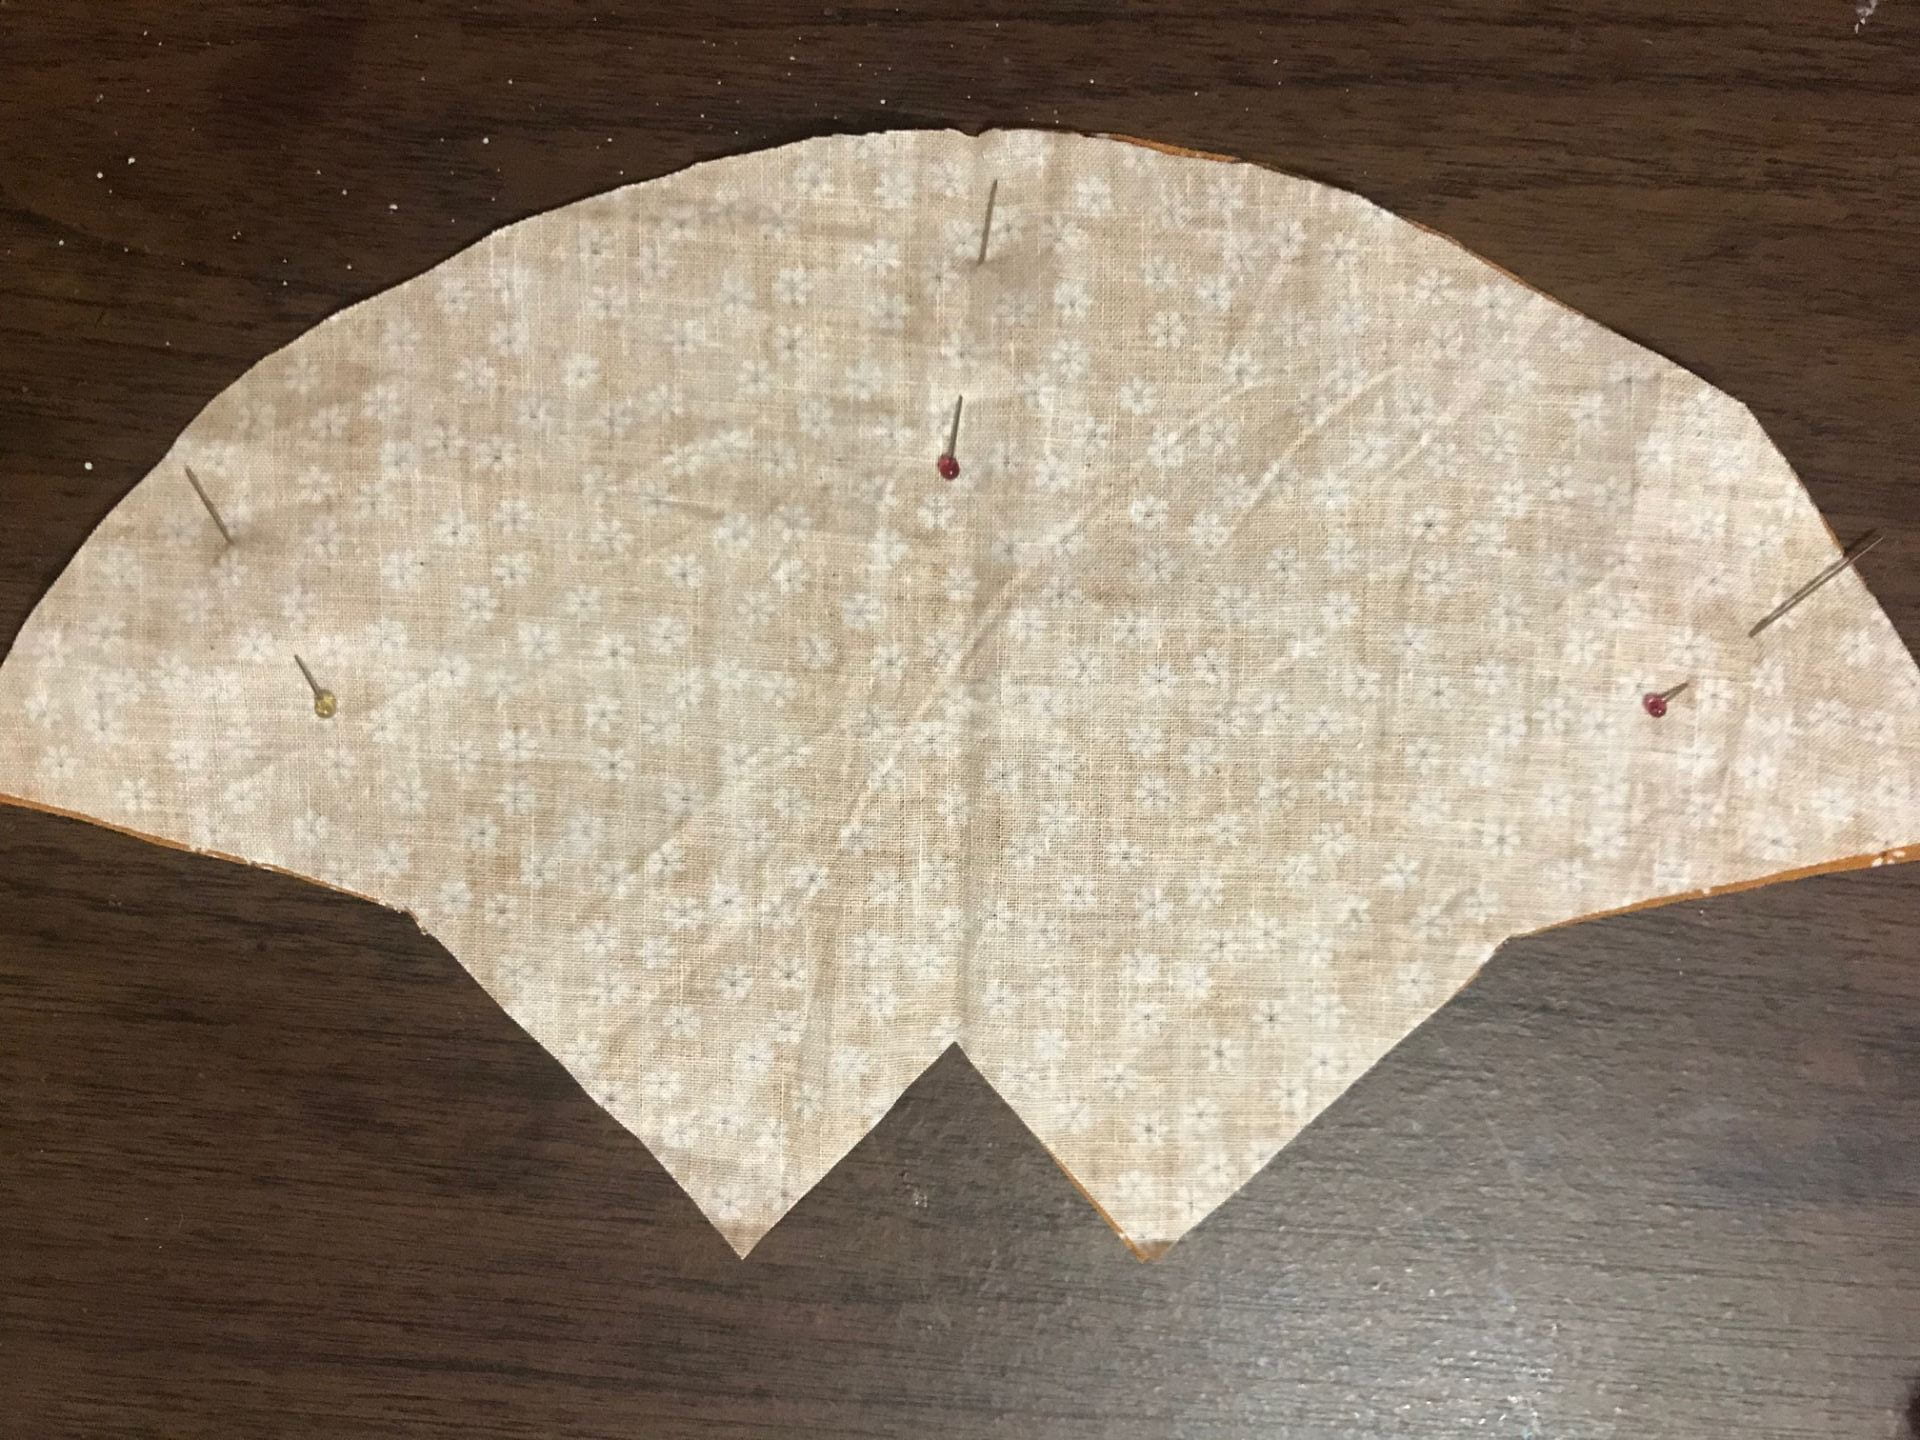
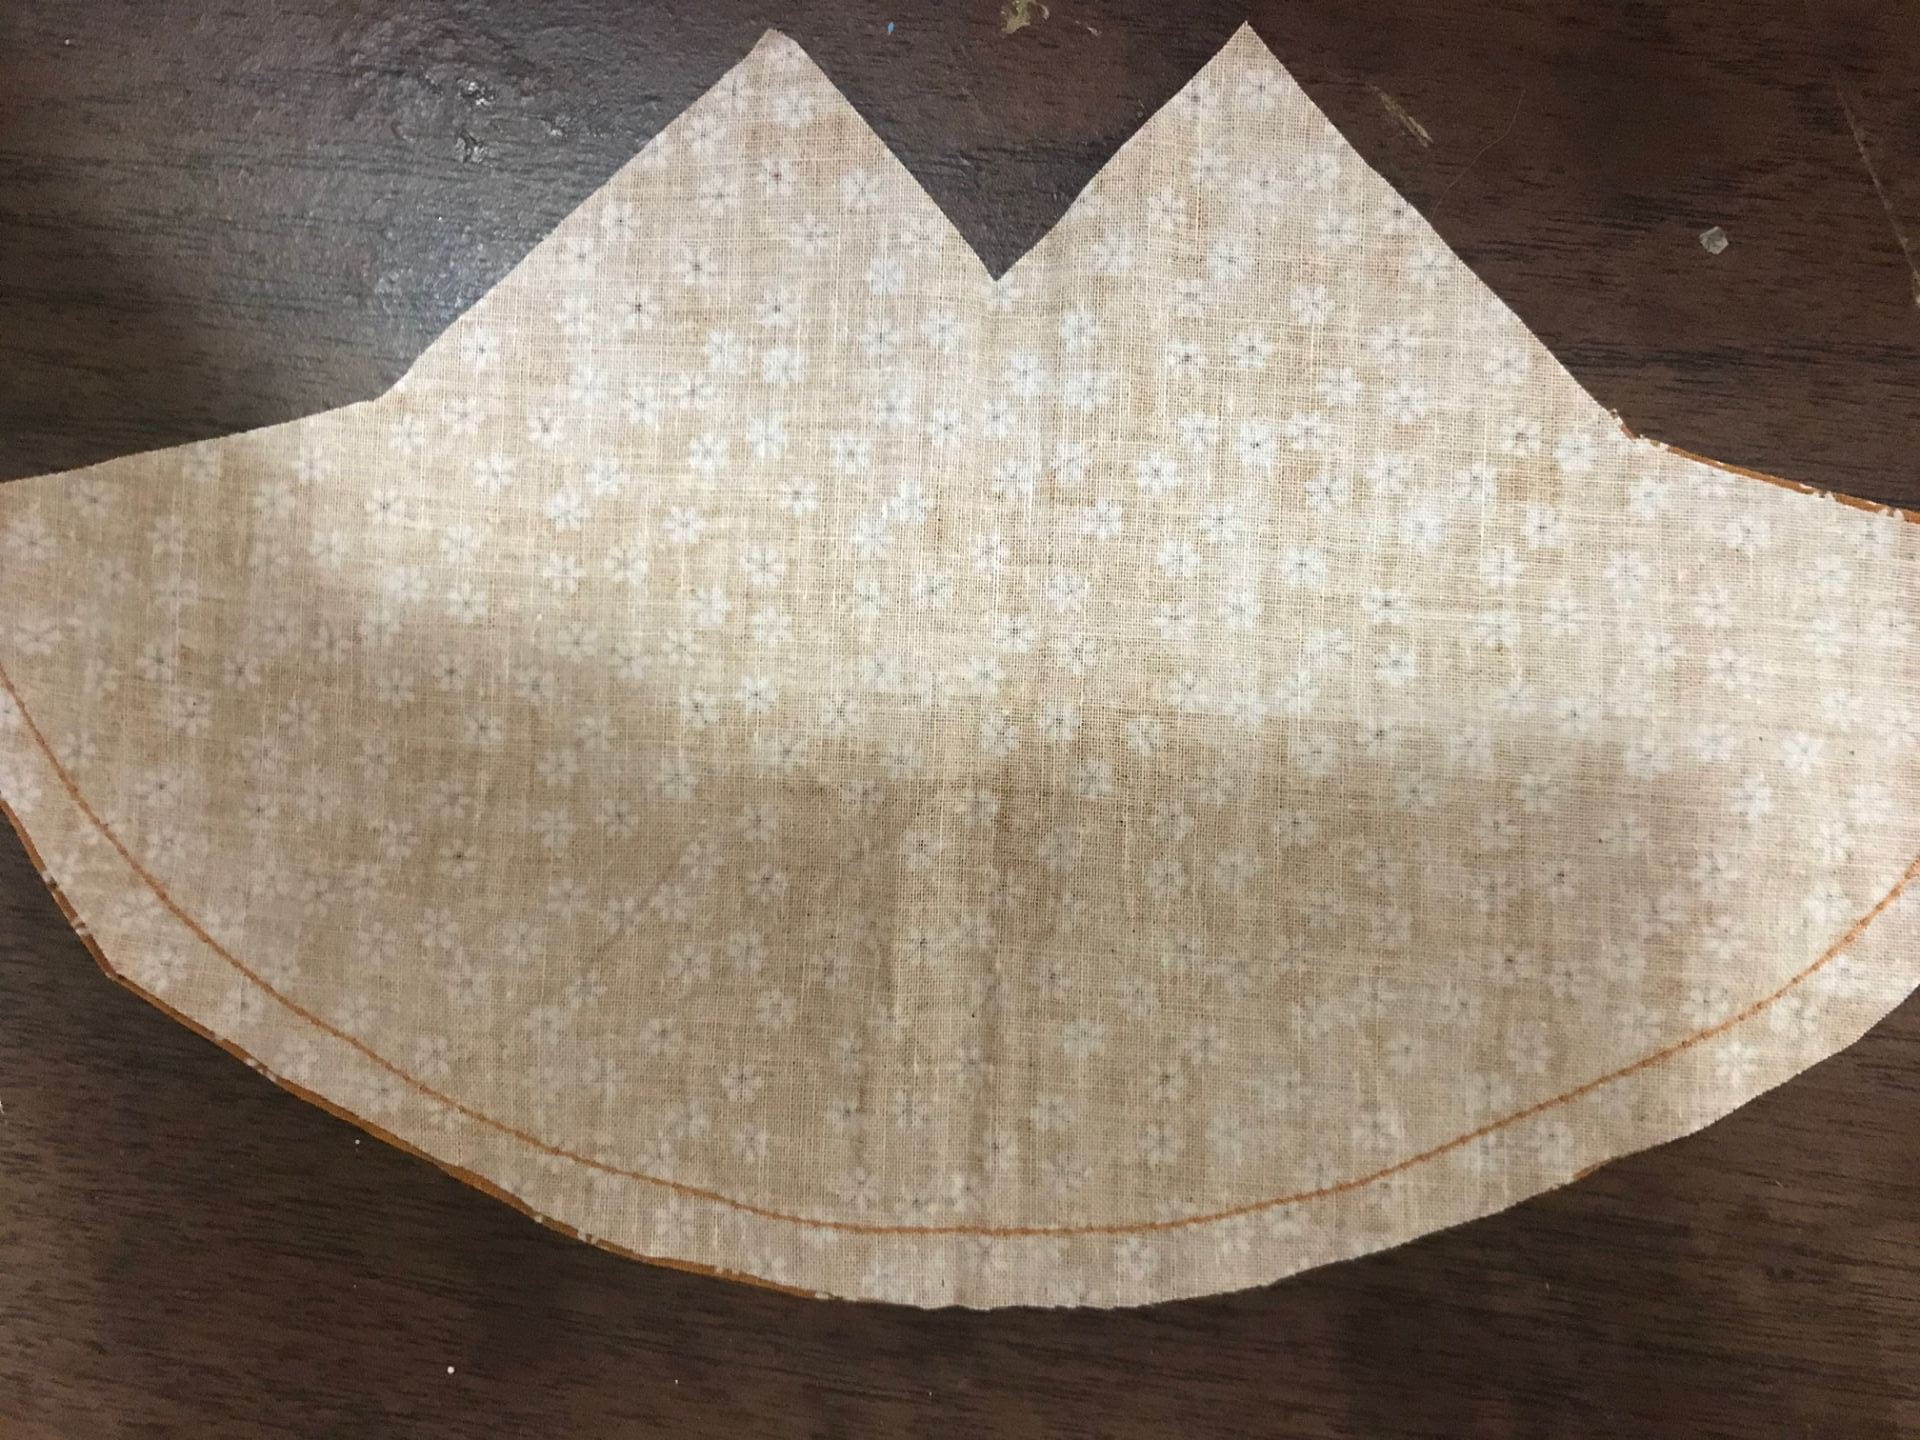
Throughout my meetings with my mentor, she has provided me with countless alternatives. Here is one of the alternatives that my mentor provided me in this last meeting. If you watch the video below from these timestamps, 0:24 – 1:37, you will see how the person in the tutorial cuts out a circle. My mentor suggested an alternative of how to do this in fewer steps. Instead of first cutting out the square with the right dimensions, she told me to fold the fabric into four. Then she halved the measurement for one side of the square, medium is 28×28 cm, so 28/2=14. I then marked off 14 centimetres on the folded fabric and continued marking off the circle the same way the video did. My mentor always provides me alternatives that complete things better, faster, and more effectively.
This week I decided to make some masks. After spending some time watching tutorials on YouTube, I finally found one that I liked. Here it is.
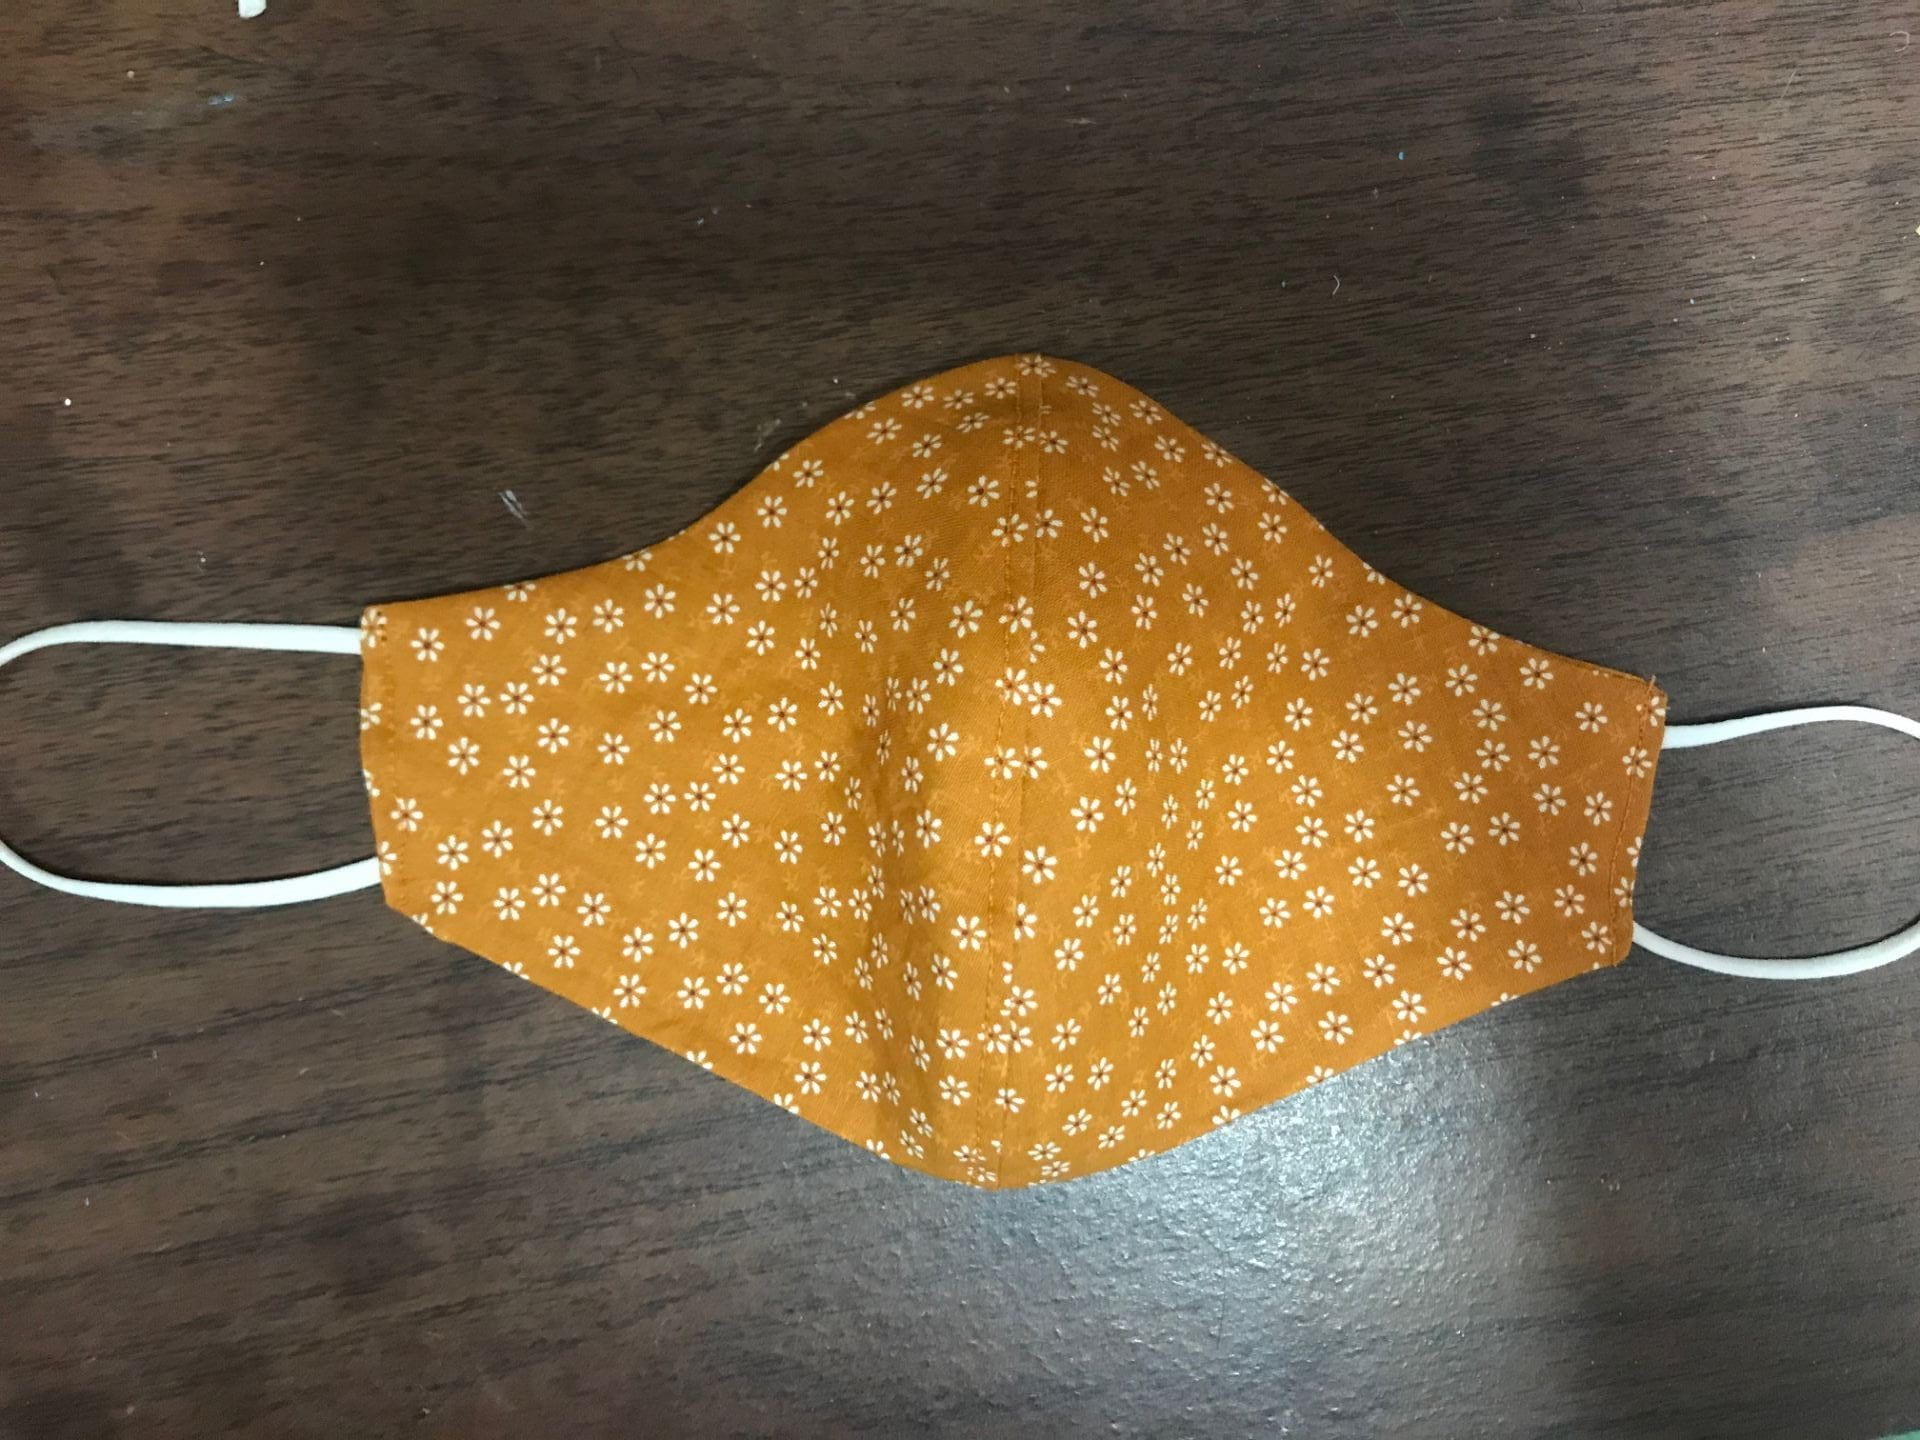
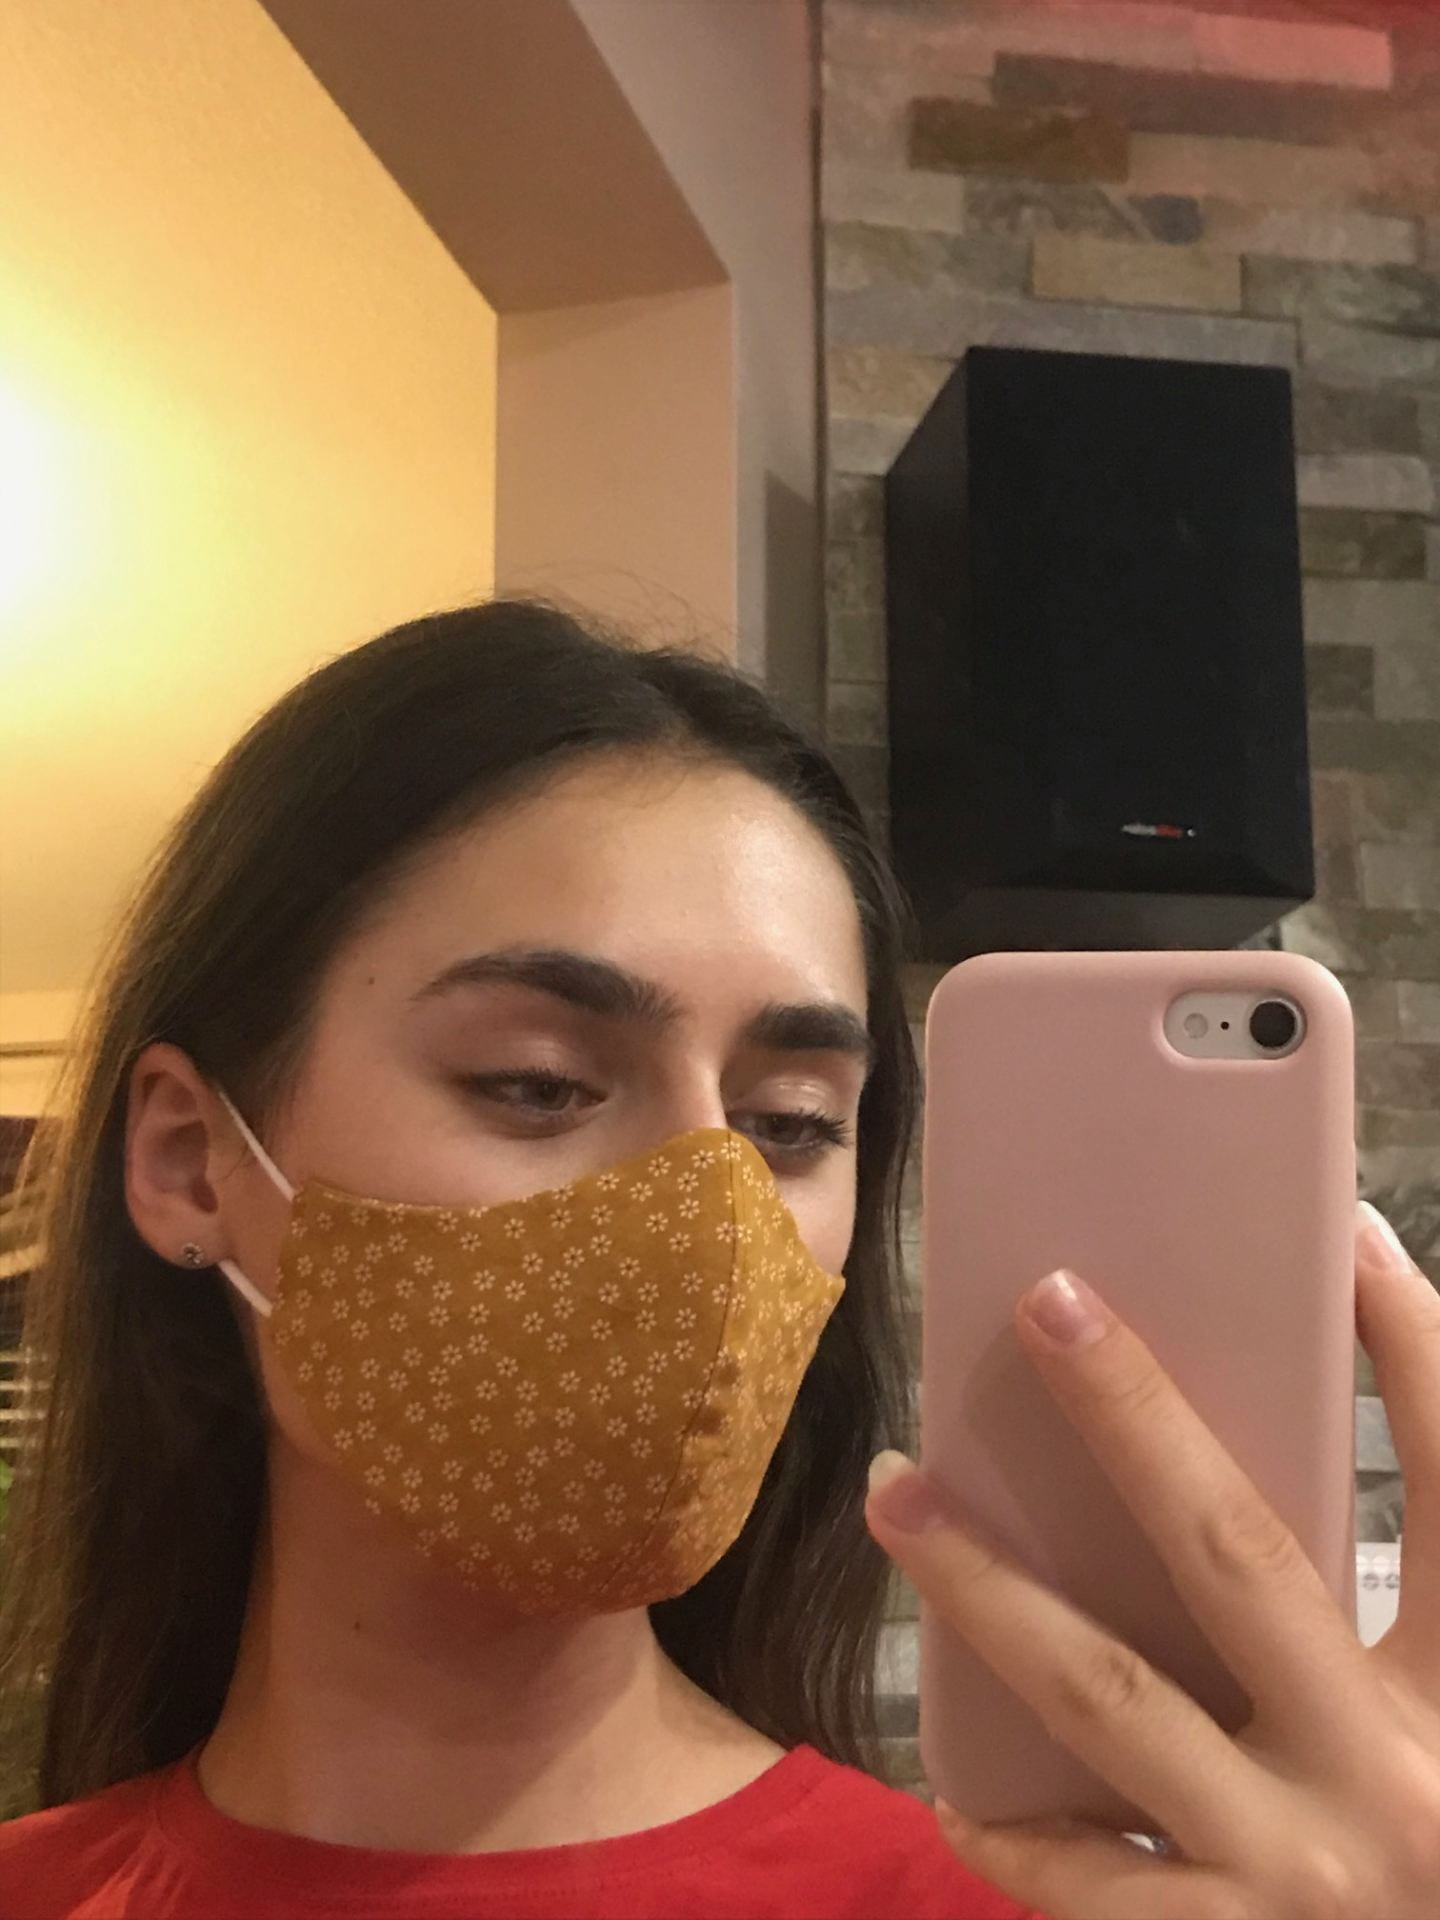
Before beginning sewing the mask I confirmed with my mentor that it was a good design and asked her if she had any suggestions for me. She gave me a few tips and I began following the tutorial step-by-step. I decided to use the measurements for the medium mask, so then I could decide from there if I should size down, size up or make another medium. It took me about an hour from start to finish. Here are some pictures from the process, and the final result.
For the straps on the mask, I cut off the straps from an old reusable mask and sewed on those. In general, this mask fit quite well however, I think a large would be a bit better. It fit nicely around the chin area it was just a bit tight on my nose. I think this mask would fit someone who has a smaller nose bridge better. Instead of making the same mask in a large size, I decided to find a completely different tutorial. This was the tutorial that I followed.
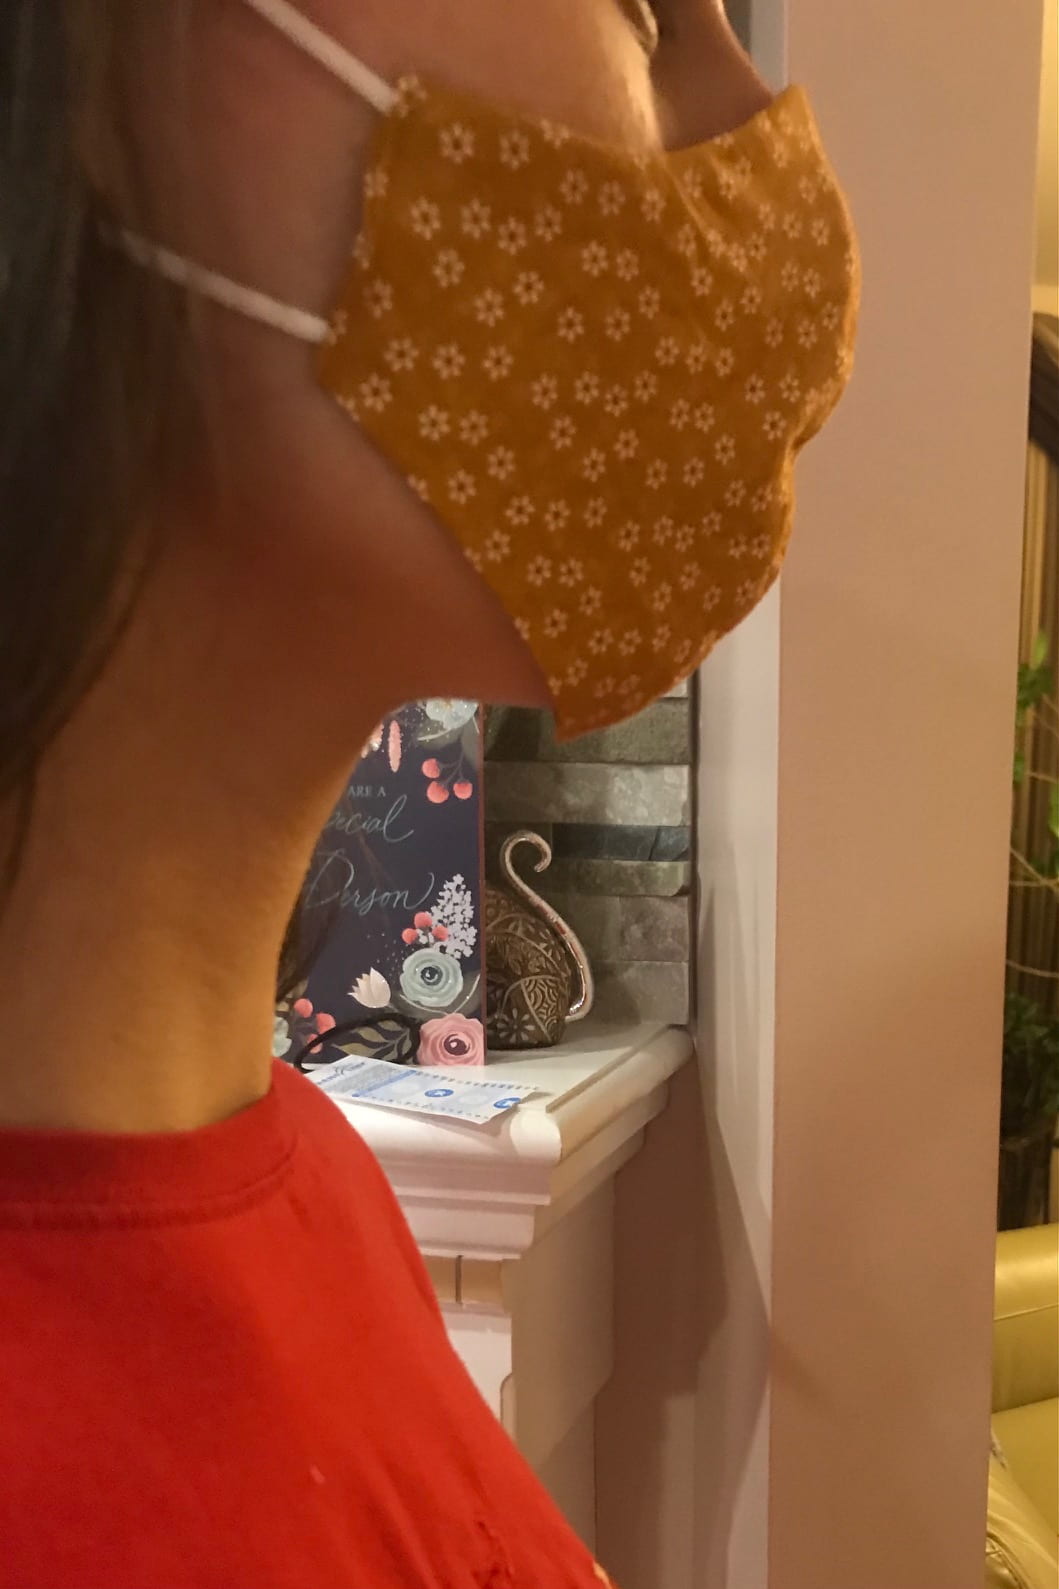
For this mask, I also decided to make a medium-sized mask. This mask also took me about an hour to complete. I didn’t take pictures of the process but here is the end result.
In my opinion, this mask was a flop. There was way too much gapping going on in the nose area, and the mask was way too big on the bottom. I should’ve just made the second mask using the large measurements of the first tutorial. I’m a little disappointed but I’m honestly not that mad about it because I still grew from this experience. Every single thing I make won’t be successful, but I will still learn from it.
I will continue sewing clothes for myself in the future and continue meeting with my mentor (grandma), to get help and advice from her. This whole project was a great bonding experience for me and my grandma. In the future, I hope to grow my sewing skills with my passion for clothing.
Hello and welcome back to my blog. This post will focus on my progress in my in-depth project.
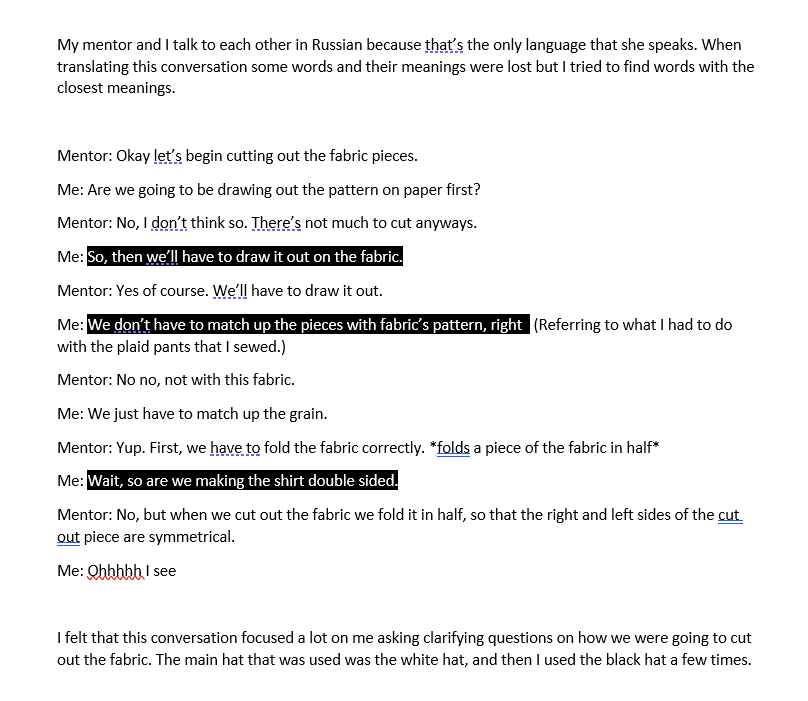
This post covers chapter 8 in Edward De Bono’s How to Have a Beautiful Mind. This chapter talked about a very interesting topic: the six hats. Each hat represents a type of thinking. De Bono says that to have a meaningful conversation all members of the conversation should be using the same hat. I forgot to record this week’s meeting with my mentor, but I will attempt to identify all of the hats from a conversation I had with her in the last meeting.
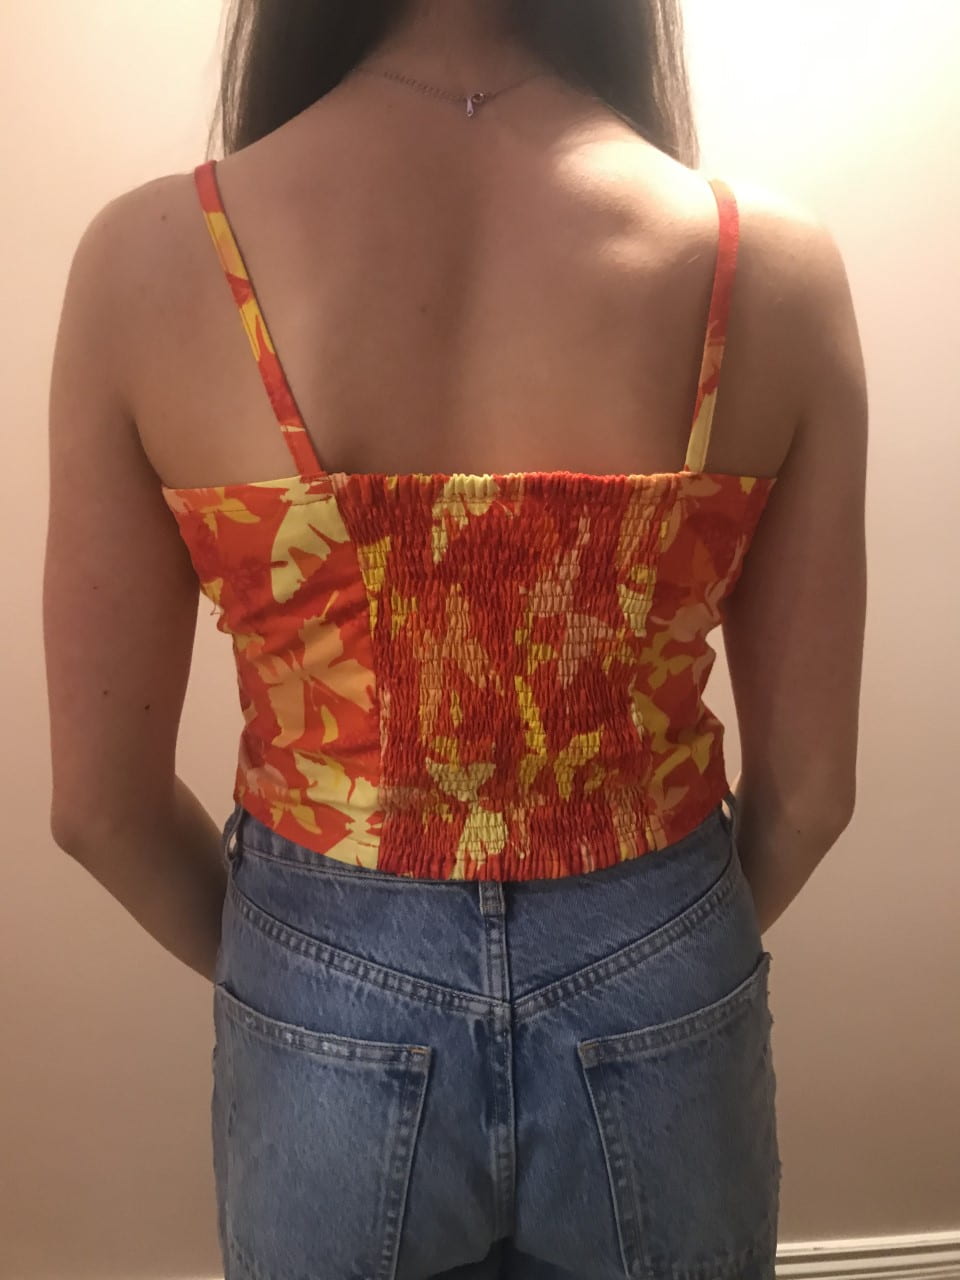
This past week I have been working on finishing my shirt. I began by zig-zag stiching all of the seams on the inside so the fabric wouldn’t fall apart. Then I sewed the back and the front together. Afterwards, I hemmed all of the raw edges on the outside. The last thing I had to do was sew the straps and sew them onto the shirt. To create the straps I had to use the help of an iron. I first folded both sides of the piece of fabric into the center and ironed them down. Then I folded it in half and ironed it down again, leaving me with a piece of fabric that had the edges folded into itself. All I had left to do was sew the sides together. Finally, I sewed the straps onto the shirt and I was finished. Here is the finished result. I am completely in love with how it turned out.
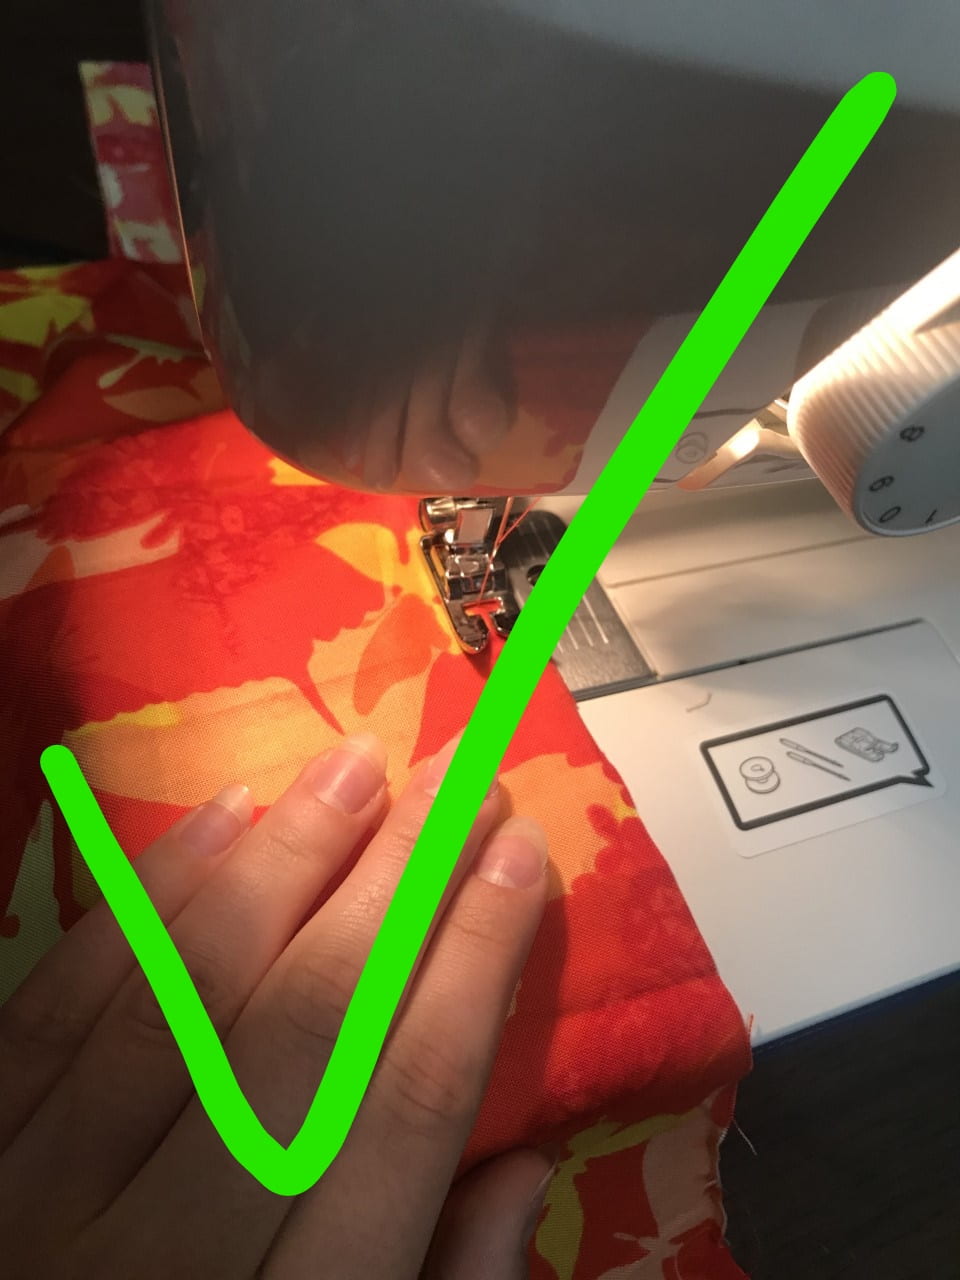
While finishing this shirt I didn’t have a lot of major challenges. I obviously had to rip a few seams but other than that, it was quite stress-free. My mentor did give me corrections when she saw I was doing something wrong. For example, she noticed that I was holding my fabric wrong when feeding it into the machine. Refer to the images below.
Wrong: This is how I used to hold my fabric while feeding it into the sewing machine however, this is incorrect. According to my mentor, it’s a lot harder to maneuver your fabric this way.Right: This is the proper way I should be holding my fabric while sewing. It did take some practice to get used to it, as I found it a bit uncomfortable at first.
Now that I have finished sewing my shirt, I will move on to my next project. I am thinking I will learn how to sew a mask. There are many tutorials on YouTube that I could follow. A mask is a simpler project, so I think I won’t be needing my mentor’s help a lot.
Thank you for reading my post and I will see you in the next one.
Hello and welcome back to my blog. This post will focus on my progress in my in-depth project.
This post covers chapters 6 and 7 of How to Have a Beautiful Mind. The two main topics from the chapters were, “How to listen” and “How to ask questions. When meeting with my mentor this time, I tried very hard to be more engaged and listen to what my mentor was saying with thought. Asking a lot of questions helped me deepen my understanding of the topic.
Hear is one of the conversations that me and my mentor had. I think that it clearly displays this prompt: #6 What were some of the alternative perceptions that are new to you.
Mentor: I wouldn’t make the top or bottom of the front of the shirt double sided.
Me: In the video that I watched the bottom wasn’t supposed to be double sided. Only the ruched top part was.
Mentor: If the fabric was stretchy then you would make it double sided. Otherwise its just useless with cotton fabric.
Me: But won’t it feel nicer against the body if you can’t feel the ruches?
Mentor: I believe you won’t feel a difference with cotton.
Me: Okay.
Mentor: So, nothing will be double sided, we’ll just have nice seams.
Me: Sounds good. Lets take my measurements.
In this conversation you can see that I had a very one-sided opinion on how to sew the shirt because I had only watched one video. I was first hesitant to to listen to my mentor but then I remembered that my mentor has a lot more experience.
After finishing my pyjama pants I began my next project. I had this red-orange-yellow fabric with butterflies on it laying around and I knew had to make something with it. I’ve seen similar prints like this recently become more popular and I think they will be very trendy this summer. Here are some inspiration pictures that I had for this project. Keep in mind that the piece of fabric that I had was quite small, so as much as I wanted to, I couldn’t choose to make a dress. In the end, the piece of fabric was just enough to make the shirt.
This video gave me a very basic idea of how I should begin tackling this project.
The girl in the video has stretchy jersey-like fabric, but I had to work with cotton. The issue that this posed was that 100% cotton isn’t at all stretchy. So, my mentor and I had to come with a way that I would still be able to put the shirt on and still have it tight-fitting. Some options that we had were either a button-down back, a zip-up back, a lace-up back, or a shirred back. For reference here is what a shirring looks like.
I thought that a shirred back would look best with this shirt. With a basic plan in mind, my mentor and I began taking my measurements. Using my measurements we drew an image of the back and front of the shirt and did some math to figure out what should be the dimensions of each piece. This took quite a bit of critical and thinking and collaboration to figure out, as we were coming up with the pattern ourselves. Here is an image of one of the drawn-out pieces.
Drawing out the pattern.
After cutting out all of the pieces, I began sewing the ruched part of the top. To do this I had to sew two seams on the bottom of the shirt about one centimetre apart. I did the same on the top of the shirt. Then I pulled on the strings that were hanging out from the stitches to make the top the correct length. I would later sew in between the two seams to secure the ruches. Without the two original seams, I would have never been able to create that clean ruche look. I then sewed the rest of the front pieces together. Here is how it turned out.
All the big front pieces sewn together.
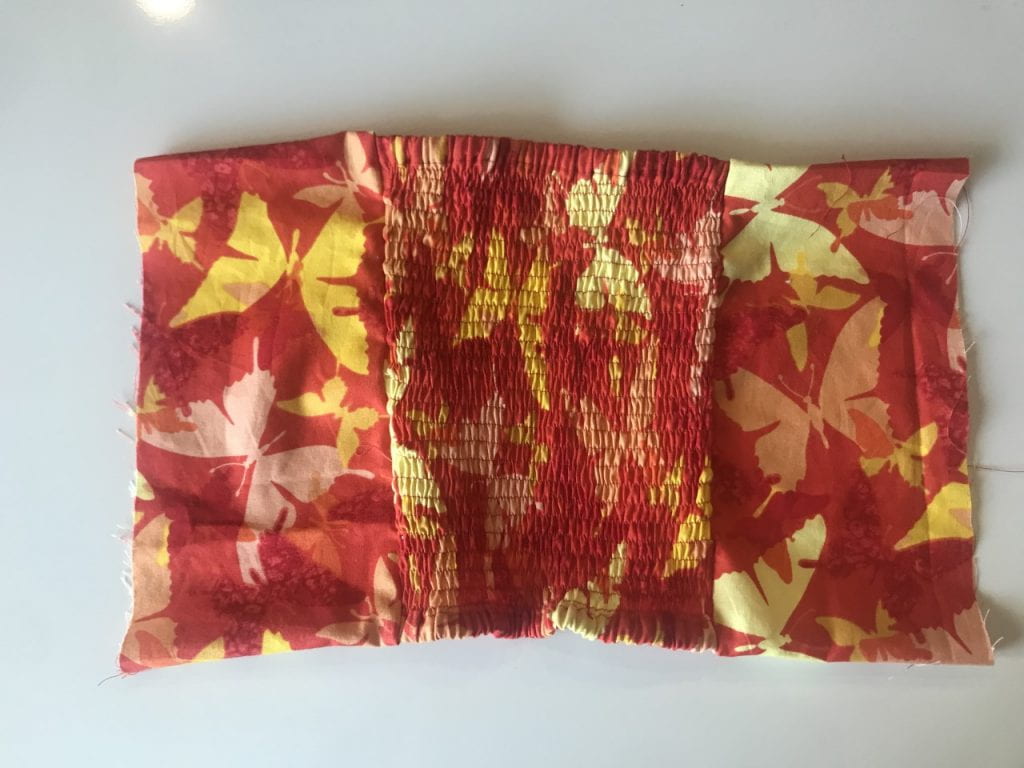
Next, I began on my shirred back. Neither my mentor nor I have ever shirred something before, so it was a learning experience for both of us. This video taught me how to shir something. To do this I had to change out the thread in the bottom to an elastic thread. I practiced a couple of times first on a piece of scrap fabric before moving on to my shirt. The shirring process took a very long time actually as I had to stitch back and forth down the entire length of the back piece. I think it took me a bit over an hour. Then I sewed the rest of the side pieces together. Here’s how it turned out.
All the big back pieces sewn together.
I honestly think this one shirt has taught me so much since my last blog post. There were so many complex components that taught me so many new skills and techniques.
I think that this project has been particularly stressful and difficult because my mentor and I were coming up with how to sew the shirt on the go and there were a lot of key details that had to considered when making this shirt. Multiple times I had to rip some seams and resew them because we had sewn them in the wrong order.
Originally, the shirt was supposed to have the entire back shirred however, there was an unfortunate incident. My mentor decided to help me by cutting out the hems, and there was a major facepalm moment when she cut them out of the piece of fabric for the back. However, there wasn’t enough extra fabric to cut out a new piece for the back that could be fully shirred. So, we came up with a solution. I would have a smaller panel in the center that would be shirred and then the sides would be normal. In the end, it actually turned out really well and it ended up saving me a lot of time; now I didn’t have to shir as much.
I will continue sewing this shirt and hope to finish it by the end of my next meeting with my mentor. I will be working on finishing all of the seams on the inside and hemming the raw edges on the outside, as well as sewing the front and back together and creating the straps. I am already very proud of how its turning out, and I’m looking forward to being able to wear it.
Thank you for reading my post and I will see you in the next one.