My French Fishing Project

french fishing project (1)

By: Paul Dume

1. This first semester was a good semester for me. I did all my work and I was a good kid to all my teachers, well from my point of view. For the most part, all my work this semester was good. I had some complications in some of the work and struggled at some times but still pulled trough and finished it on time. This next semester will be another but harder treck fore me.

2. a)  This assignment was our final. We had to make a video or a power point in french about a sport or an activity. The activity that I did was fishing. I had to tell the whole class about the equipment, the body parts you need, and how to fish. This whole project had to be in french and in our own words. Although it was a hard project I still got a pretty good mark on it.

b) Some skills that I was able to bring to this assignment were some power point skills due to keyboarding, and some french skills from french classes. I was ale to take words that I have learned before that we haven’t learned in that class and use them in this presentation.

c) In this project I faced some challenges of figuring out the sentences to be in my own words and at my level and making the power point match perfectly with my voice inside. Some other challenges were adding some finishing touches to the power point to make it look professional and making it run fluently

Training Post

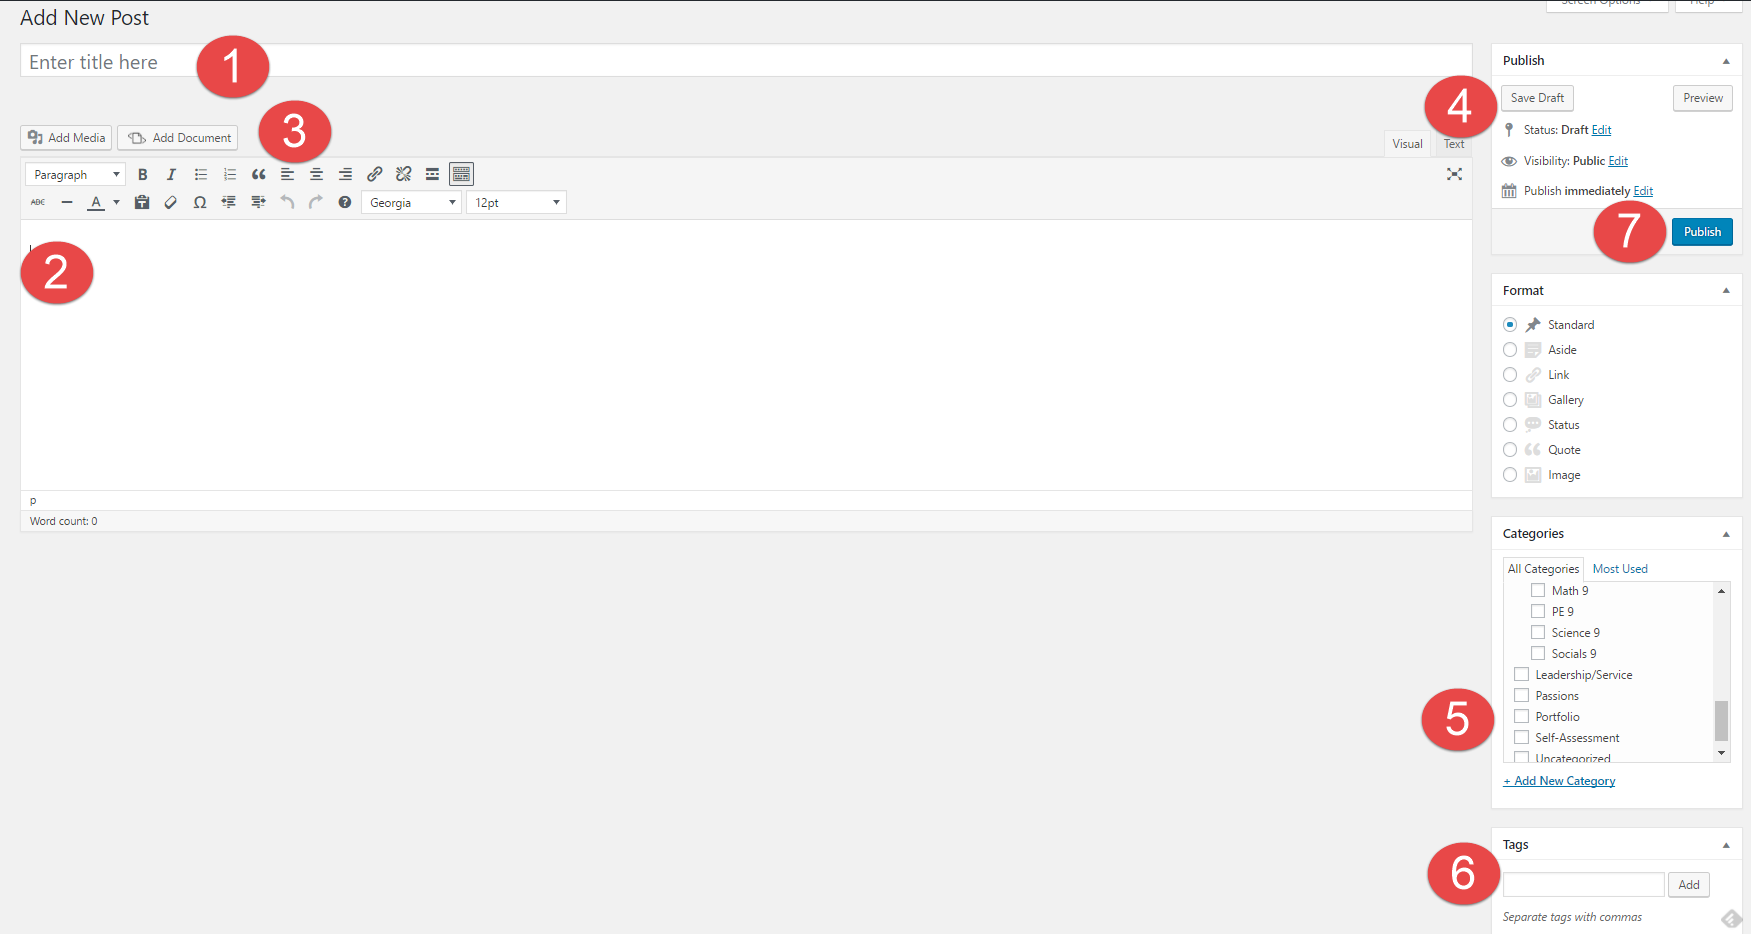
You are now going to create your very first post. In a separate tab or browser window, go to your Dashboard on the left and go to  Posts -> Add New.

1) Title – Create a title for your blog post. Your title will be: Digital Footprint Assignment

2) Body – This is where you place your content of the post – text, videos, pictures, etc. Follow the instructions on the Digital Footprint Assignment page to see what questions you need to answer here.

3) Tool Bar – In your toolbar you can “Add Media” and “Add Documents” into your posts, this is the best way to create visual representations. You can also change fonts, hyperlink, etc.

4) Publish – Here is where you control what items are public and private. You can also control when they are published to your website.

5) Categories – Here is where you choose where you want your post to go. This is your digital binder with all of your subjects. Make sure to categorize each post with the relevant subject. E.g. Categories -> English

6) Tags –  Here is where you tag posts with one or two of the most readily applicable Core Competencies. These tags can help you find things quicker on your blog and help you stay organised. E.g. Tag -> creativethinking

7) Publish – When you are done, simply “Publish” it. If it has been edited, press “Republish” to update with the latest version of the content.