https://sd43bcca-my.sharepoint.com/:v:/g/personal/scsmith_sd43_bc_ca/EZeNZGyGJSxDi90aagcOVL0BnT0Q19srqJVi1-36HSPrFQ
This is my presentation on the industrial revolution in socials 9 is my artifact. I enjoyed making the presentation because I like adding my sense of humour and my small illustrations as a form of explaining. My project also references few memes too. I decided to make the presentation something like the youtuber, Oversimplified did. I am proud of this presentation because I showed my creativity and humour into a project.
Safer Schools Tomorrow
1. What if the show was not Truth Be Told, but something else? Would it make a difference what Iliana posted?
Yes and no. I answered yes and no because if it was a different show, Iliana would have posted different things but she would probably still lie just to get the job. In short, the format of posting would be different, but she would still lie.
2. Is it important that Iliana represent herself truthfully online? Why or why not? Are there other situations where it wouldn’t matter if she represented herself untruthfully?
It would be important to represent herself truthfully because if she is hired for a skill she doesn’t actually have, then the show would have a hard time. To be honest either way she would get into trouble. However, it’s better to get caught early than to struggle and get yourself caught.
3. Do you think social media has a positive influence on our lives? Why or why not?
If you just want to talk to friends and see what is going on or actually profit then it would be very beneficial. However, getting into unnecessary drama, causing controversies, fighting with others, addiction, and low self esteem due to models can be unhealthy for you. In short, the affect of social media in our lives can vary differently.
Digital Footprint Assignment
A.
- If I have a bad digital footprint it could affect my chances of getting into a good school for post secondary.
- Having a bad digital footprint will make it harder for me to find a job because no one would want to hire me.
B.
- Don’t use social media
- Be mindful in the things you post
- Share things you know you’d want to share that wouldn’t ruin your chances of finding a job
C.
Not really because I’ve always been very mindful with the things I post and say on the internet. I rarely comment on other people’s posts and I rarely post in general. I mostly use it to see what my friends are doing and check other people’s accounts out. If I were to say something to someone younger than me wanting to use social media, I would advise to really think about what you’re posting and to realize that what you post will be on the internet forever even if you delete it.
Training Post
You are now going to create your very first post. In a separate tab or browser window, go to your Dashboard on the left and go to Posts -> Add New.
1) Title – Create a title for your blog post. Your title will be: Digital Footprint Assignment
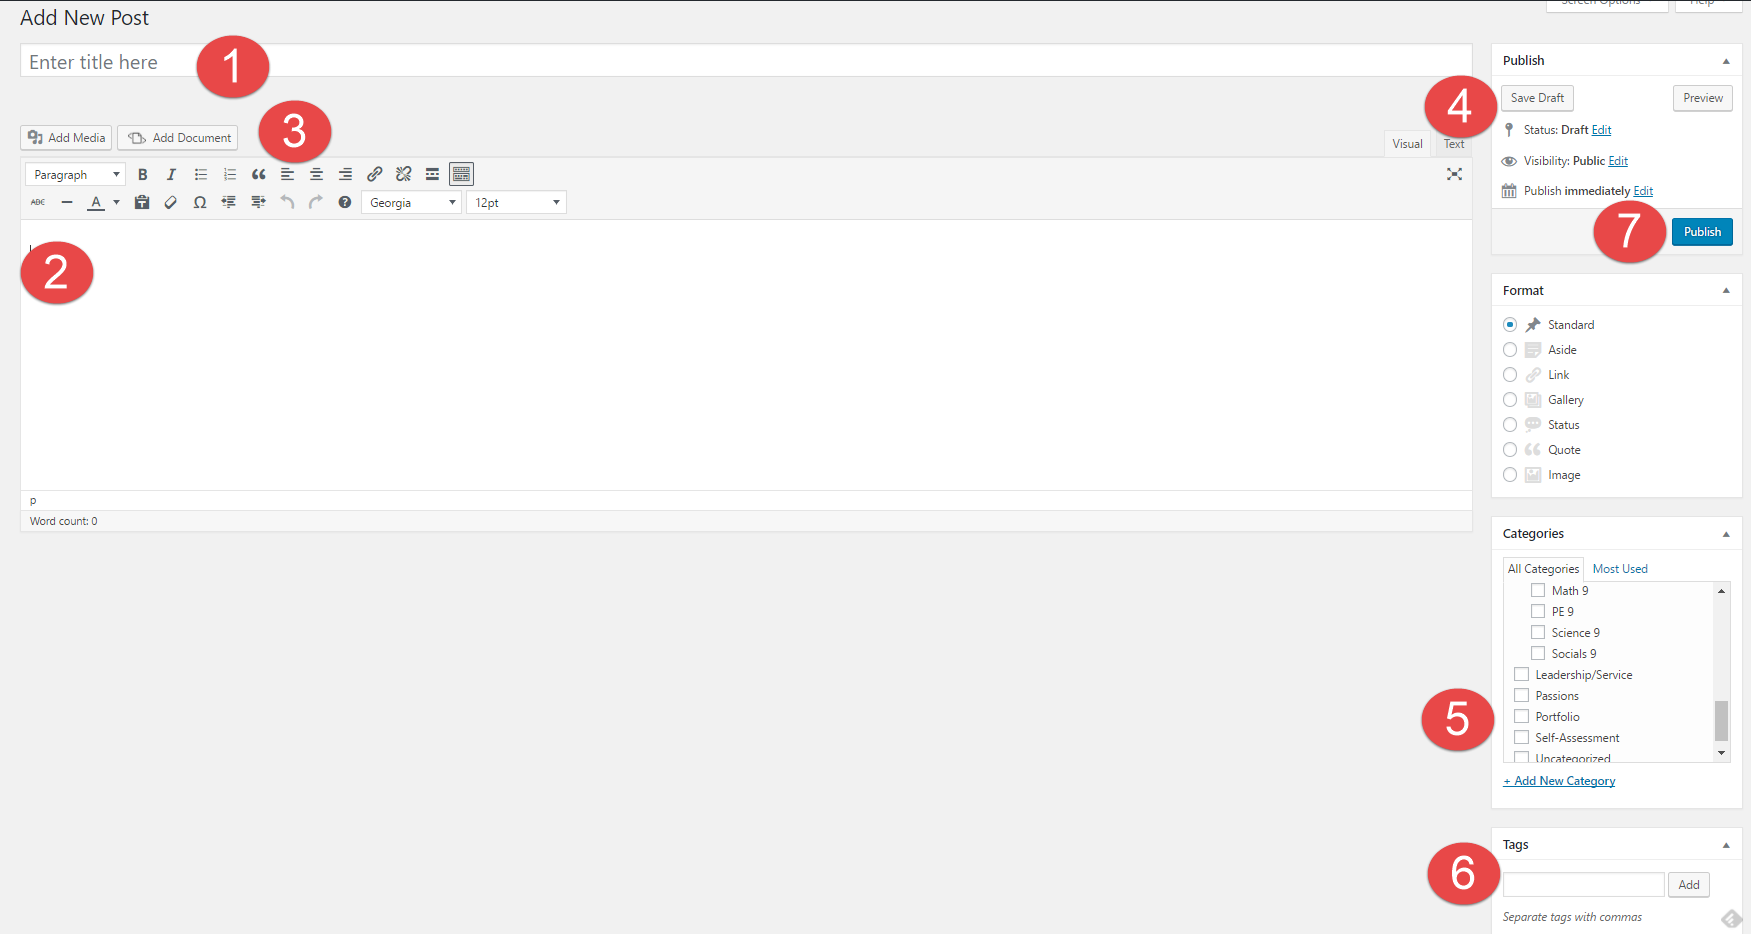
2) Body – This is where you place your content of the post – text, videos, pictures, etc. Follow the instructions on the Digital Footprint Assignment page to see what questions you need to answer here.
3) Tool Bar – In your toolbar you can “Add Media” and “Add Documents” into your posts, this is the best way to create visual representations. You can also change fonts, hyperlink, etc.
4) Publish – Here is where you control what items are public and private. You can also control when they are published to your website.
5) Categories – Here is where you choose where you want your post to go. This is your digital binder with all of your subjects. Make sure to categorize each post with the relevant subject. E.g. Categories -> English
6) Tags – Here is where you tag posts with one or two of the most readily applicable Core Competencies. These tags can help you find things quicker on your blog and help you stay organised. E.g. Tag -> creativethinking
7) Publish – When you are done, simply “Publish” it. If it has been edited, press “Republish” to update with the latest version of the content.