In-Depth Post #6: Concepts, Alternatives, and Learning Center Summary

We’re now entering the final stretch of In-Depth 2021! As we approach In-Depth night, I’ve begun to work on my three collections, testing out ideas and concepts for each one. 


March 12, 2021: 

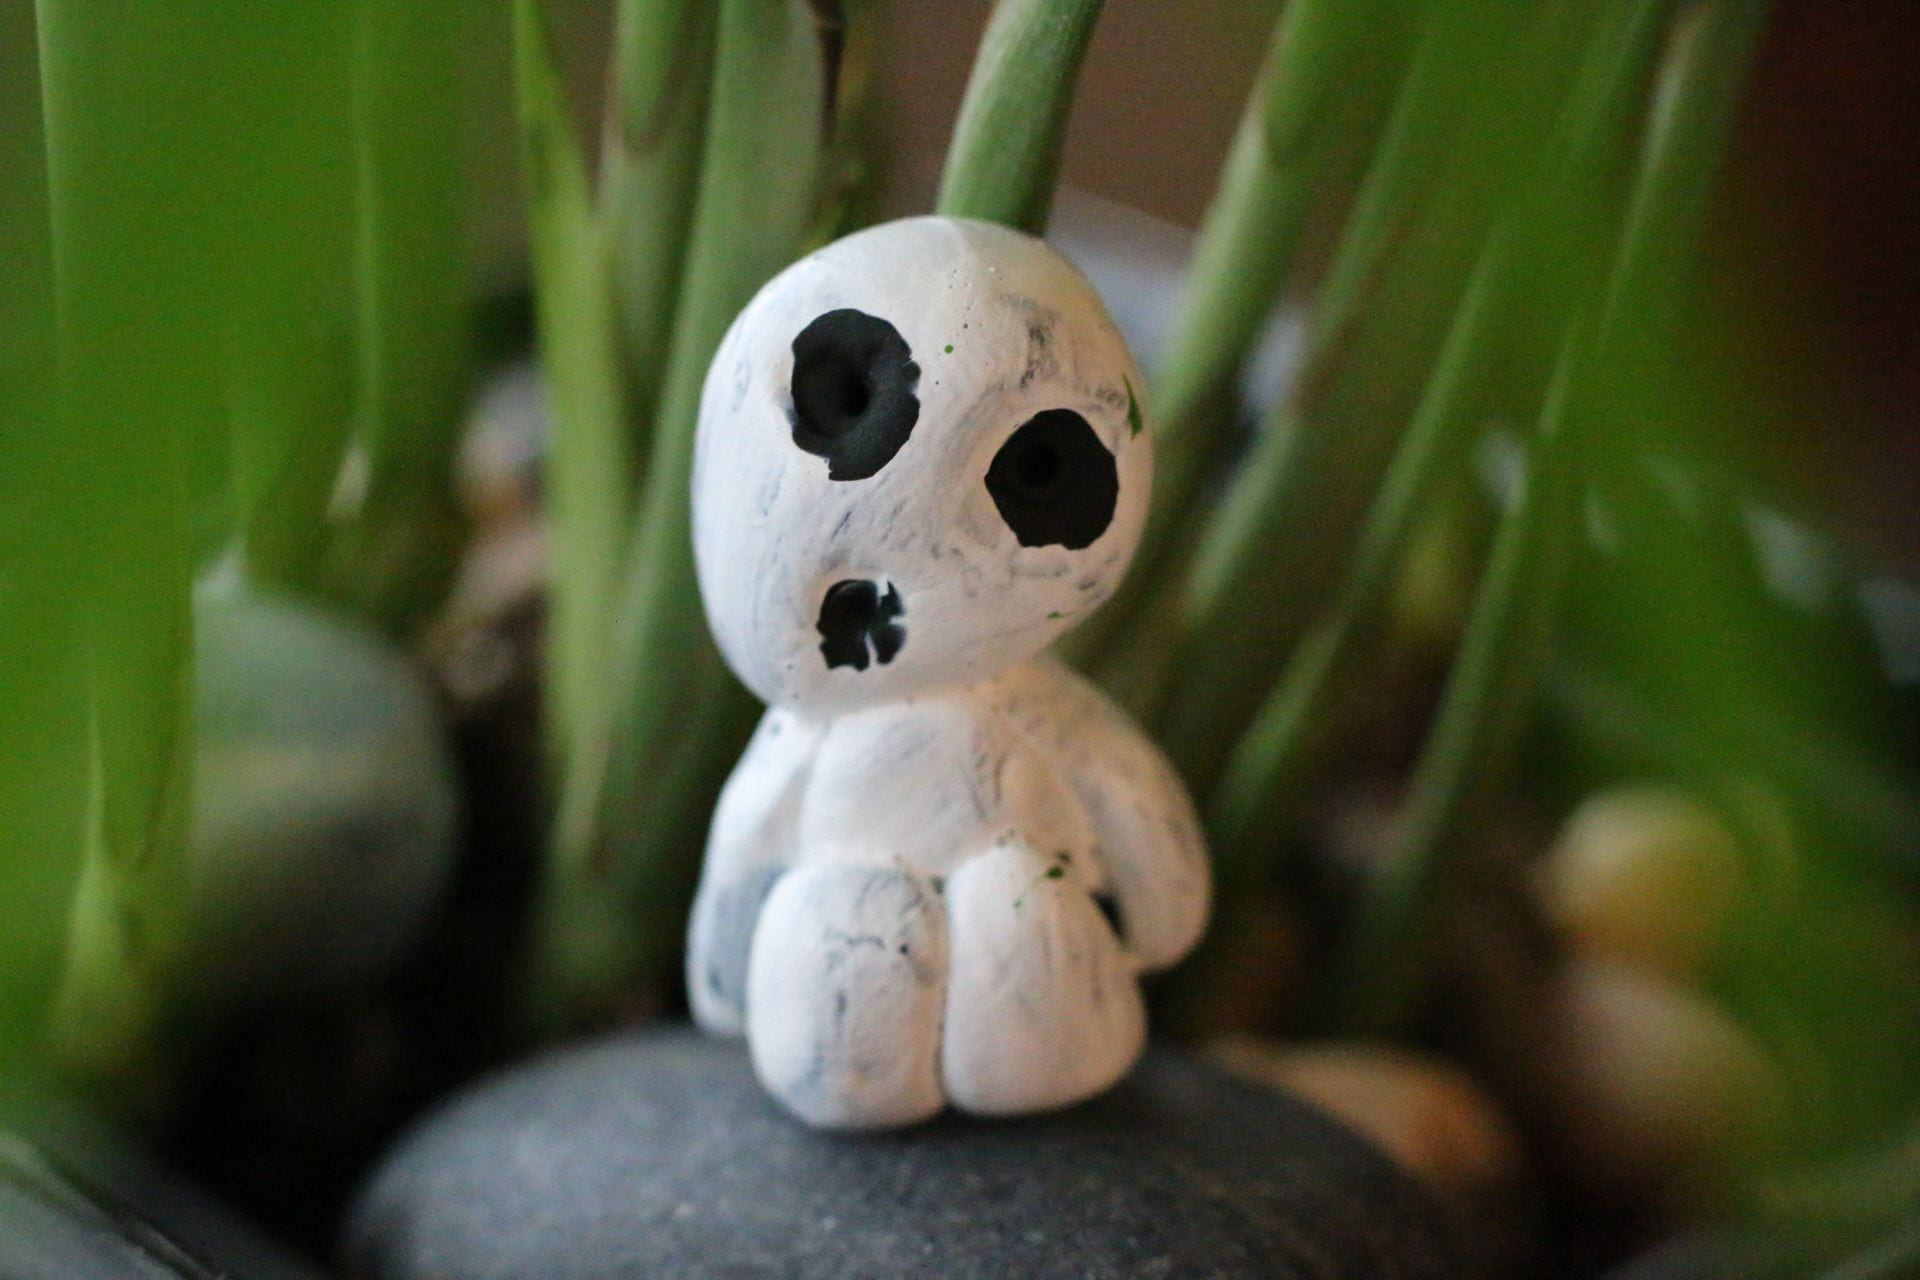
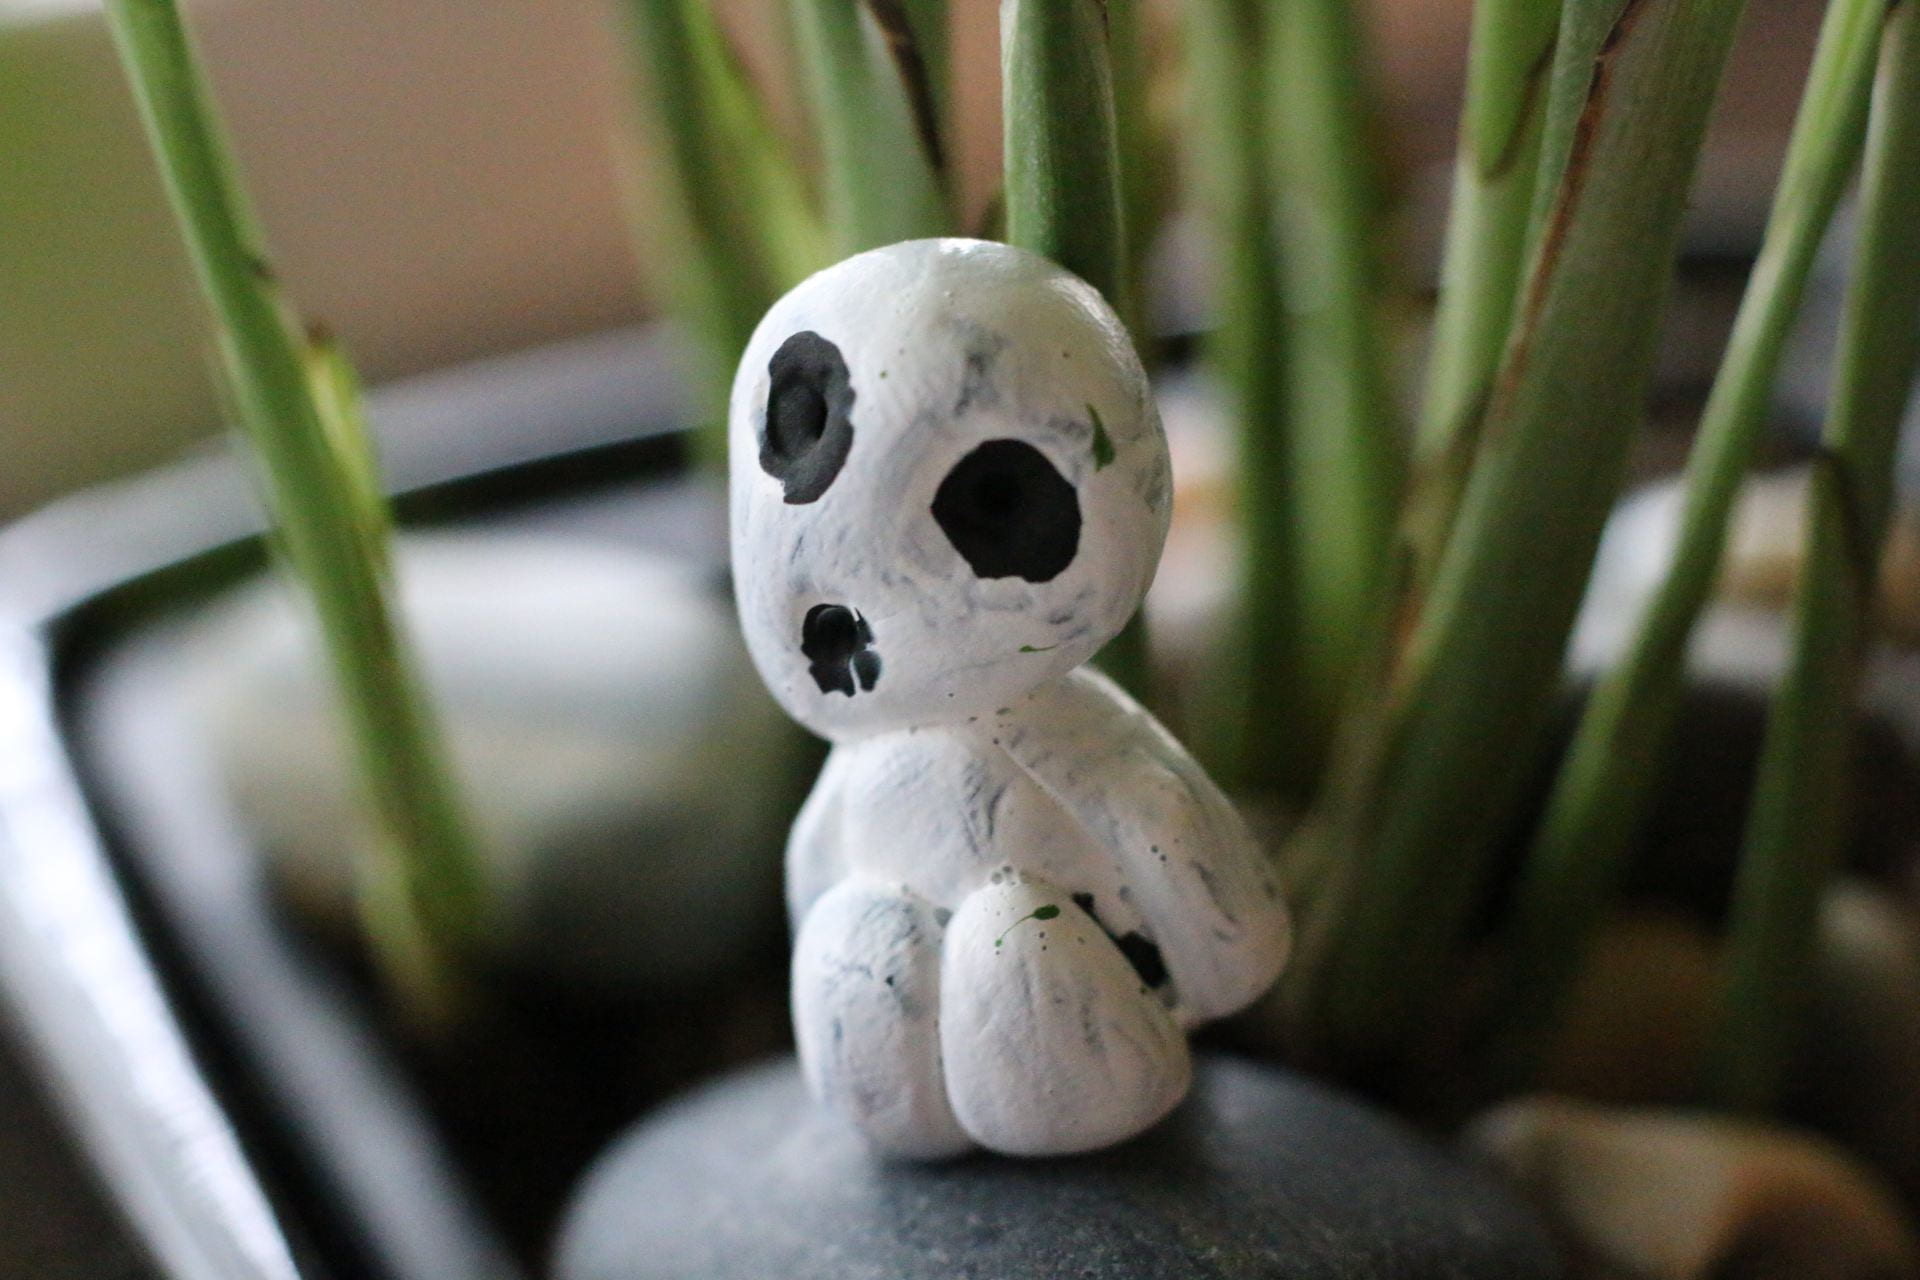
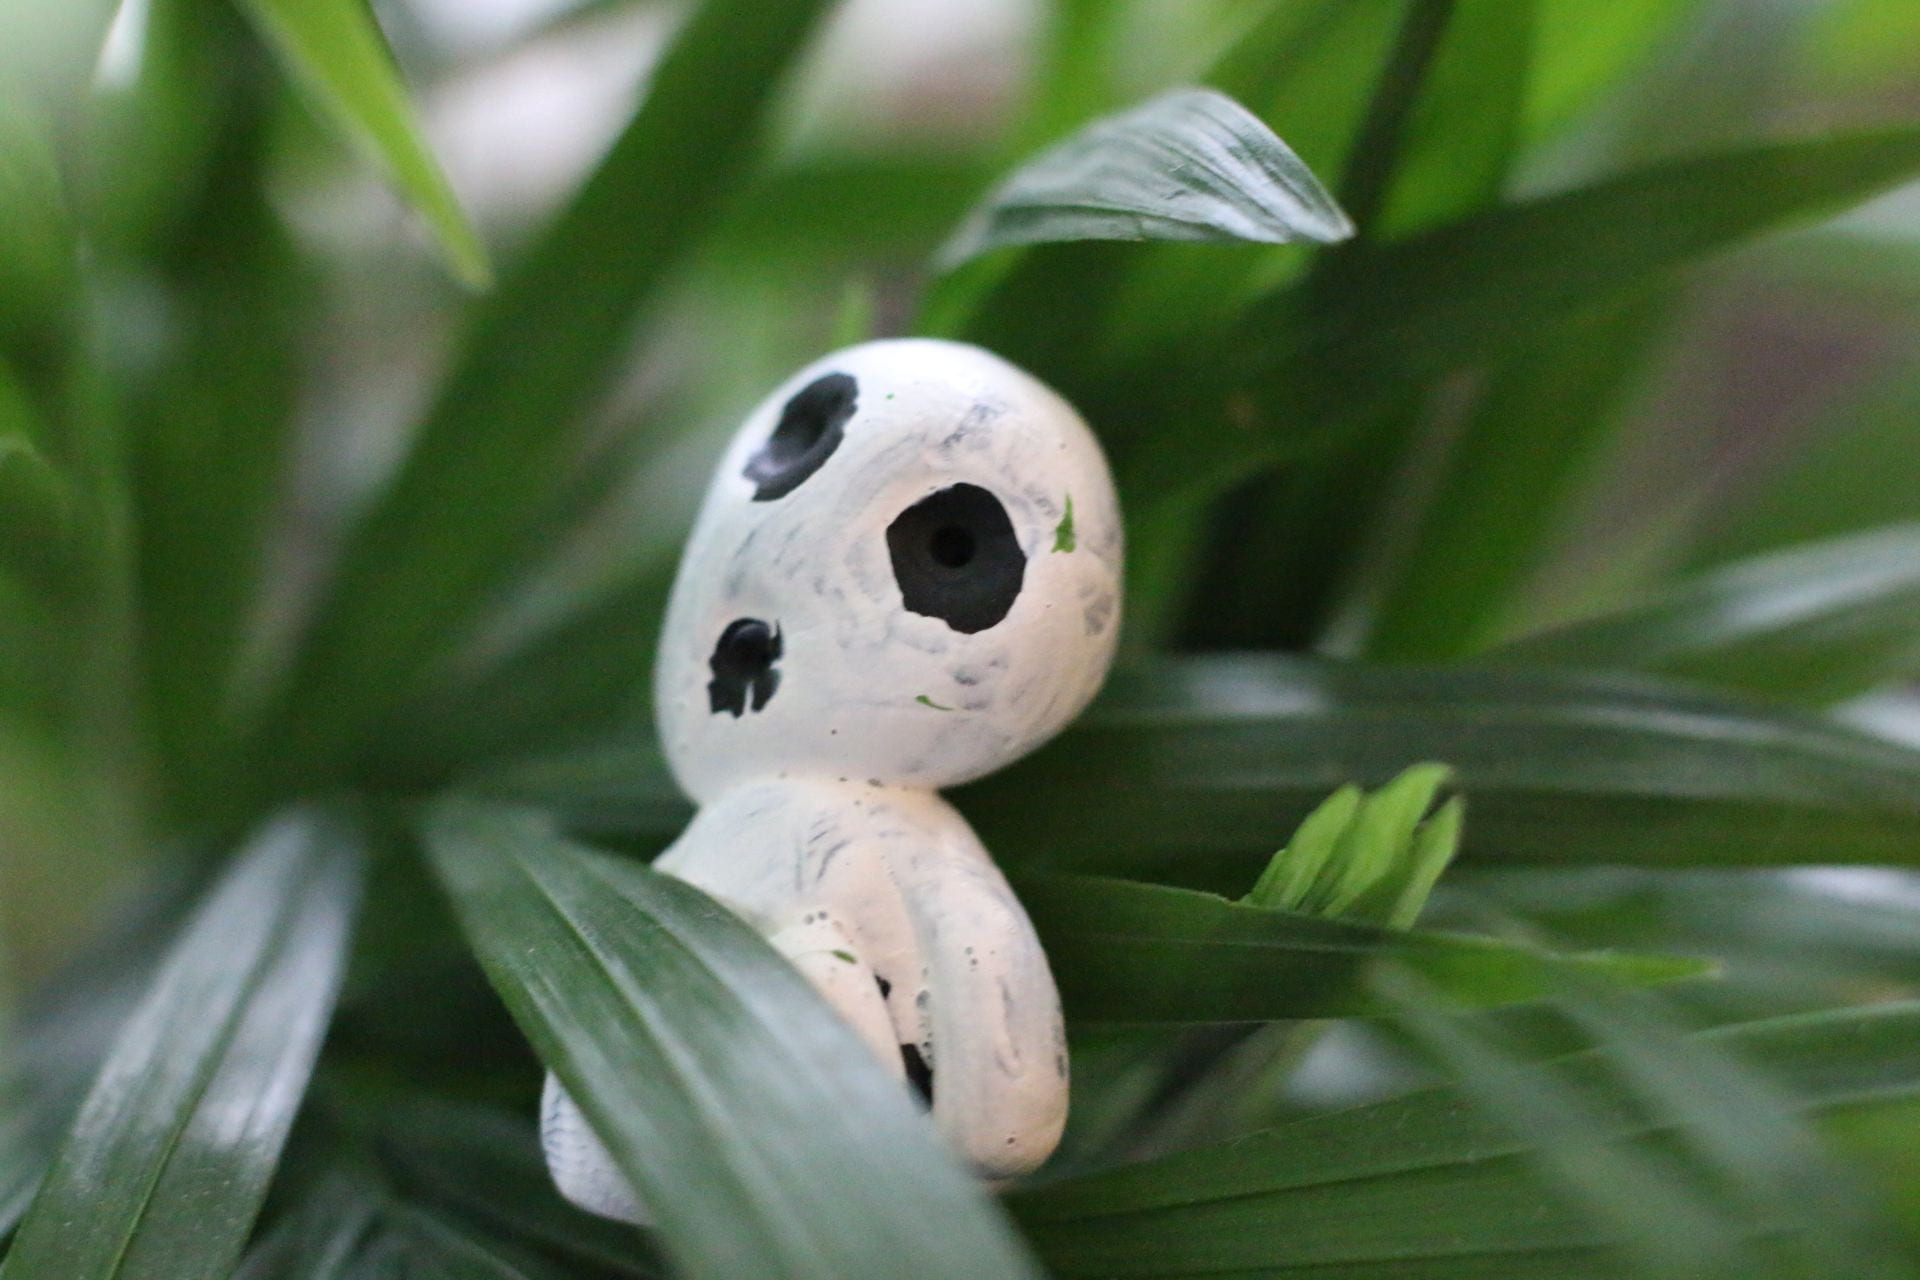
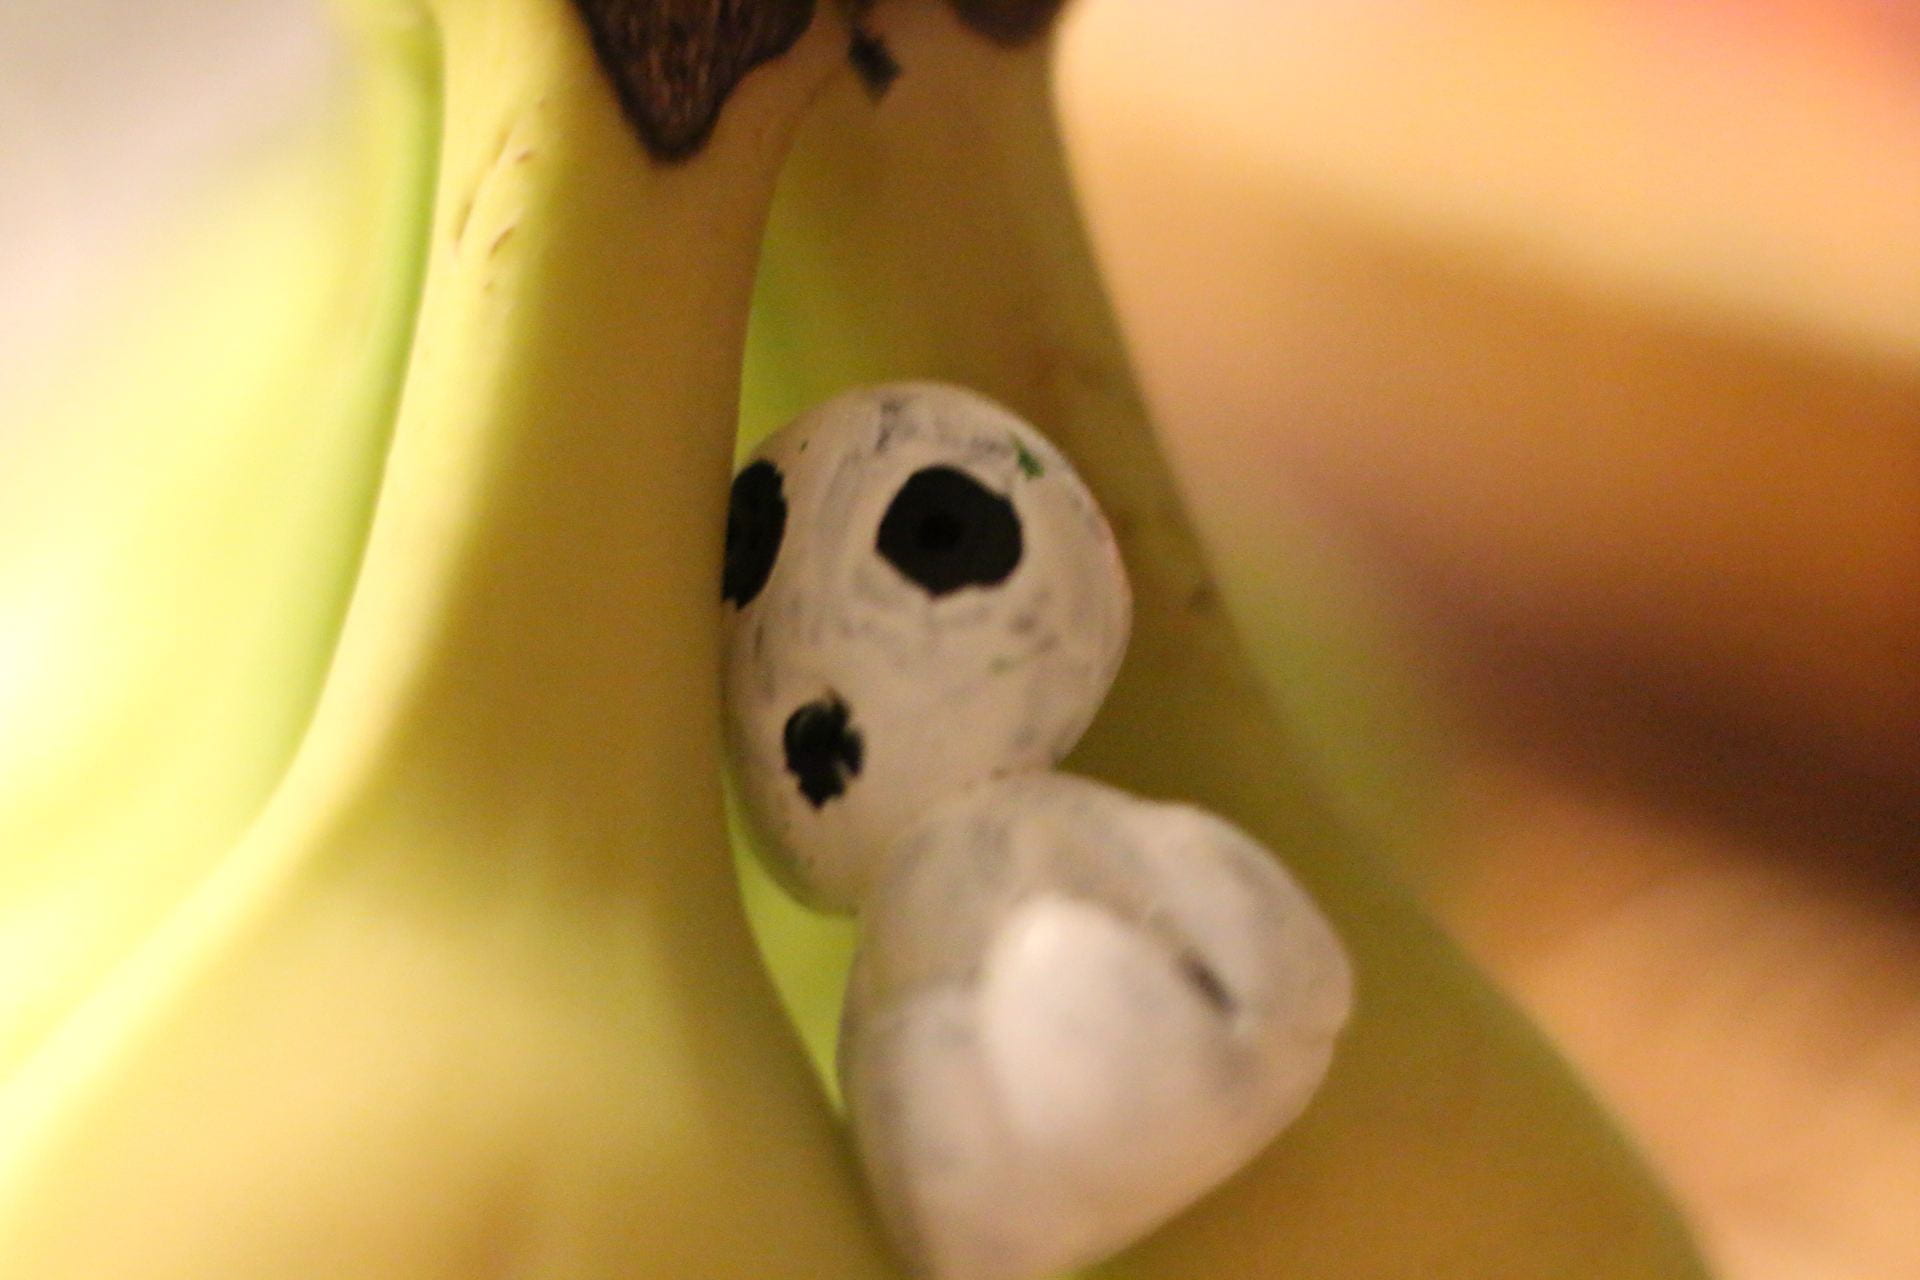
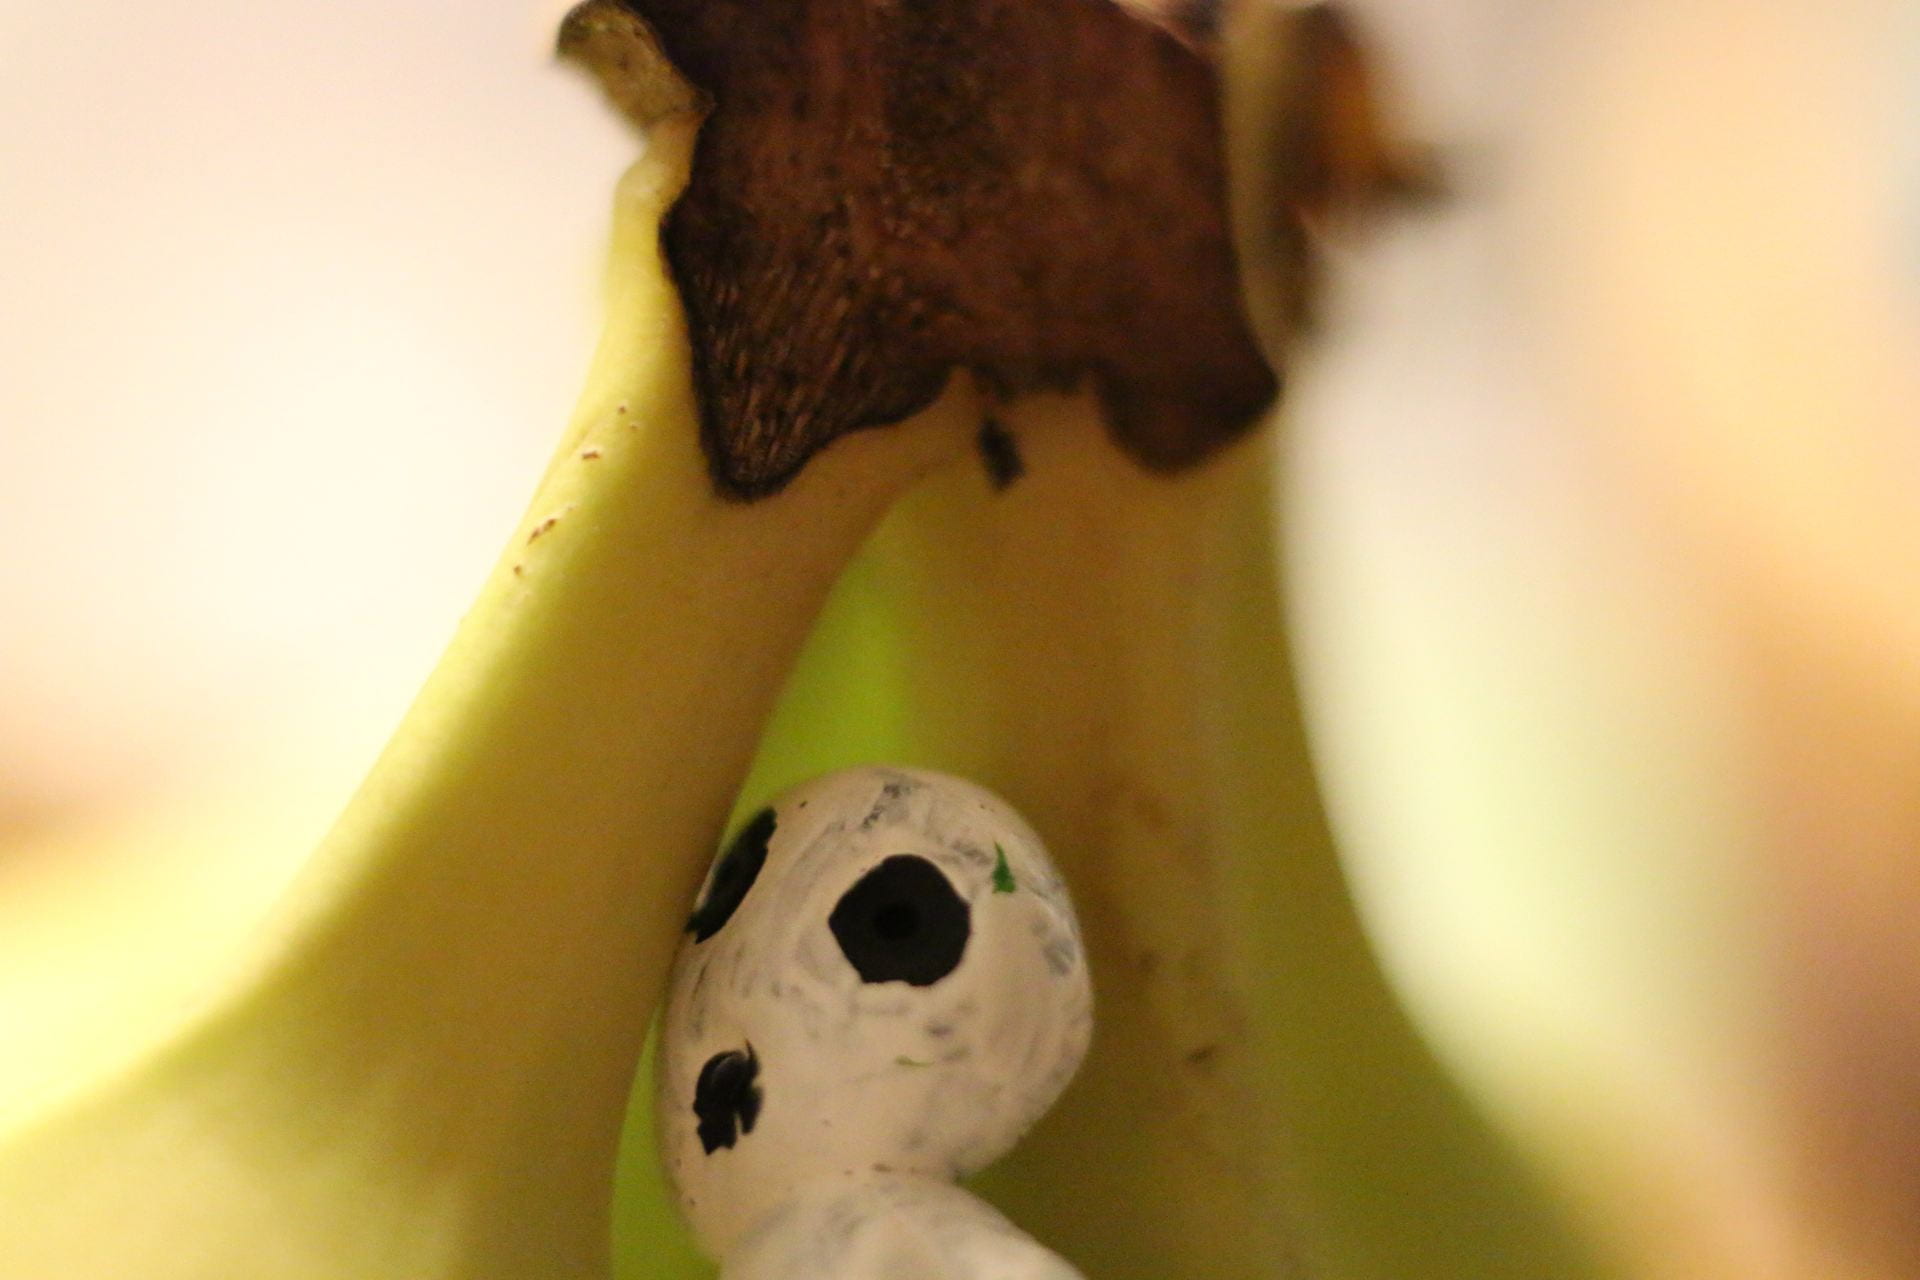
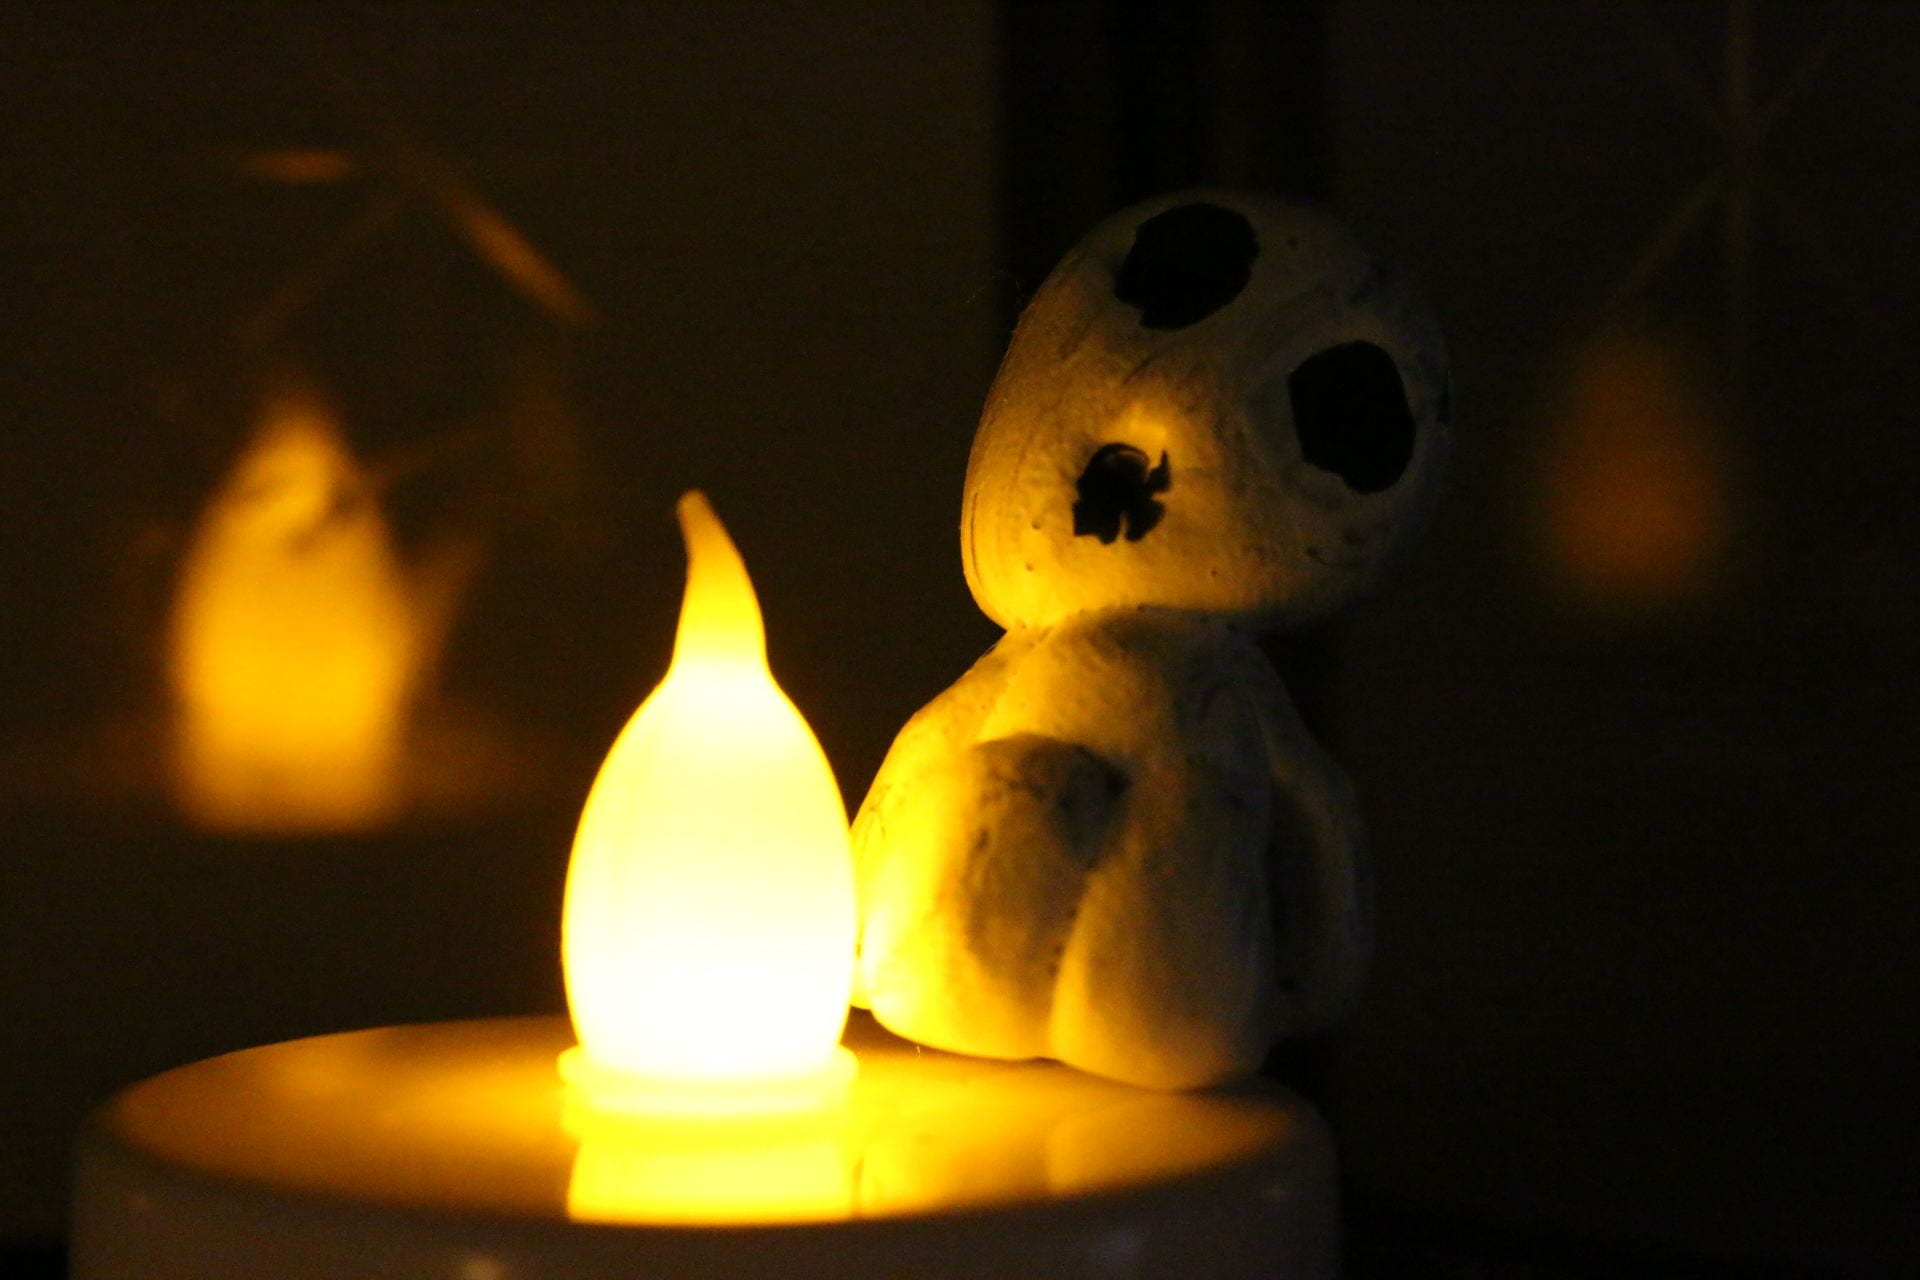
For my second collection, I required a little figurine to photograph, so I made one out of polymer clay. The figurine is supposed to be a Kodama (Japanese tree spirit), inspired by the depiction of Kodama in the film Princess Mononoke. I constructed the figurine out of polymer clay and then painted it. Unfortunately, I forgot to take photos of the design and construction process.


March 14, 2021: 

I took a few concept/practice photos for my second collection. I worked indoors for this set of photos, so I had to be mindful of lighting issues. Something else I found was that I could only take a limited variation of photos. Because my figurine is made of clay, I can’t really move or pose the limbs. This might result in the photos for this collection looking kind of repetitive. For that reason, I might make more figurines of my character in different positions (standing, lying down, expressions, etc). Here are a few of the photos I took:

April 4, 2021: 

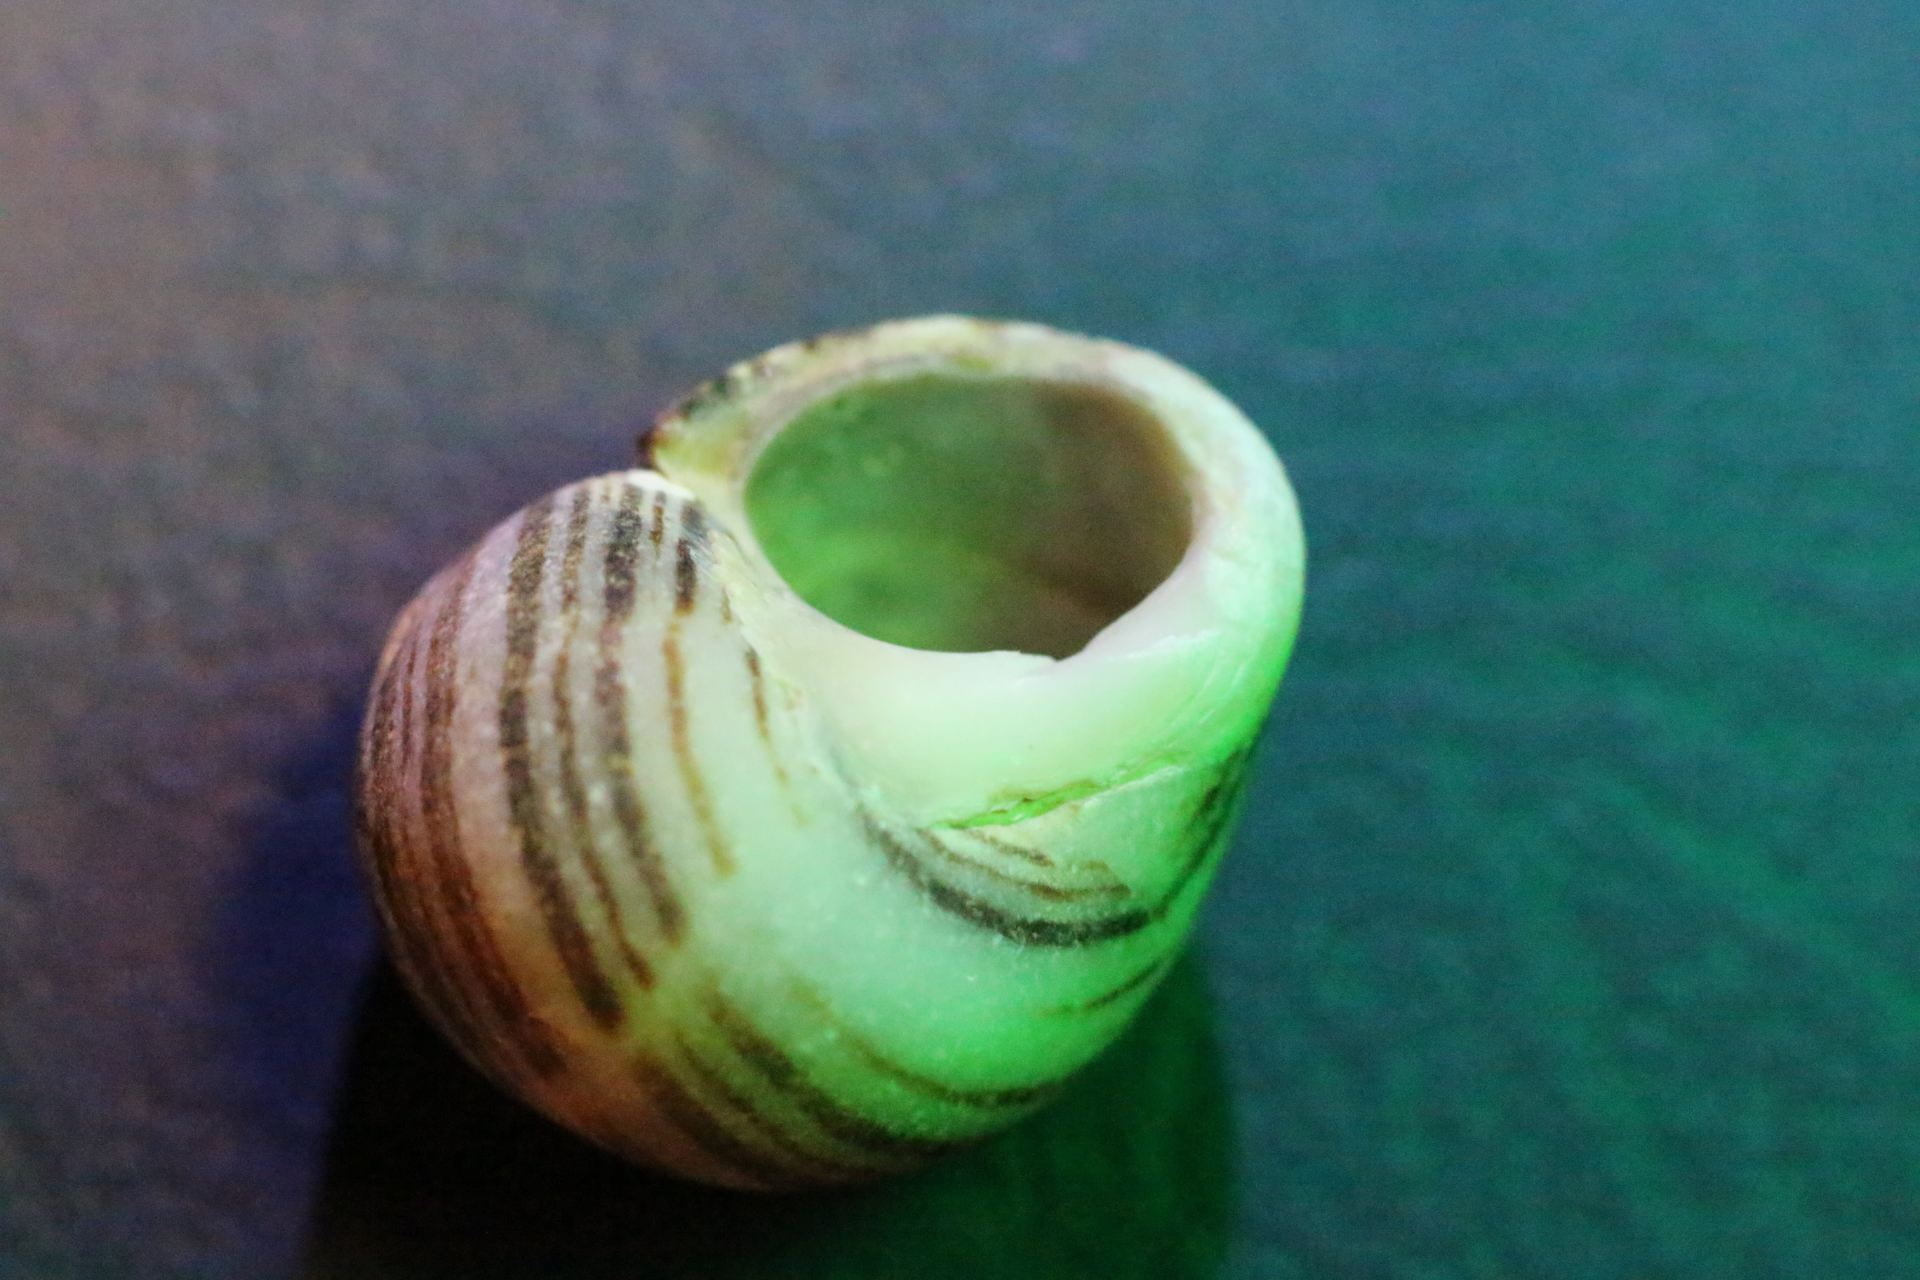
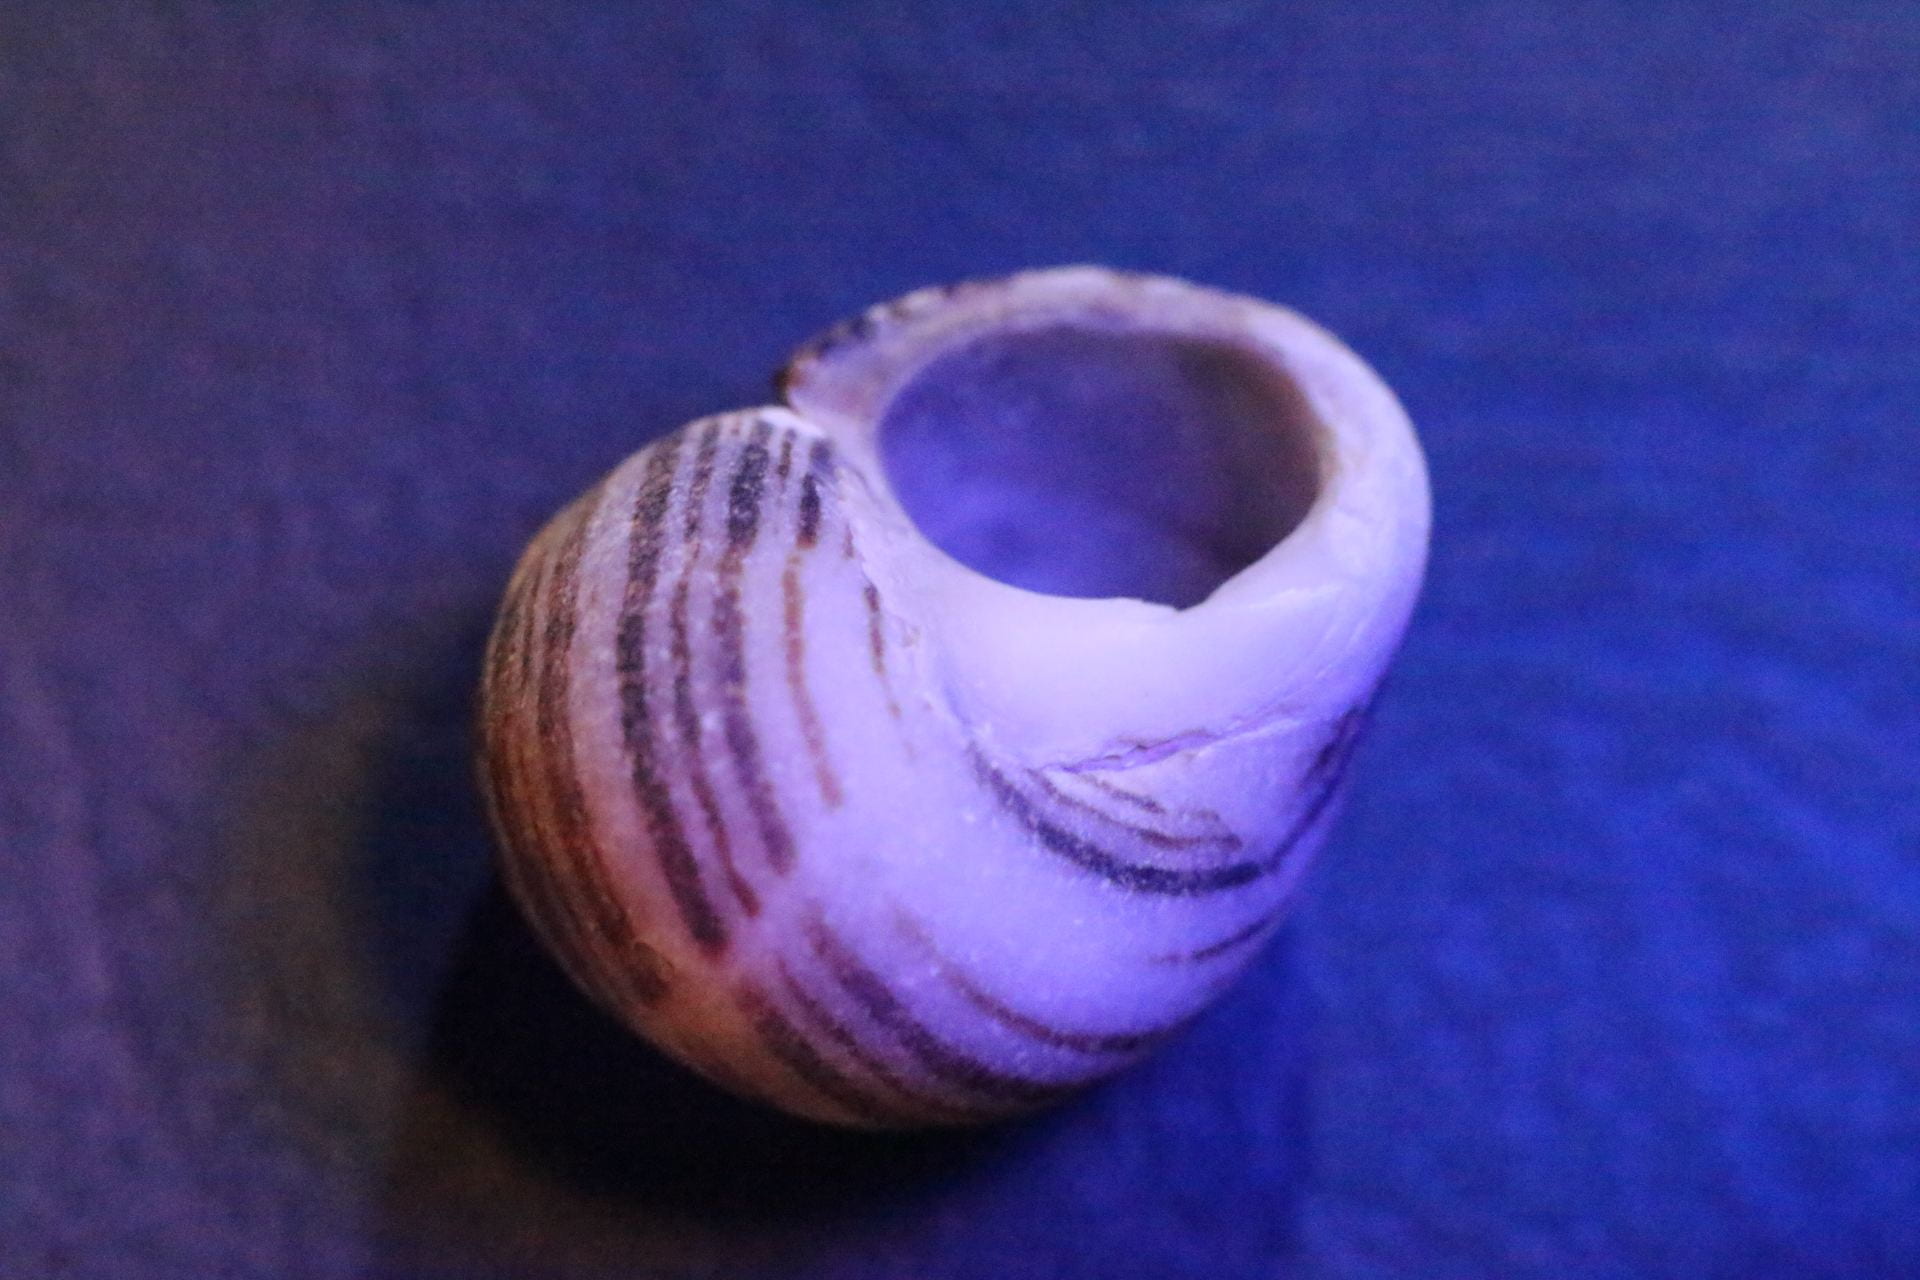
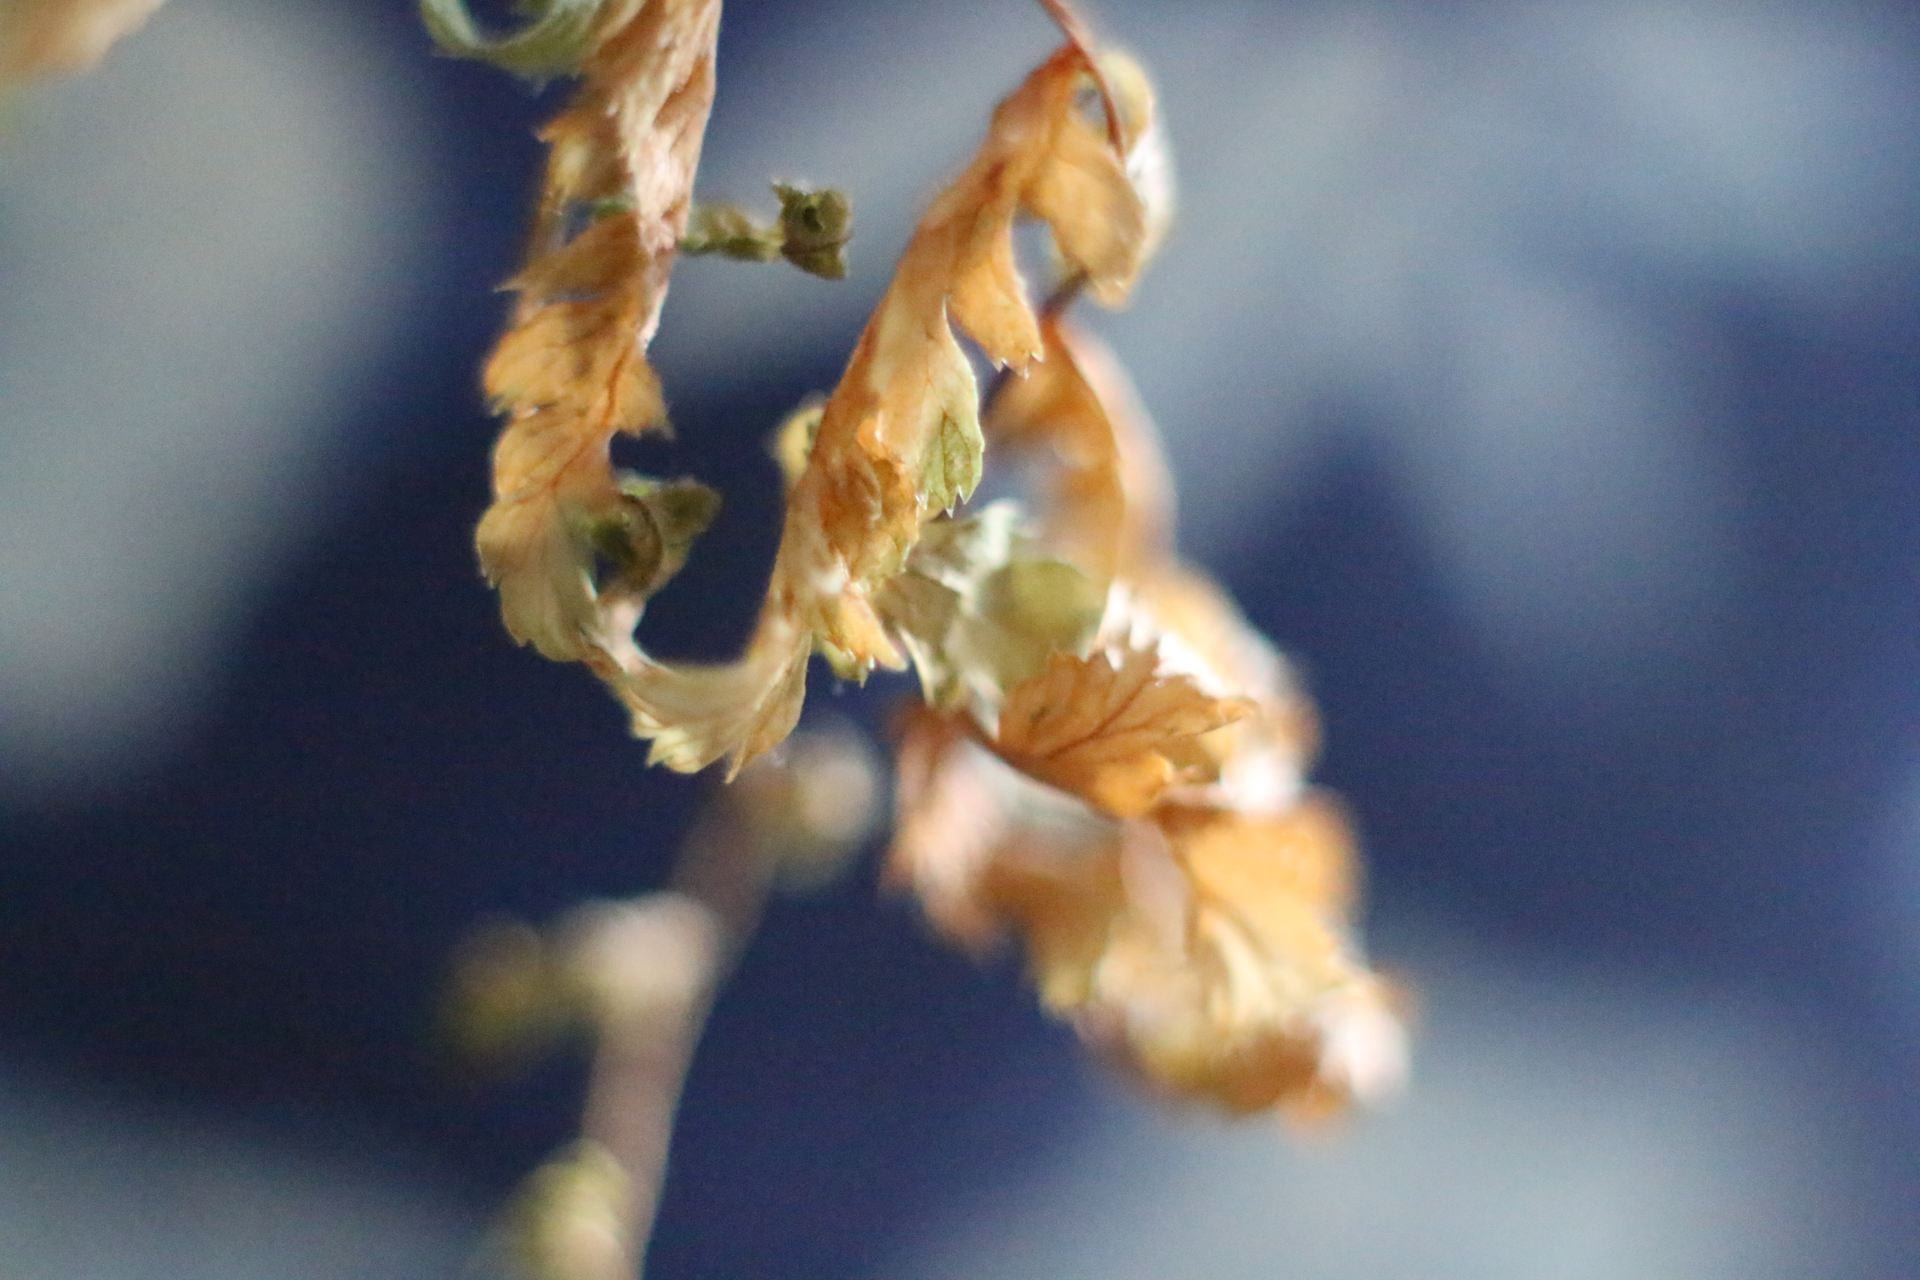
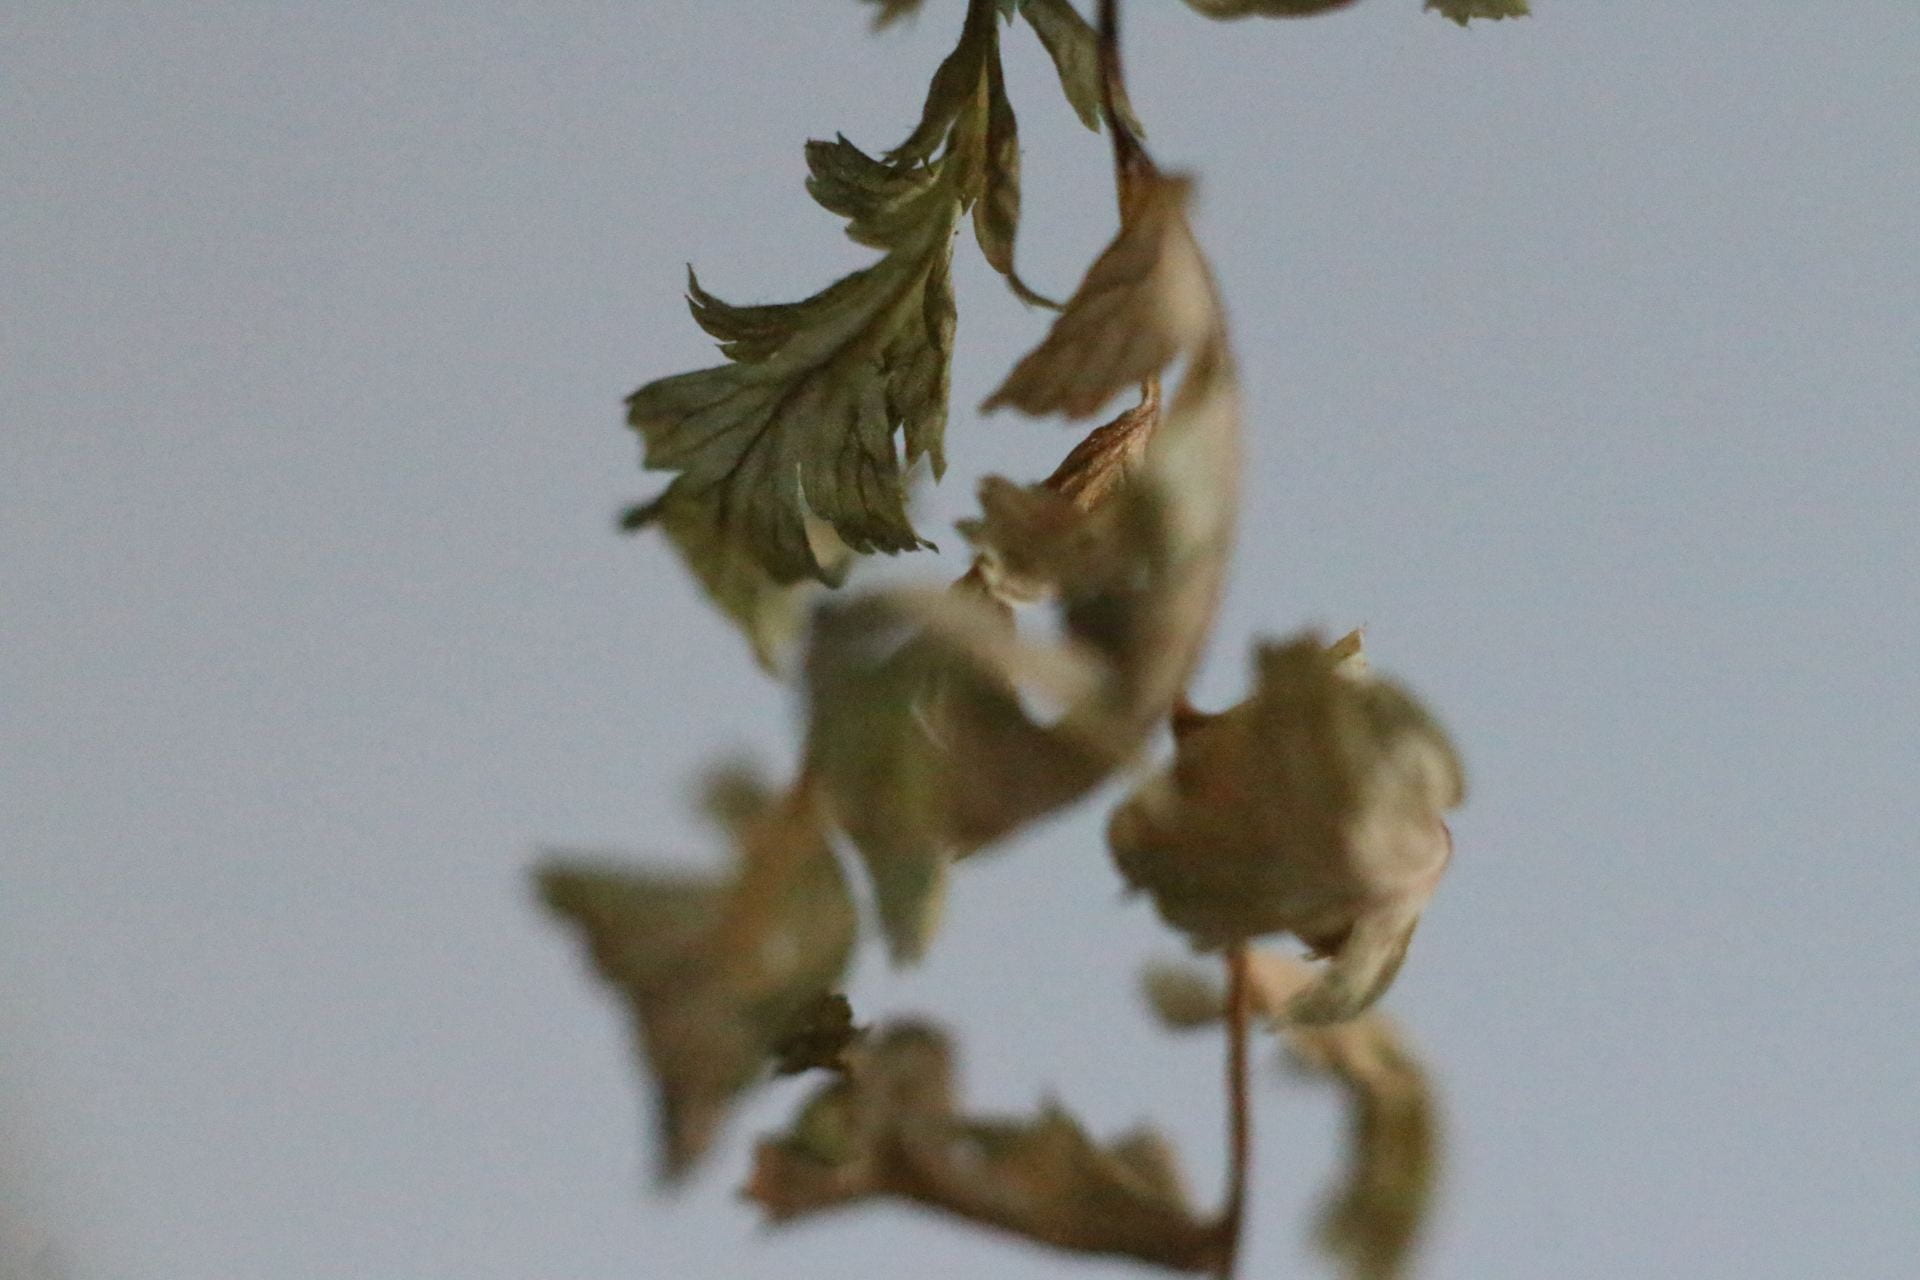
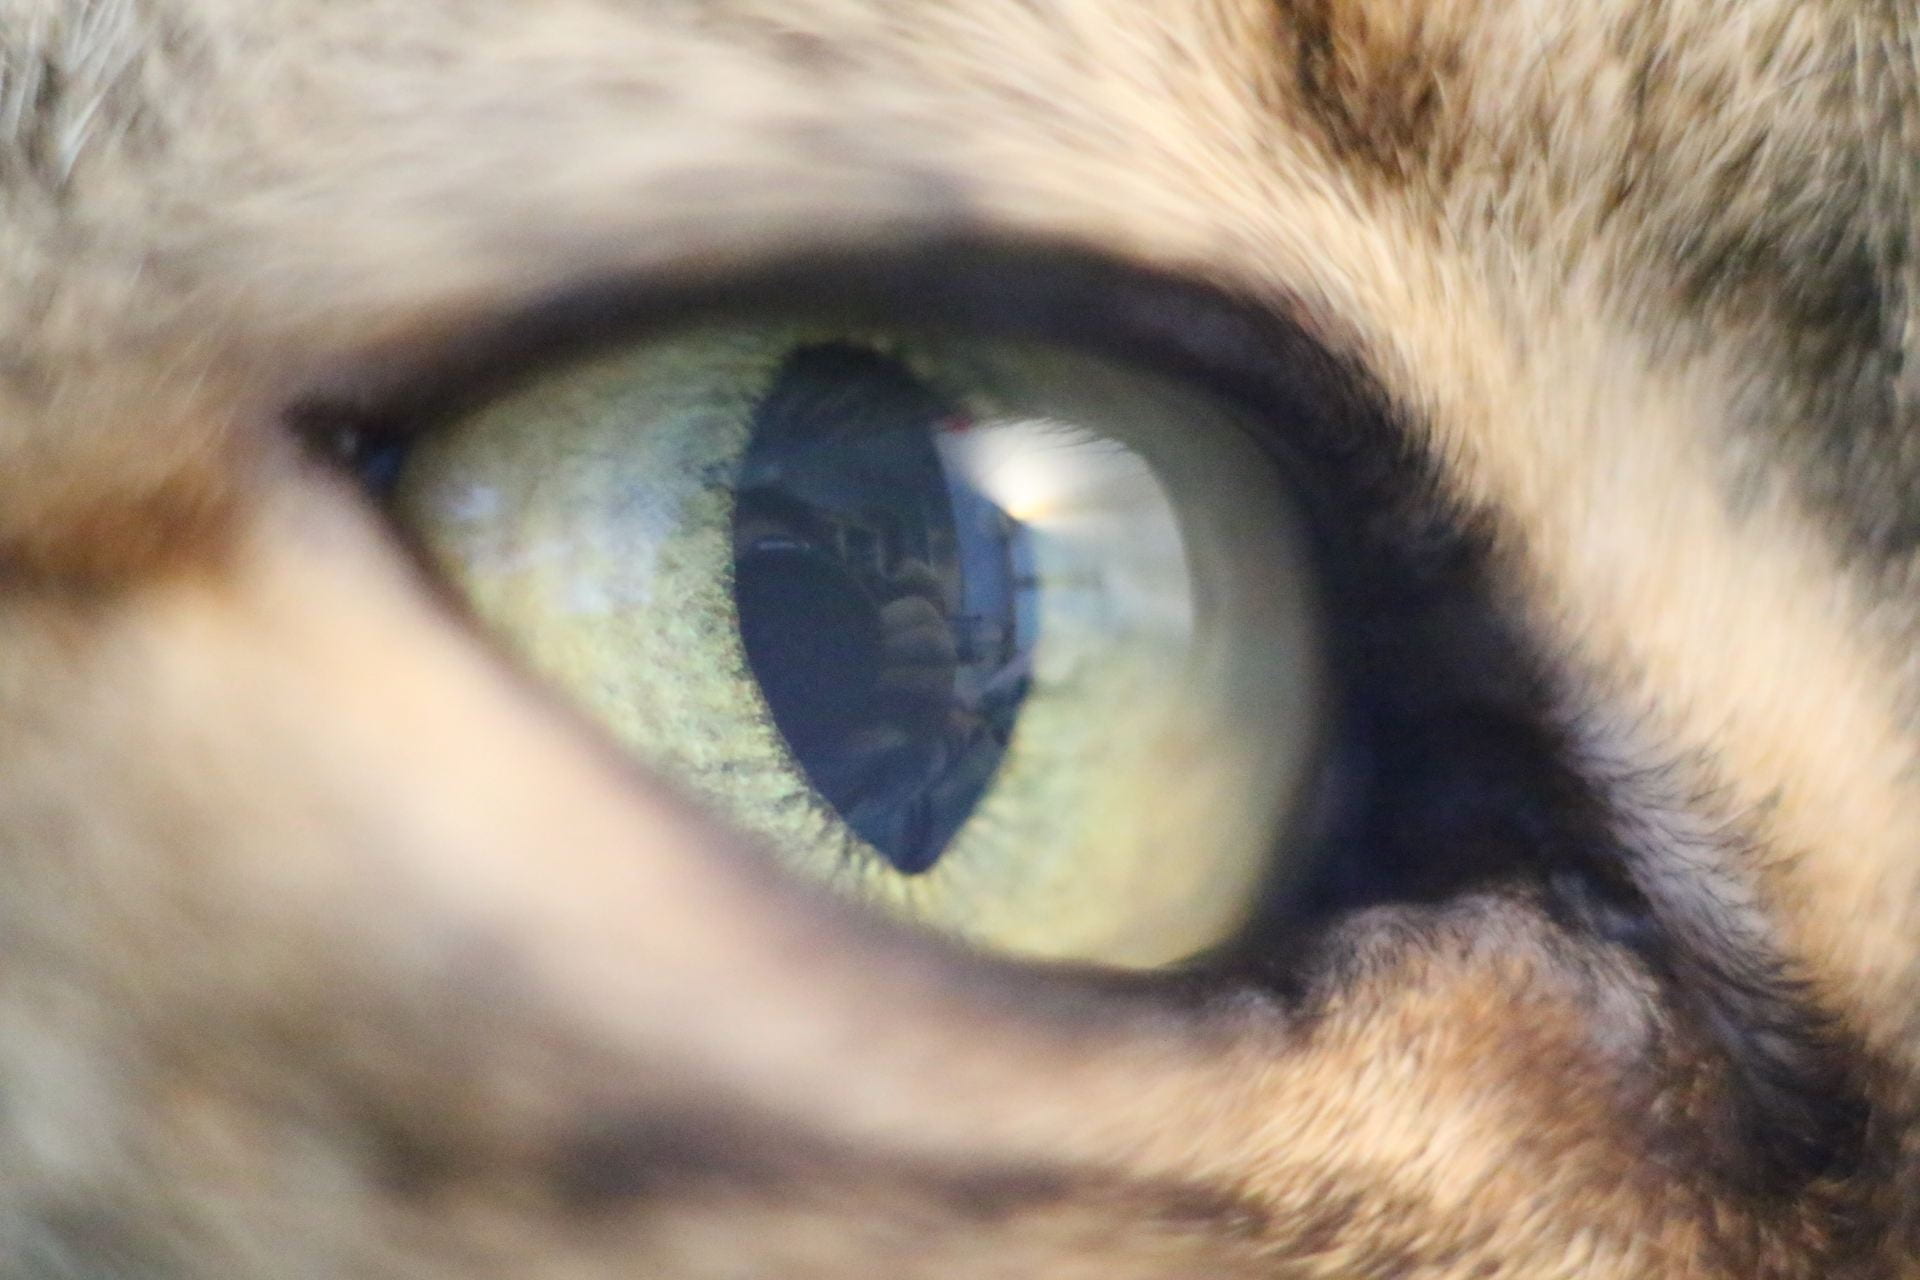
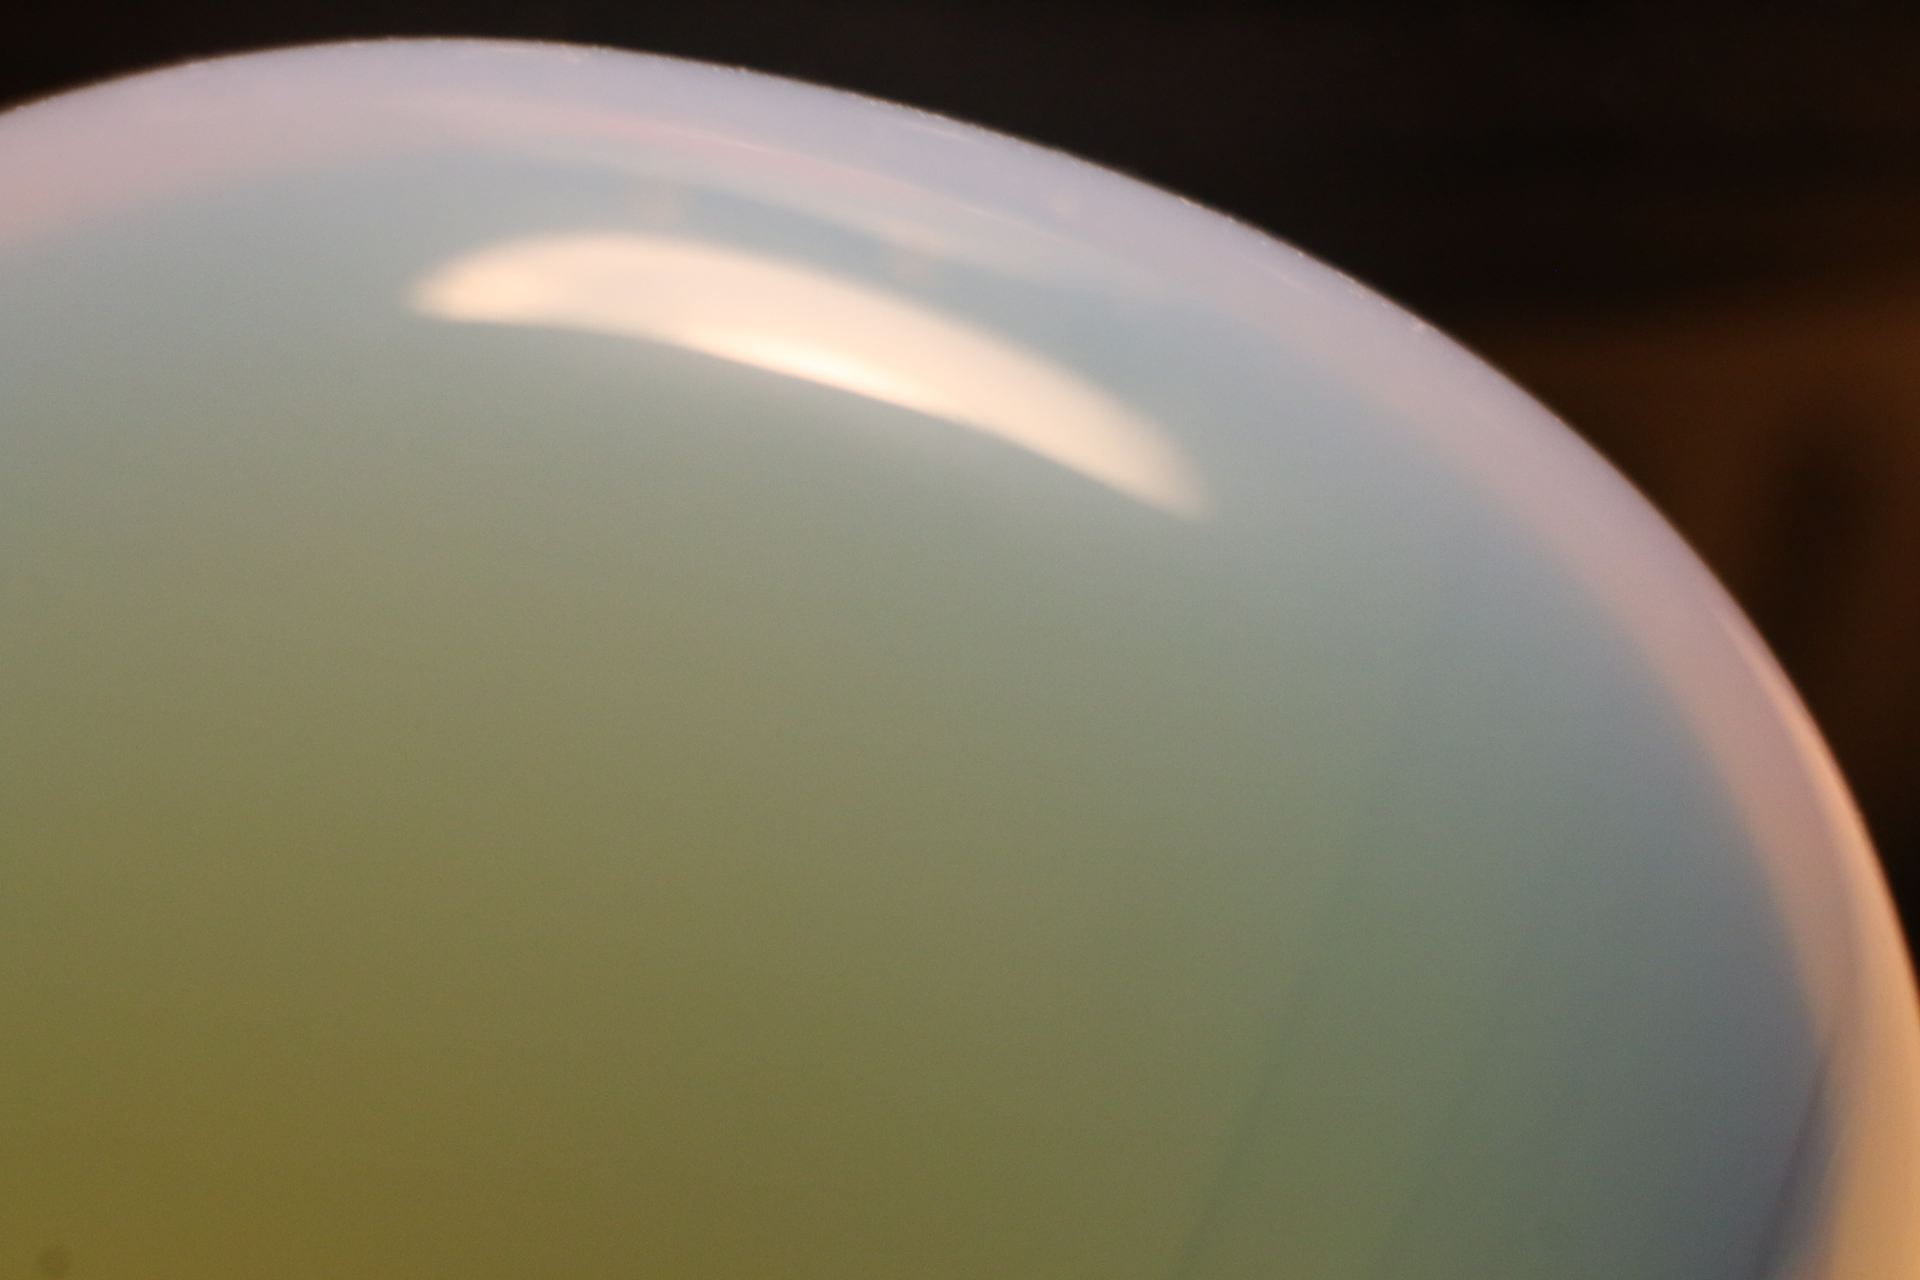
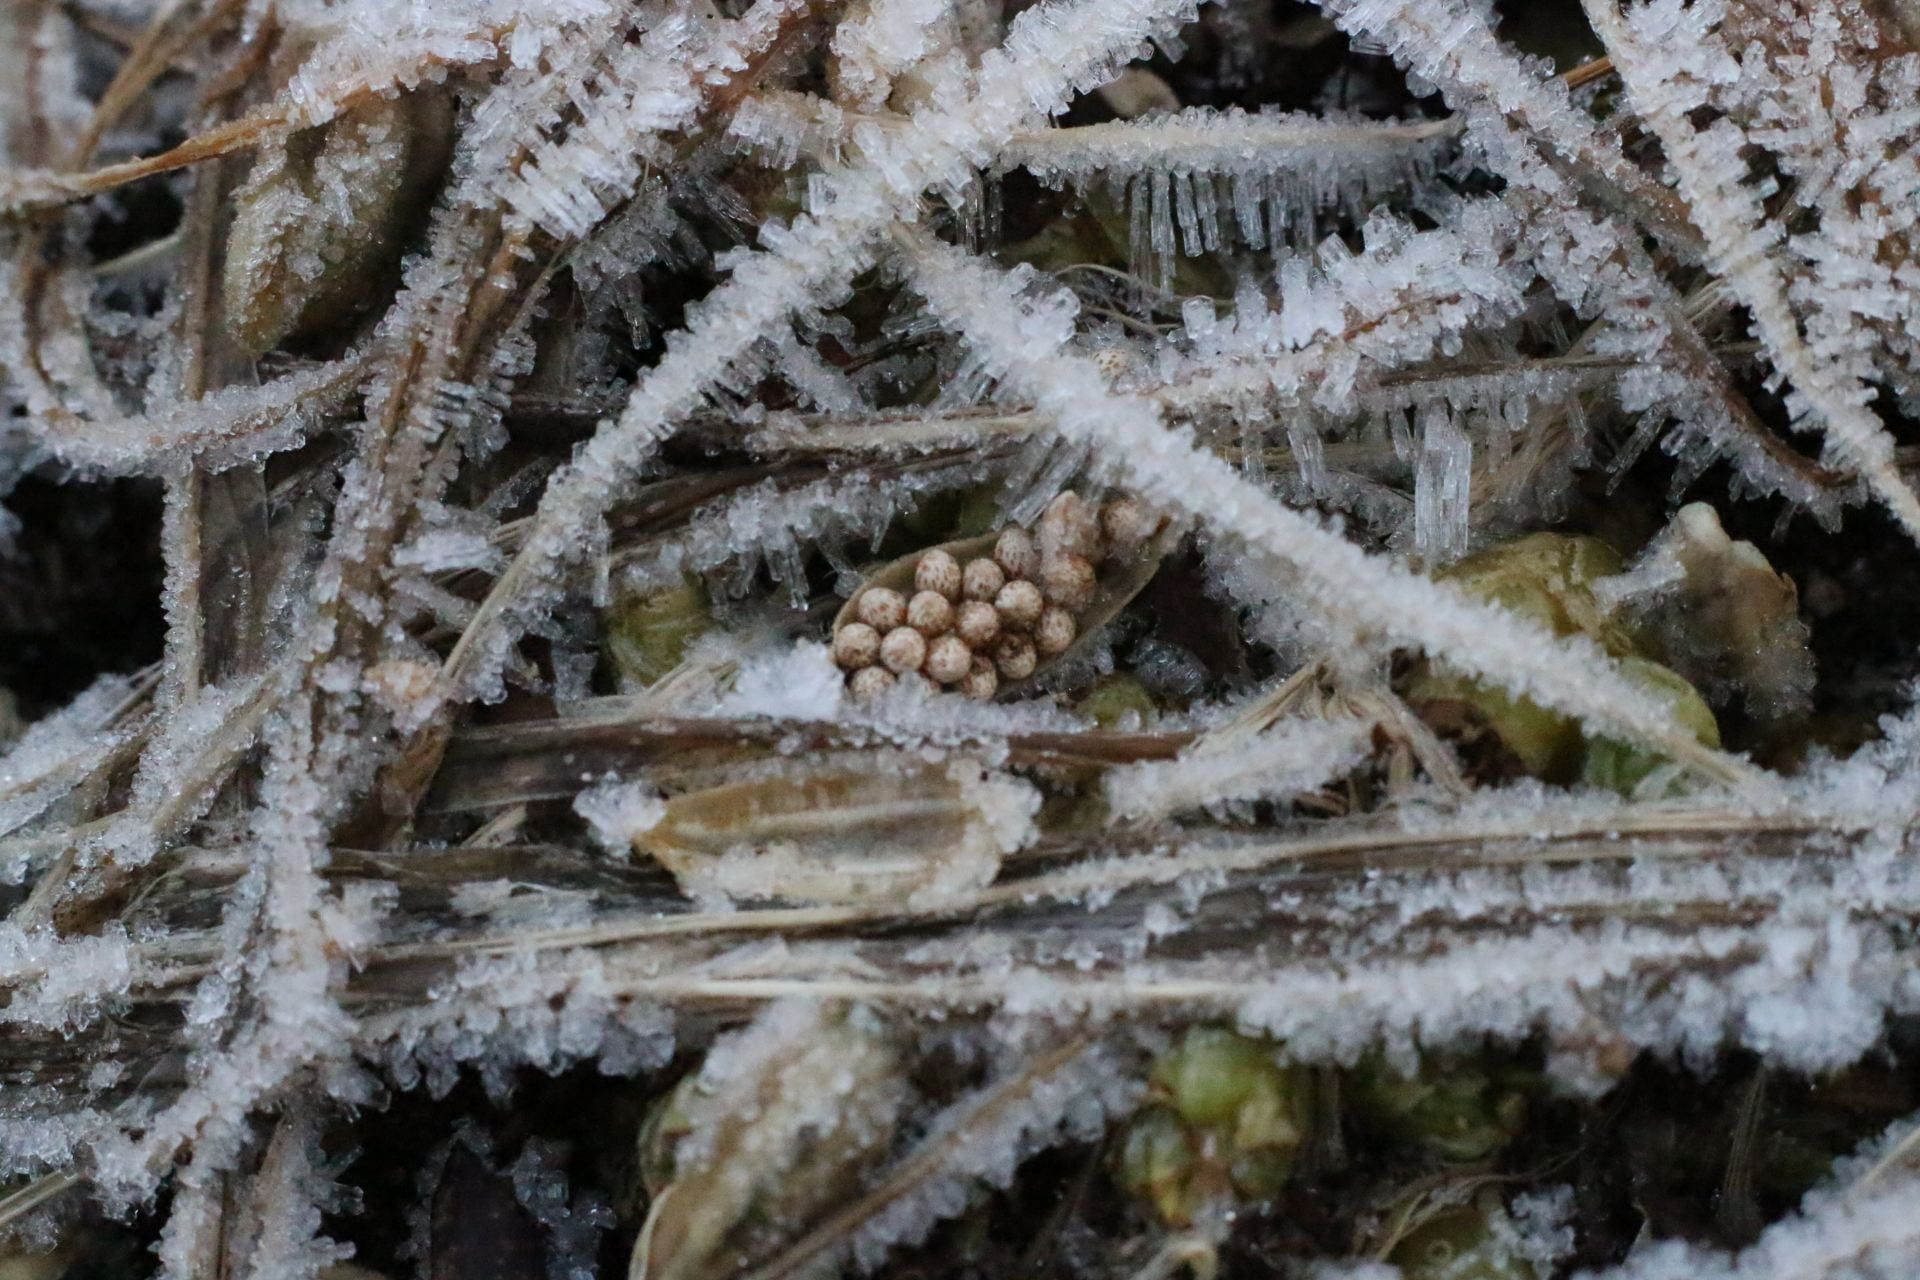
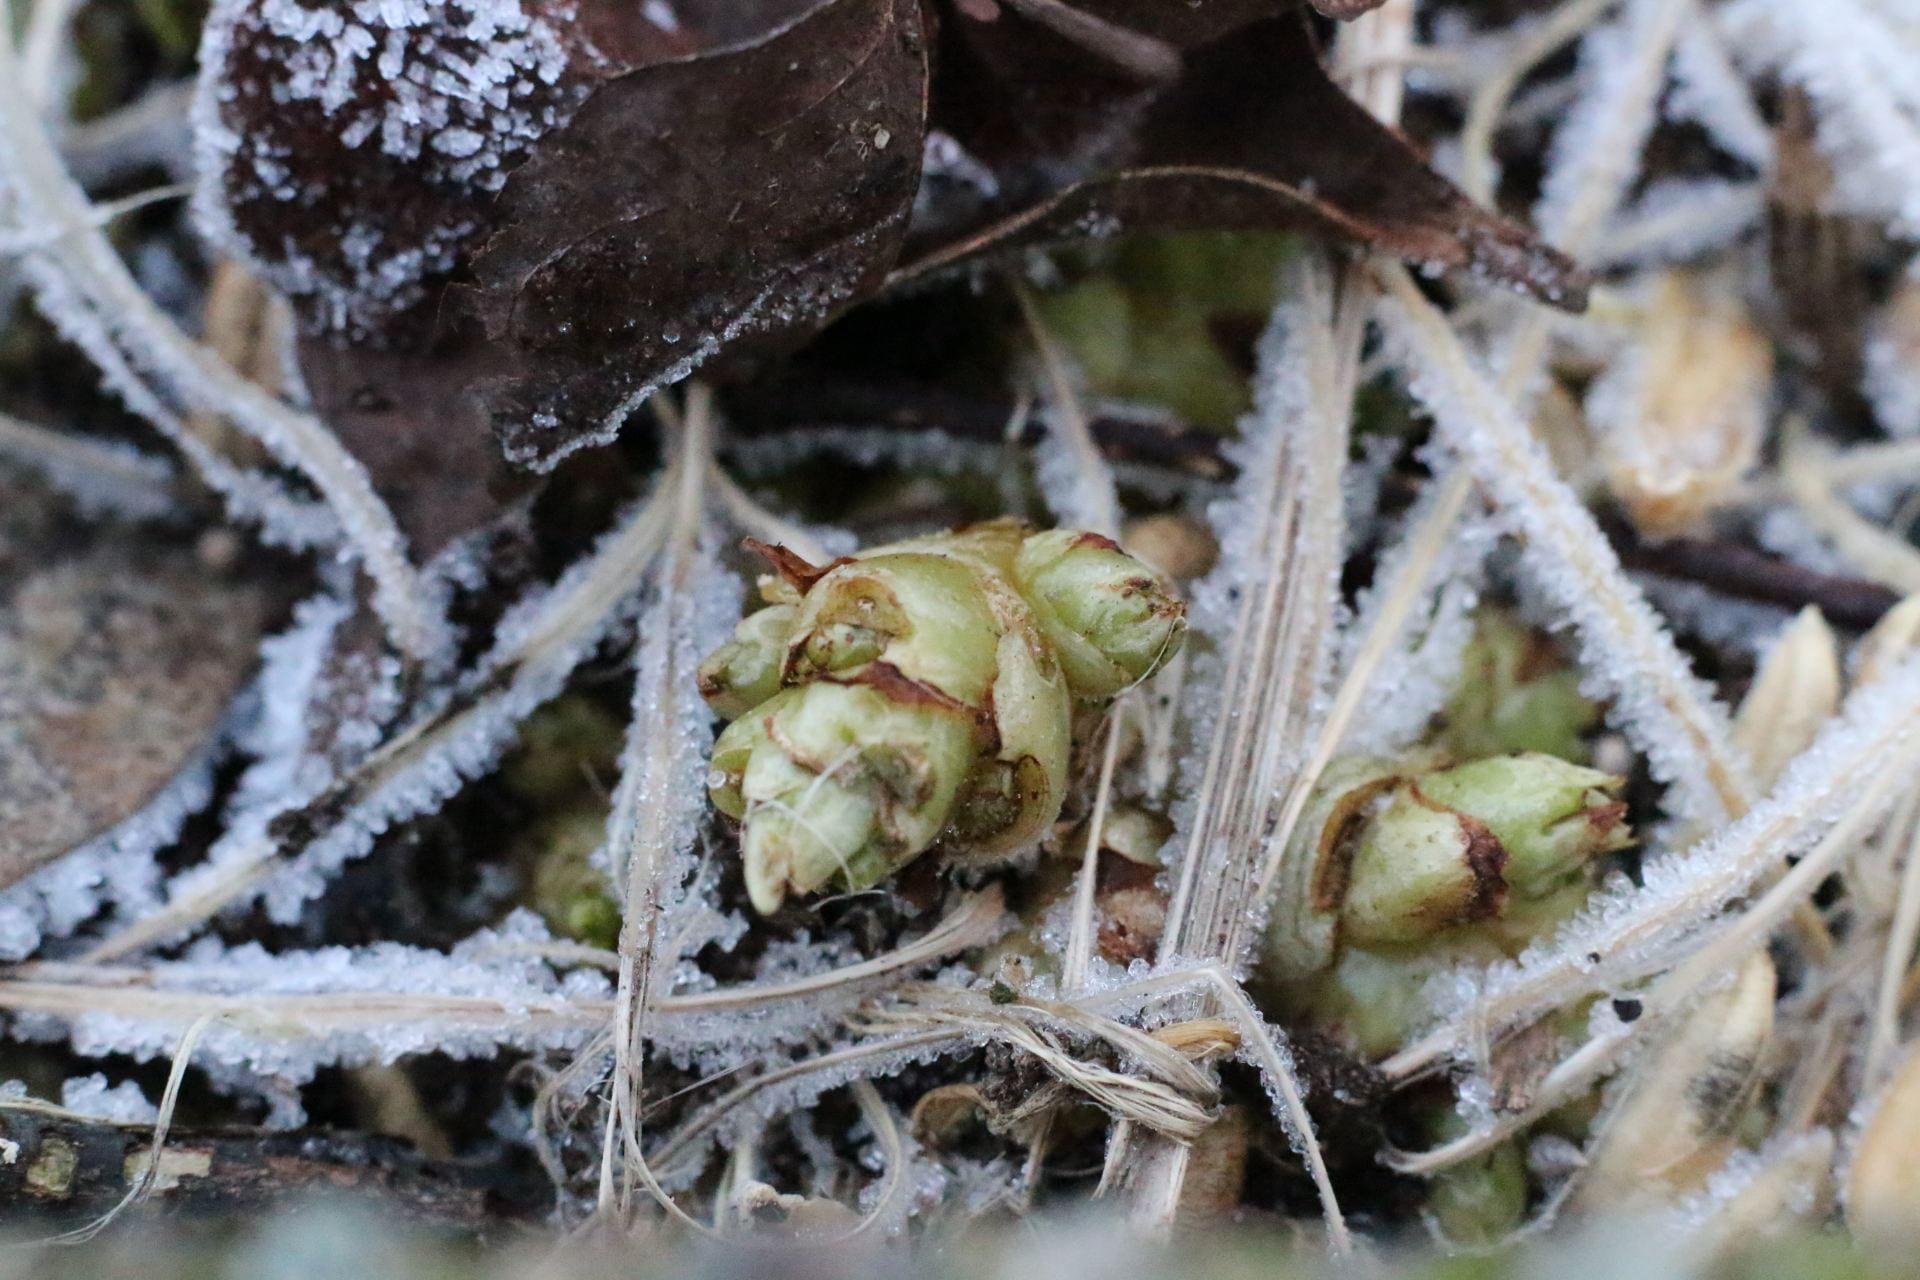
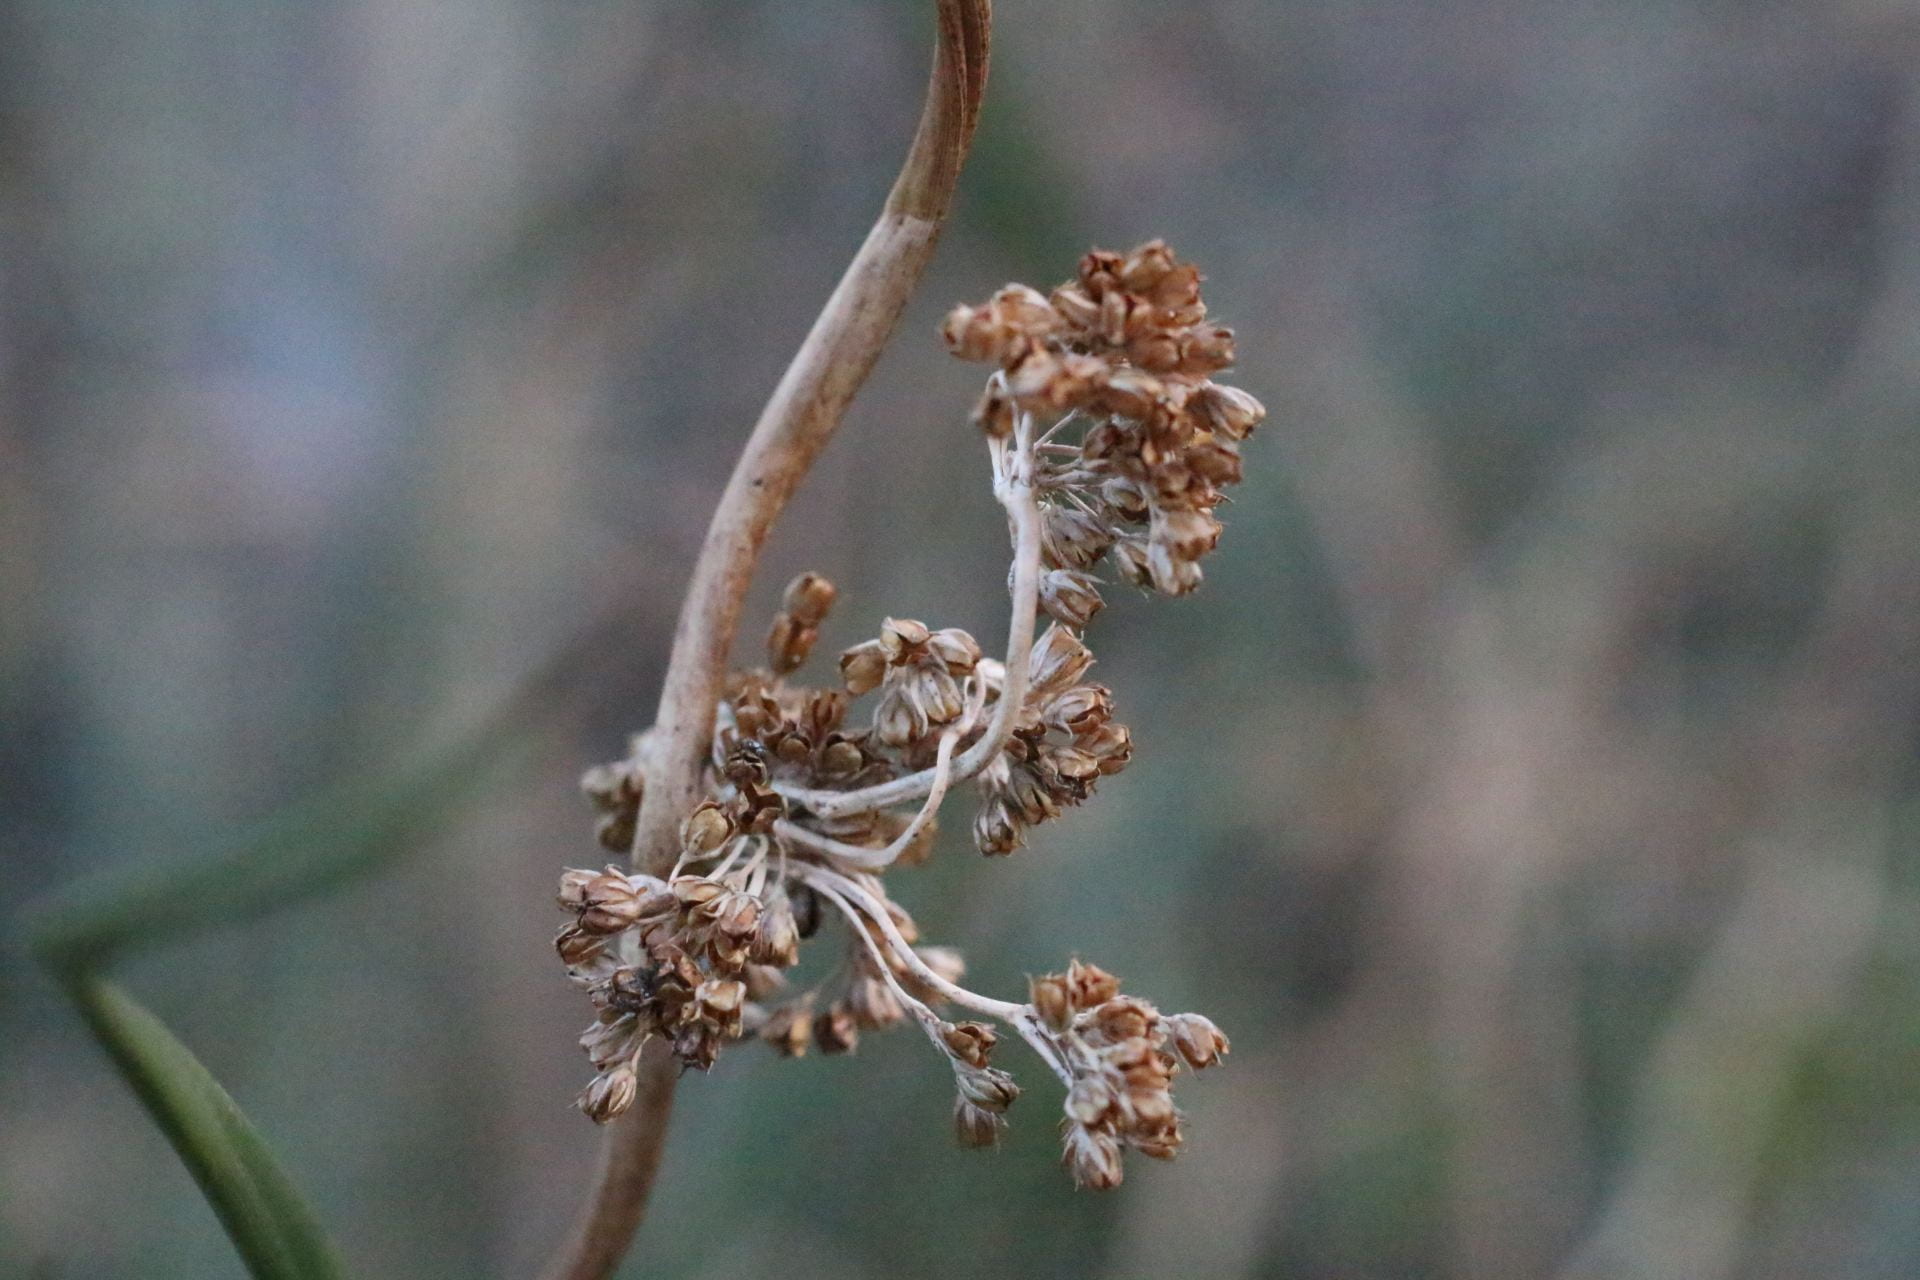
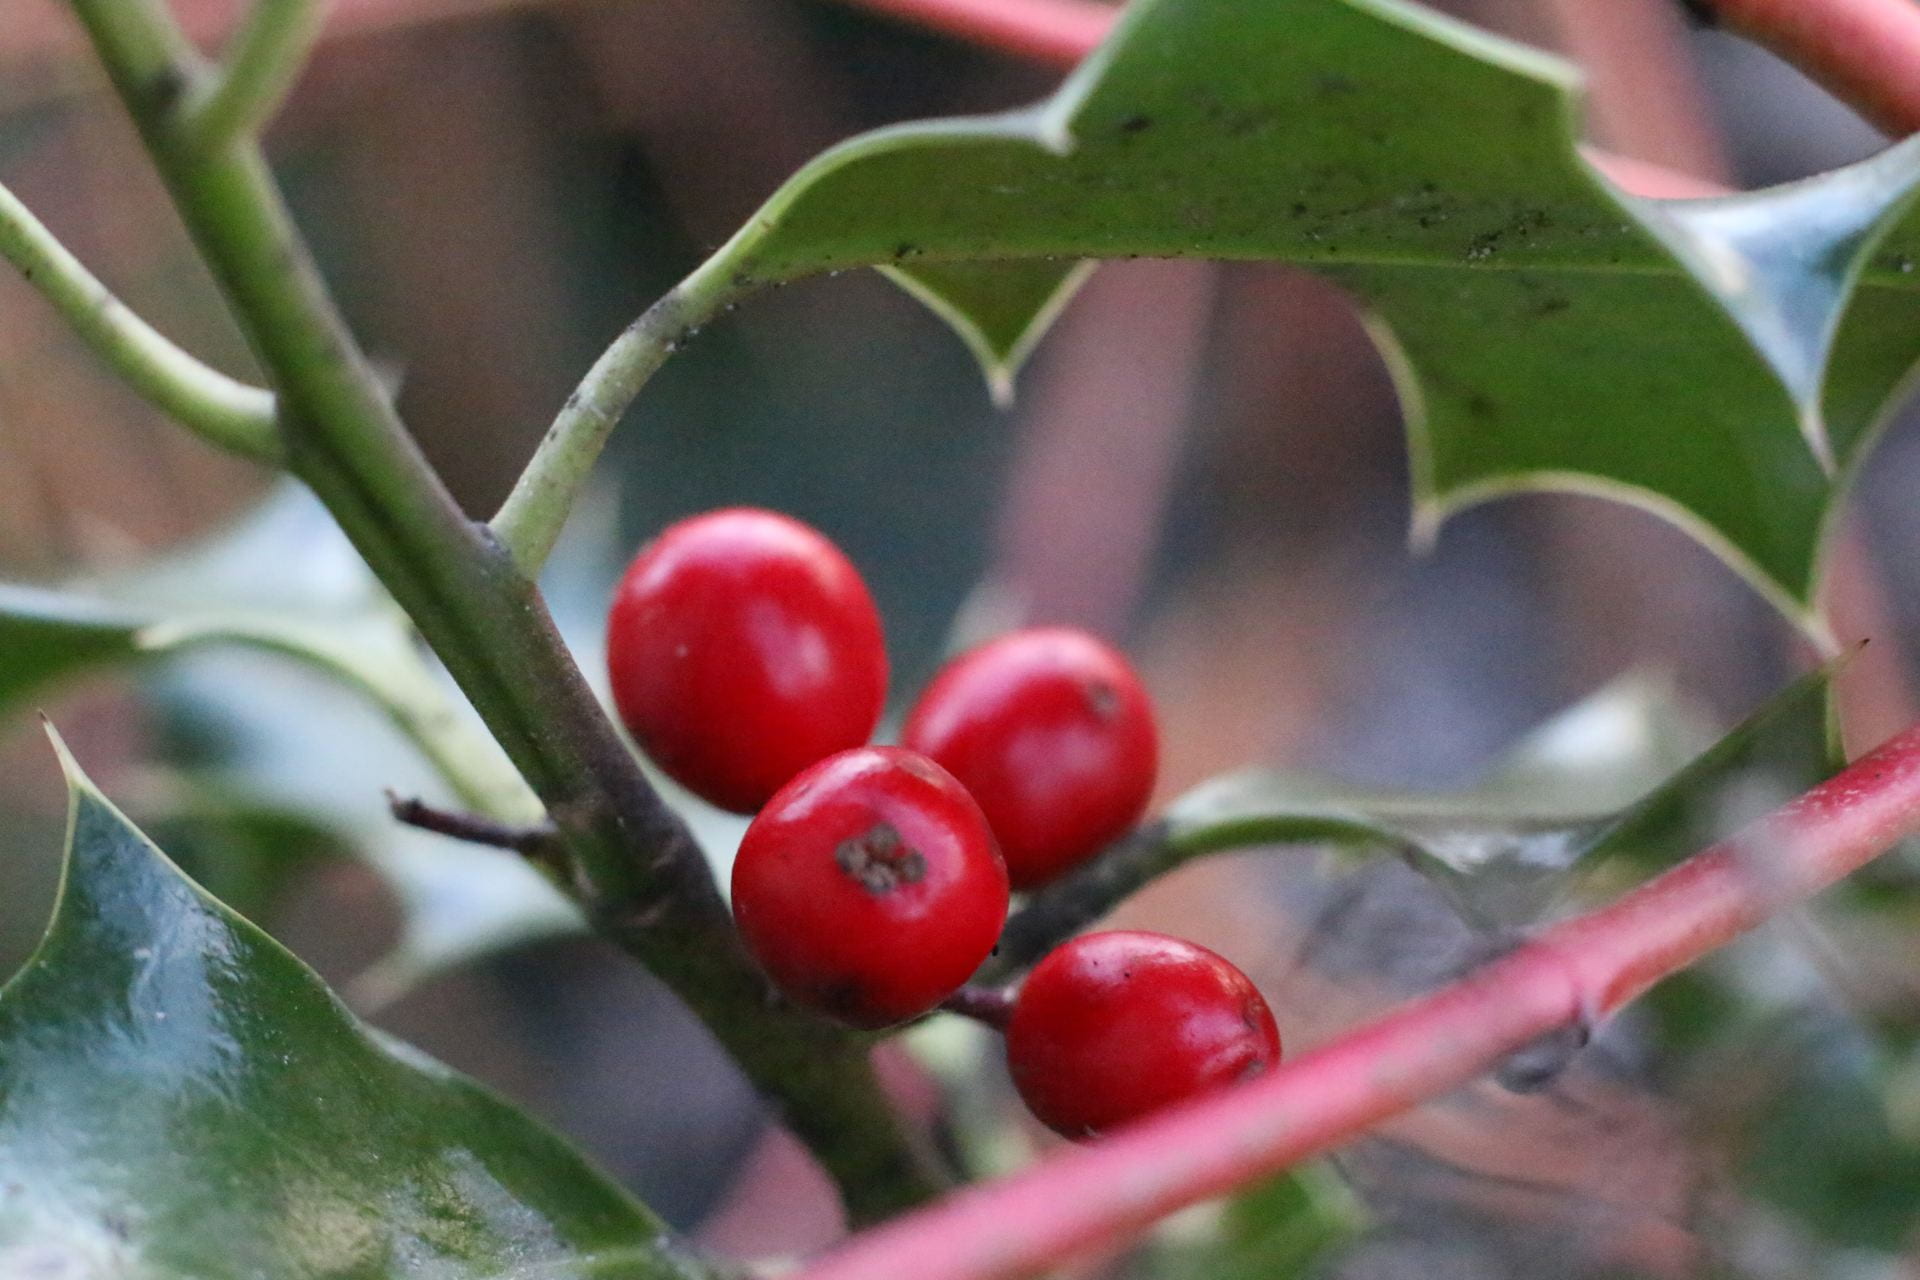
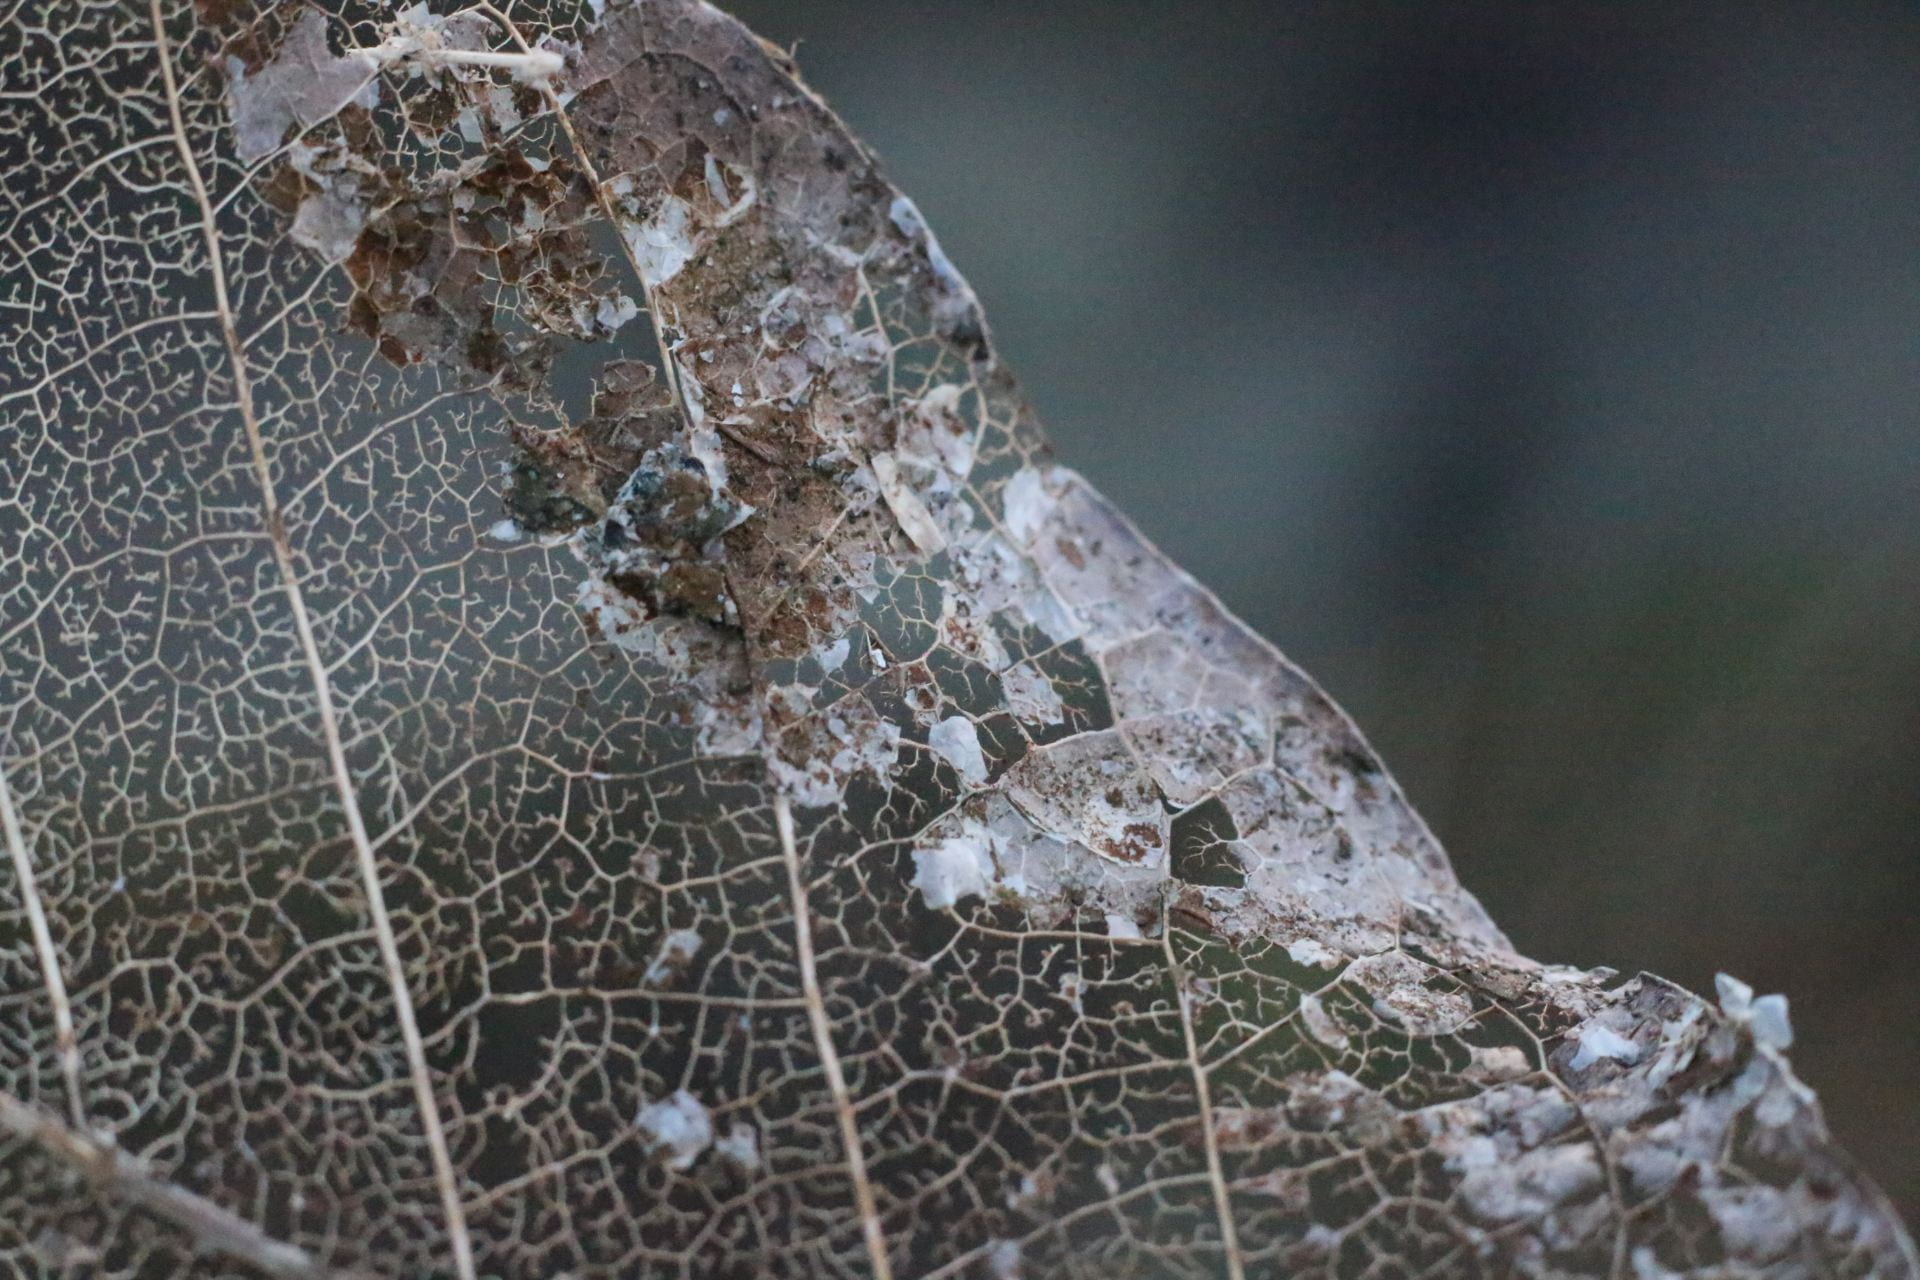
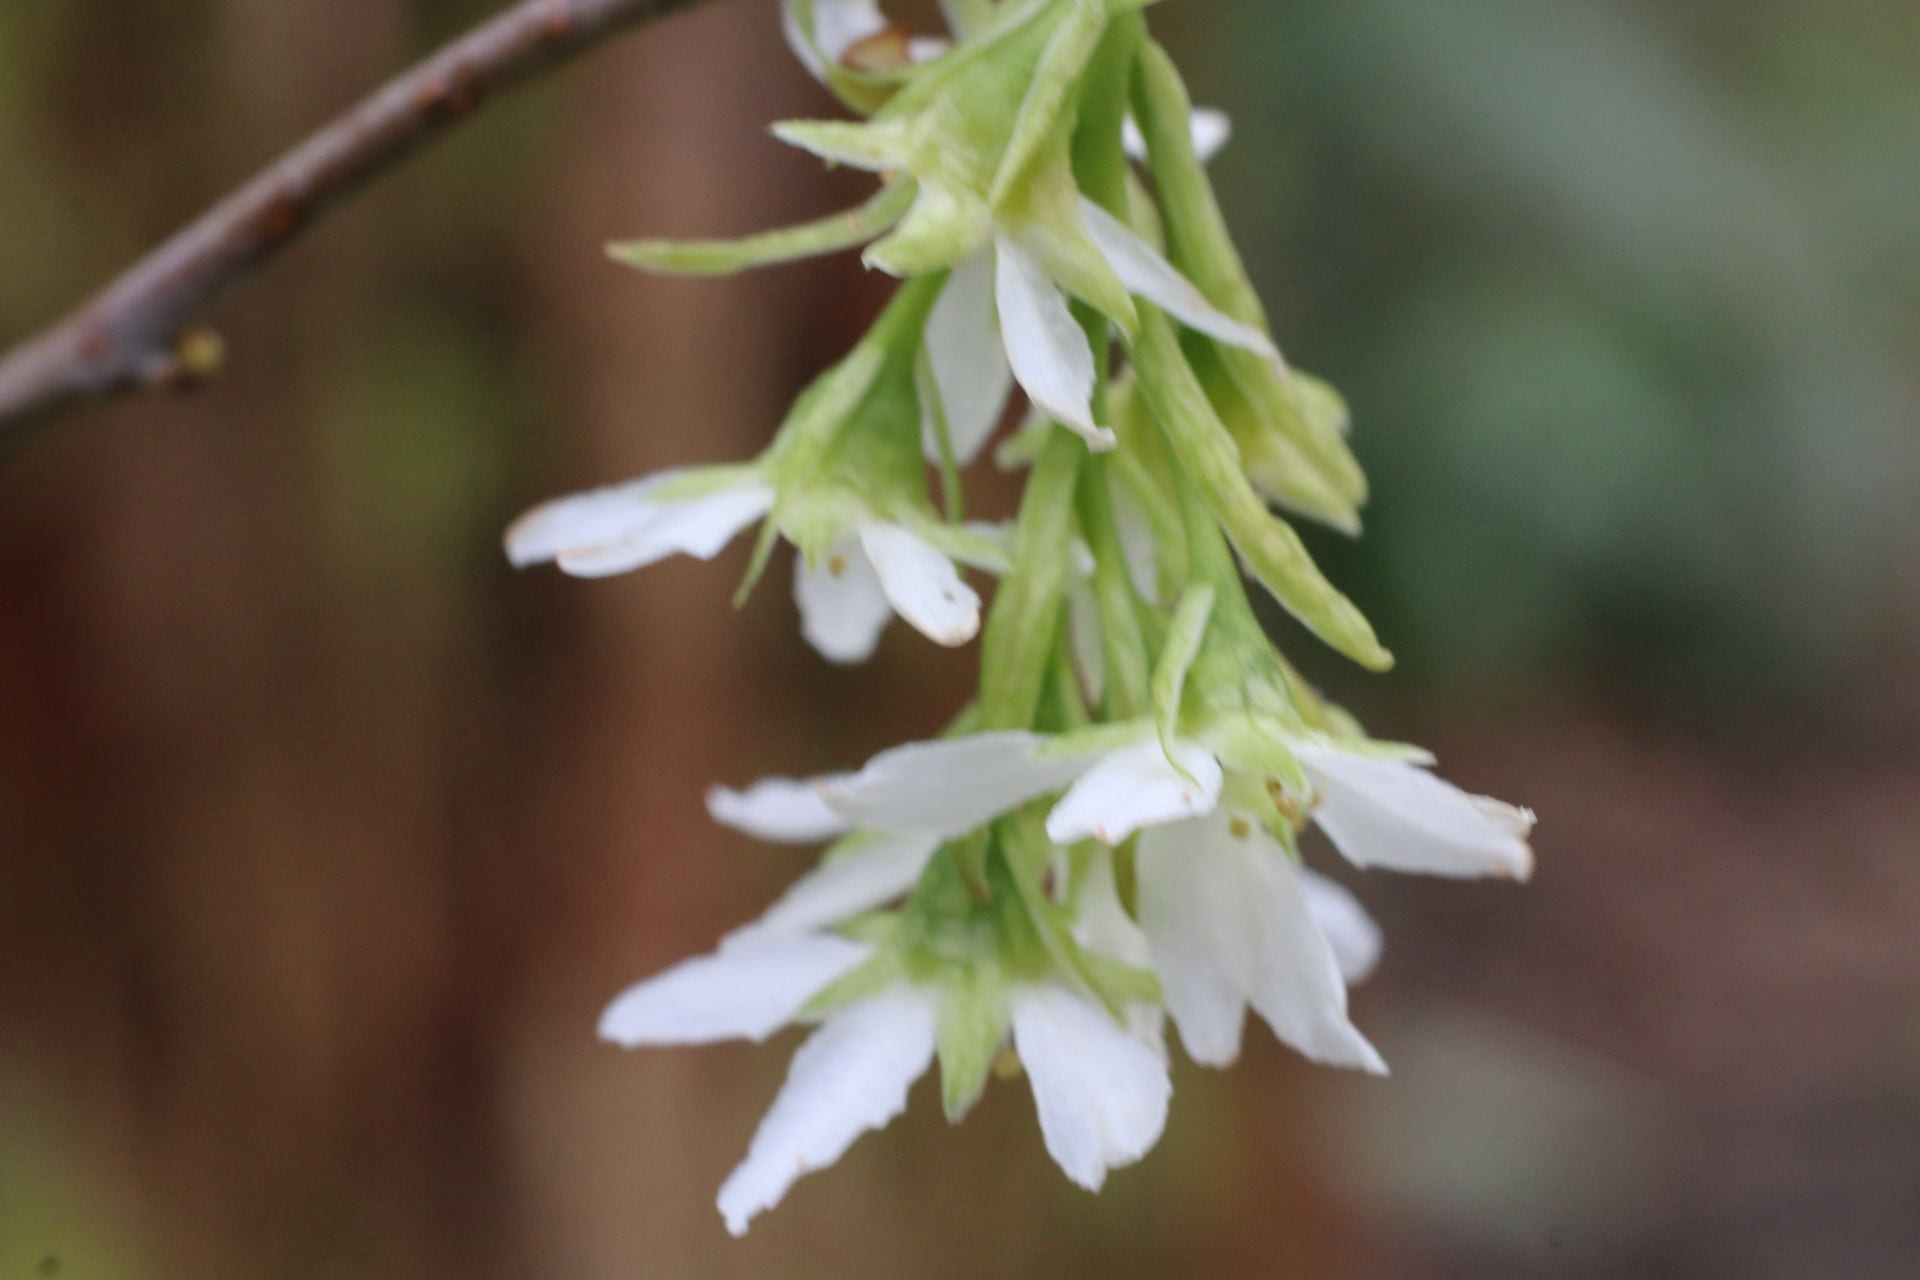
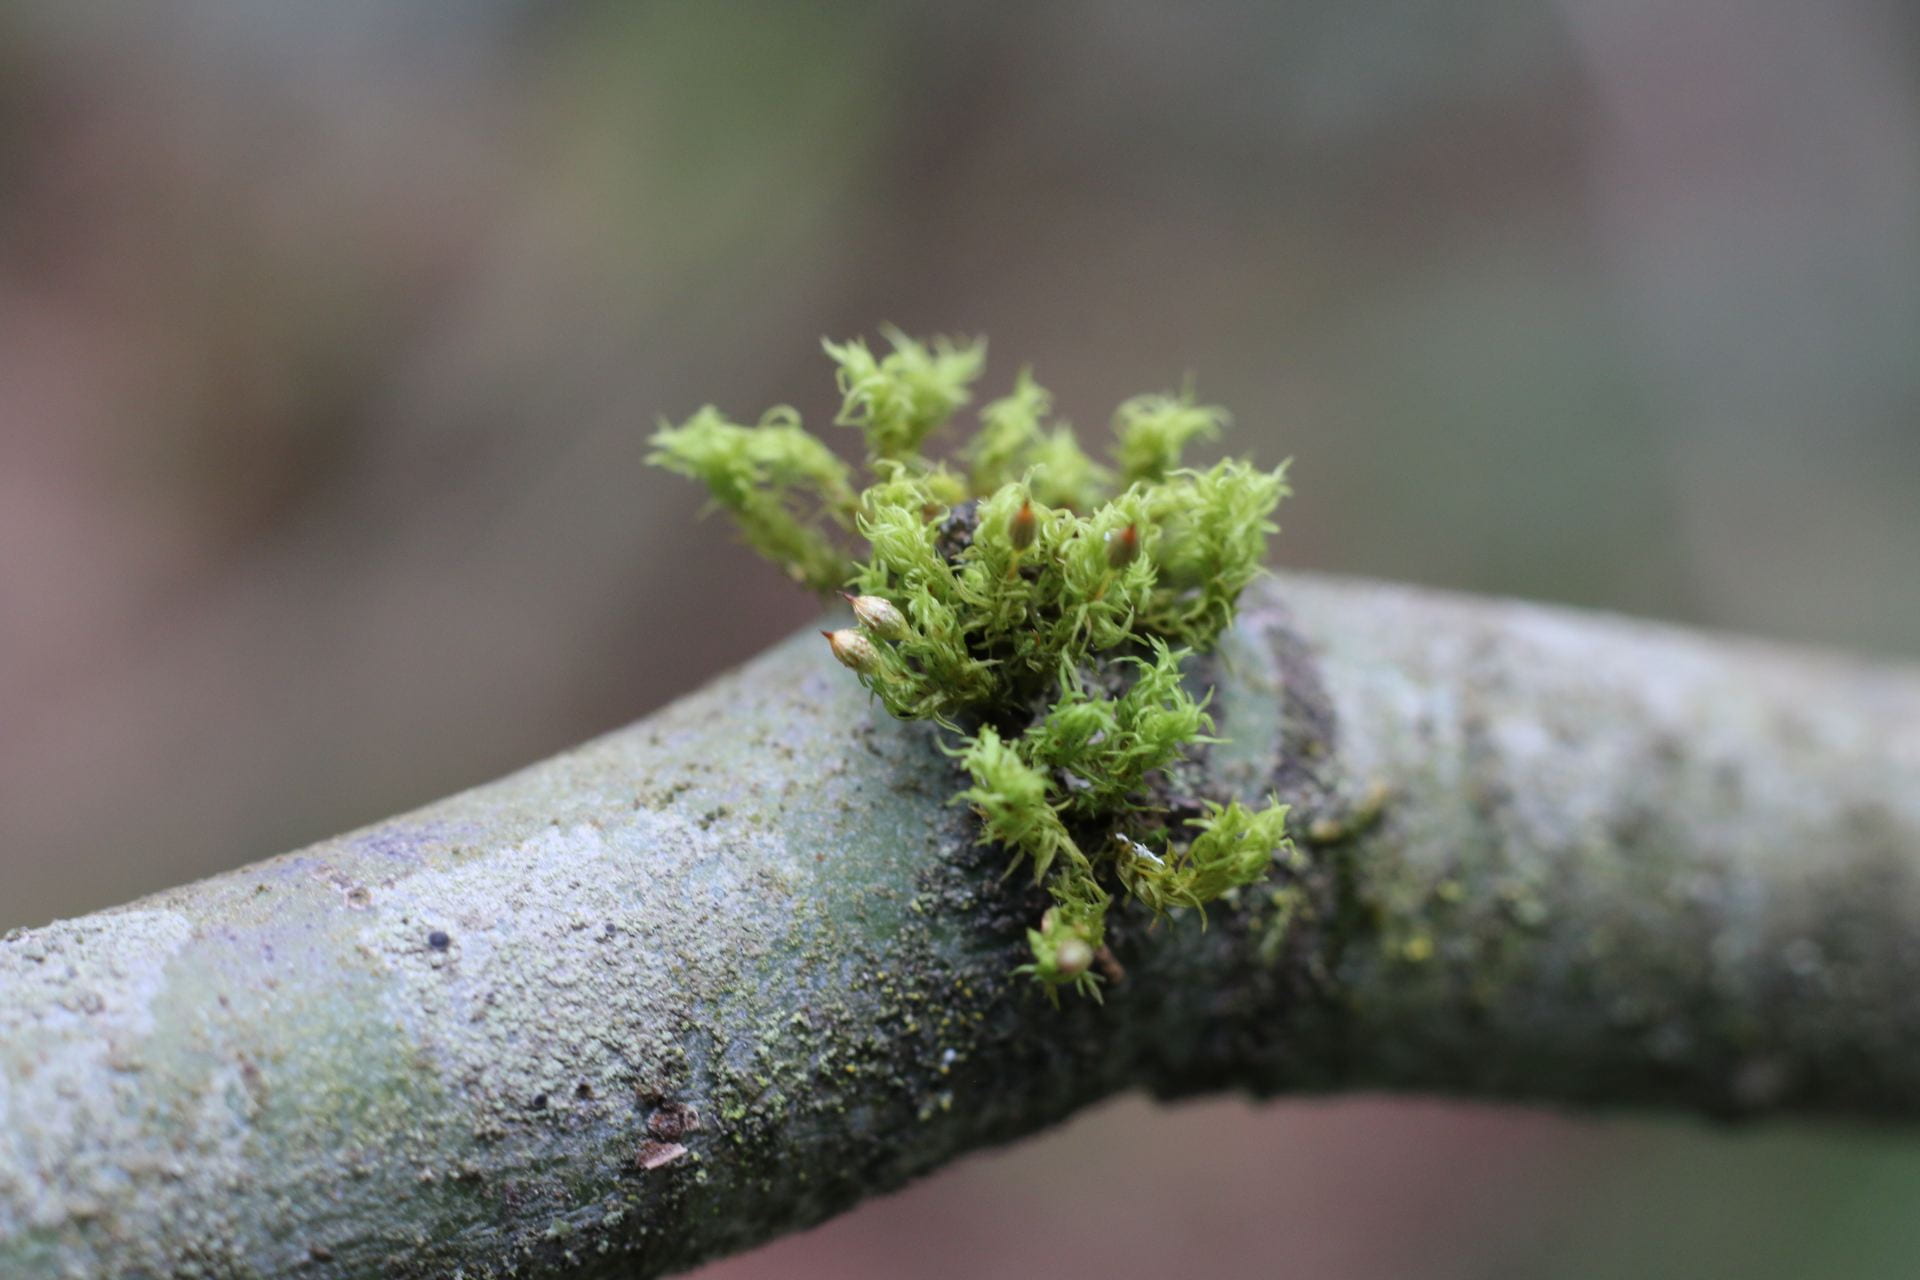
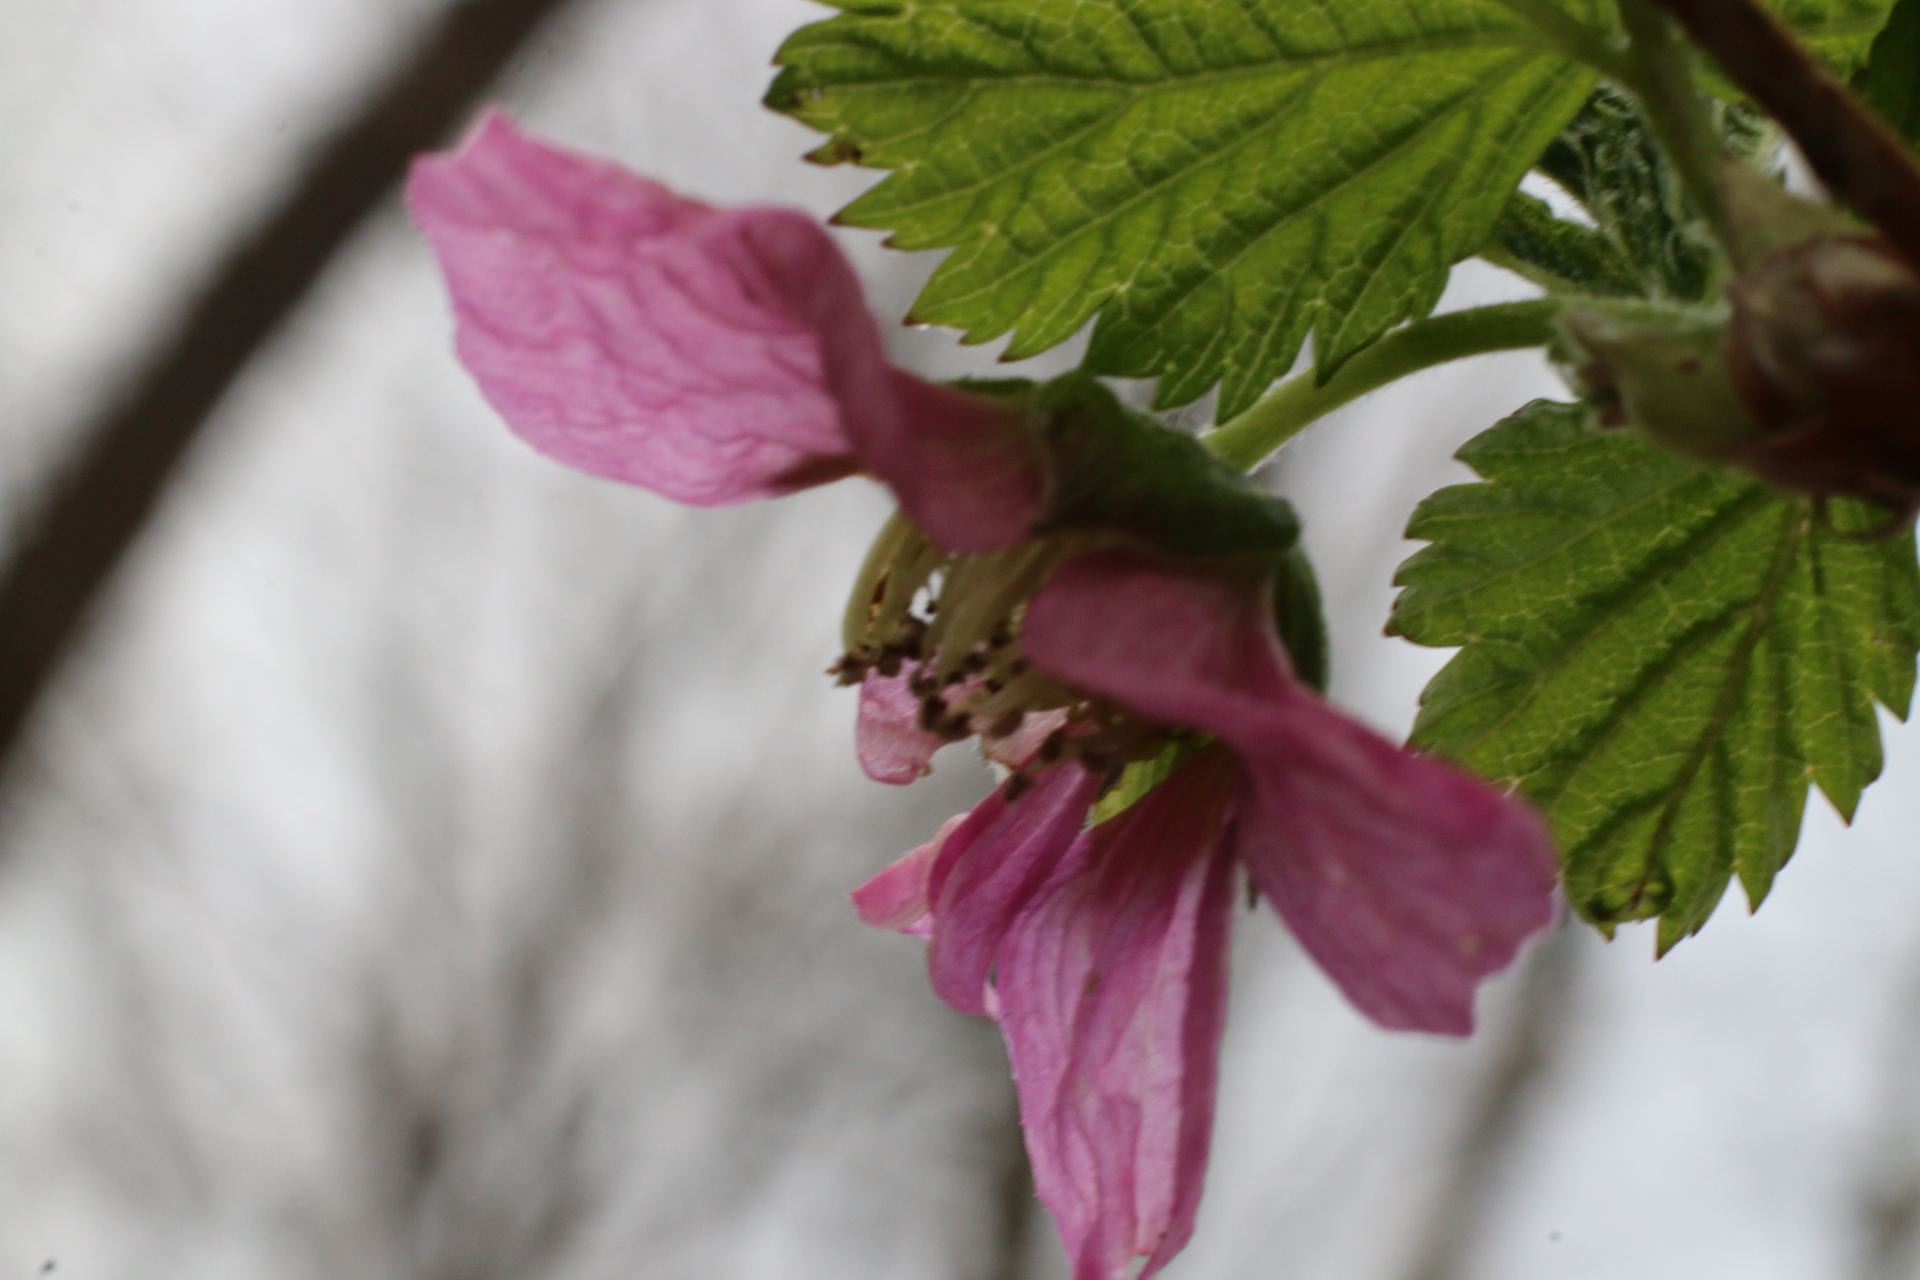
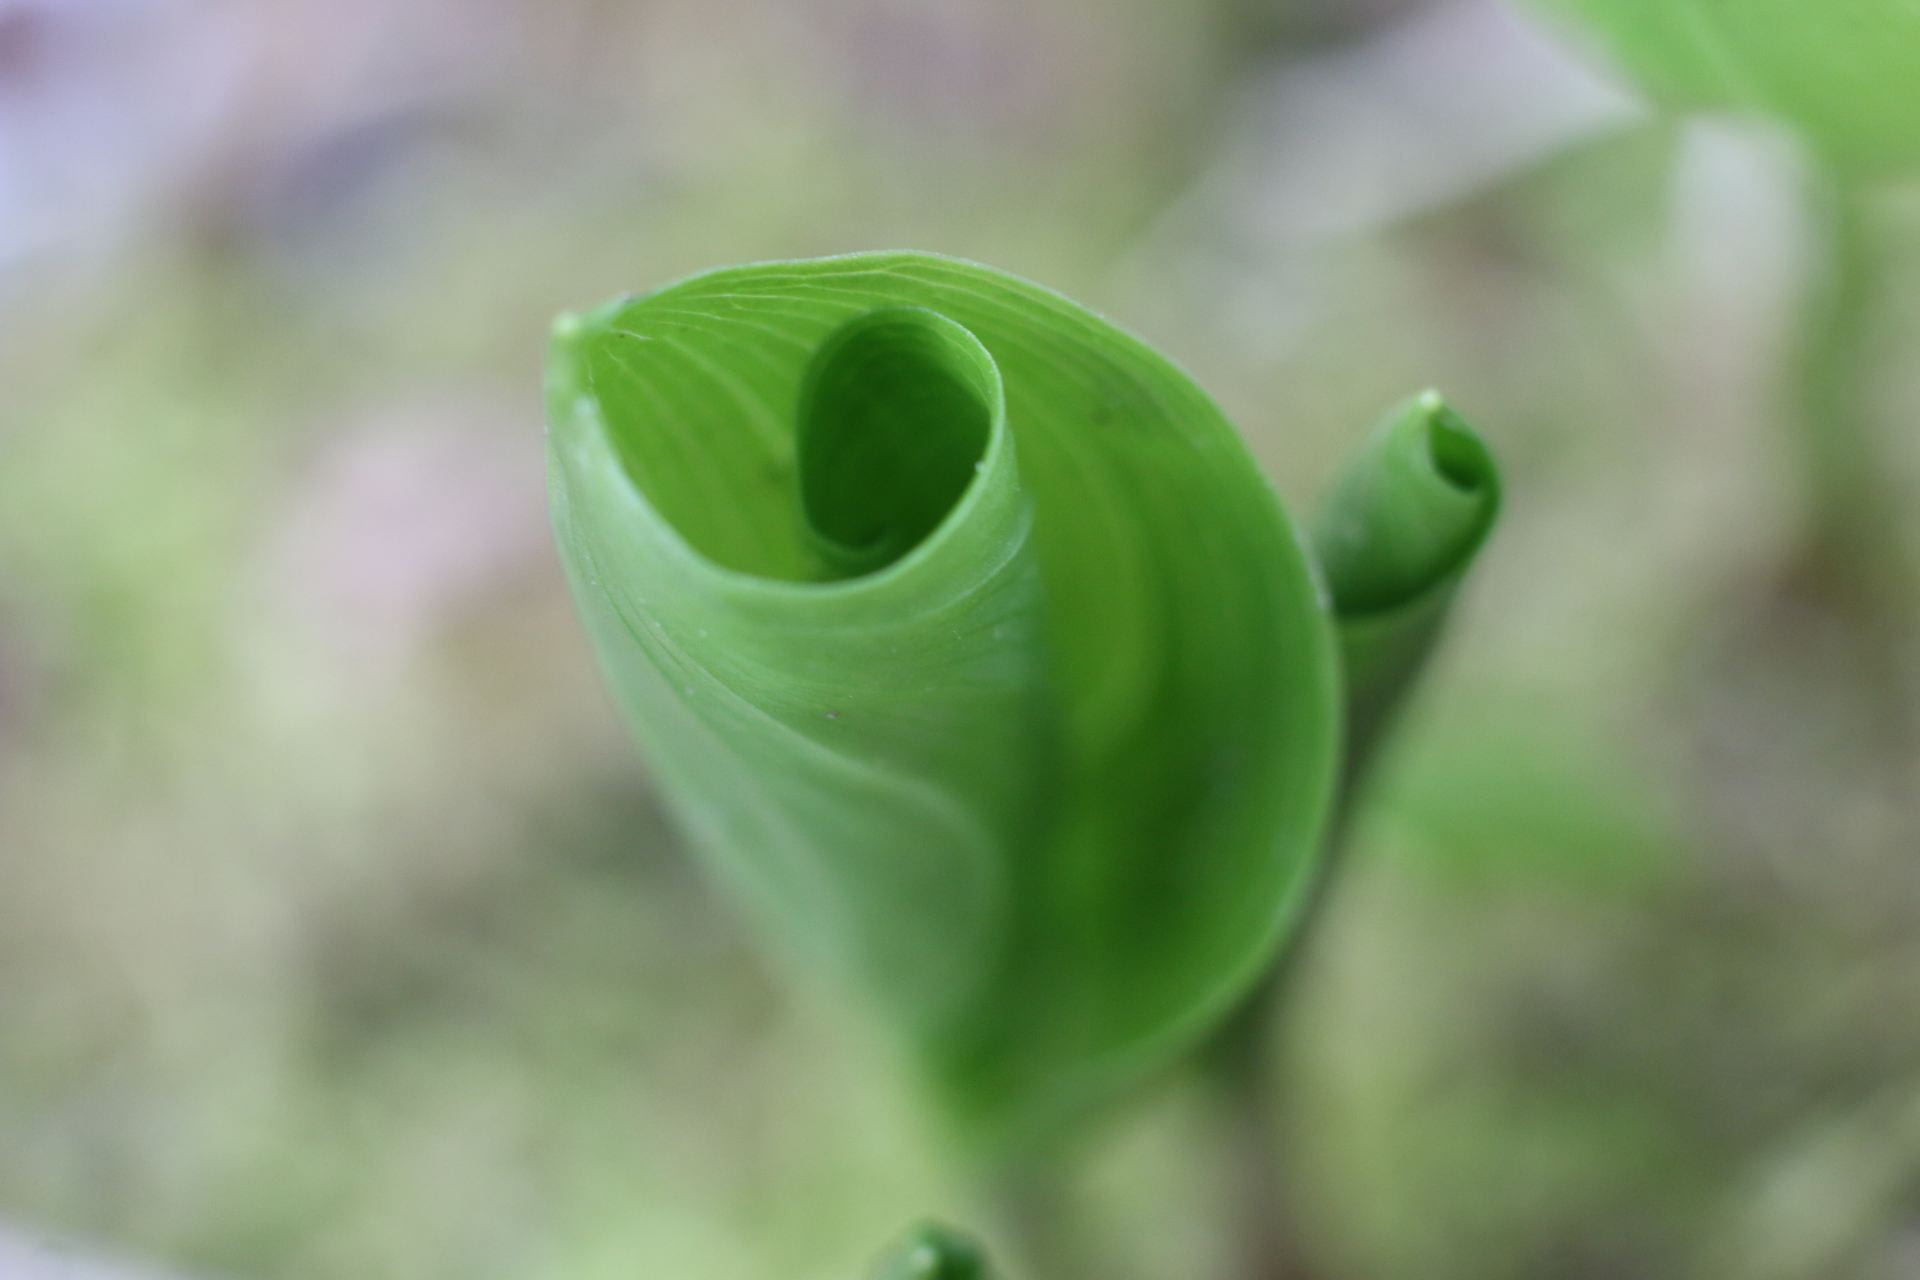
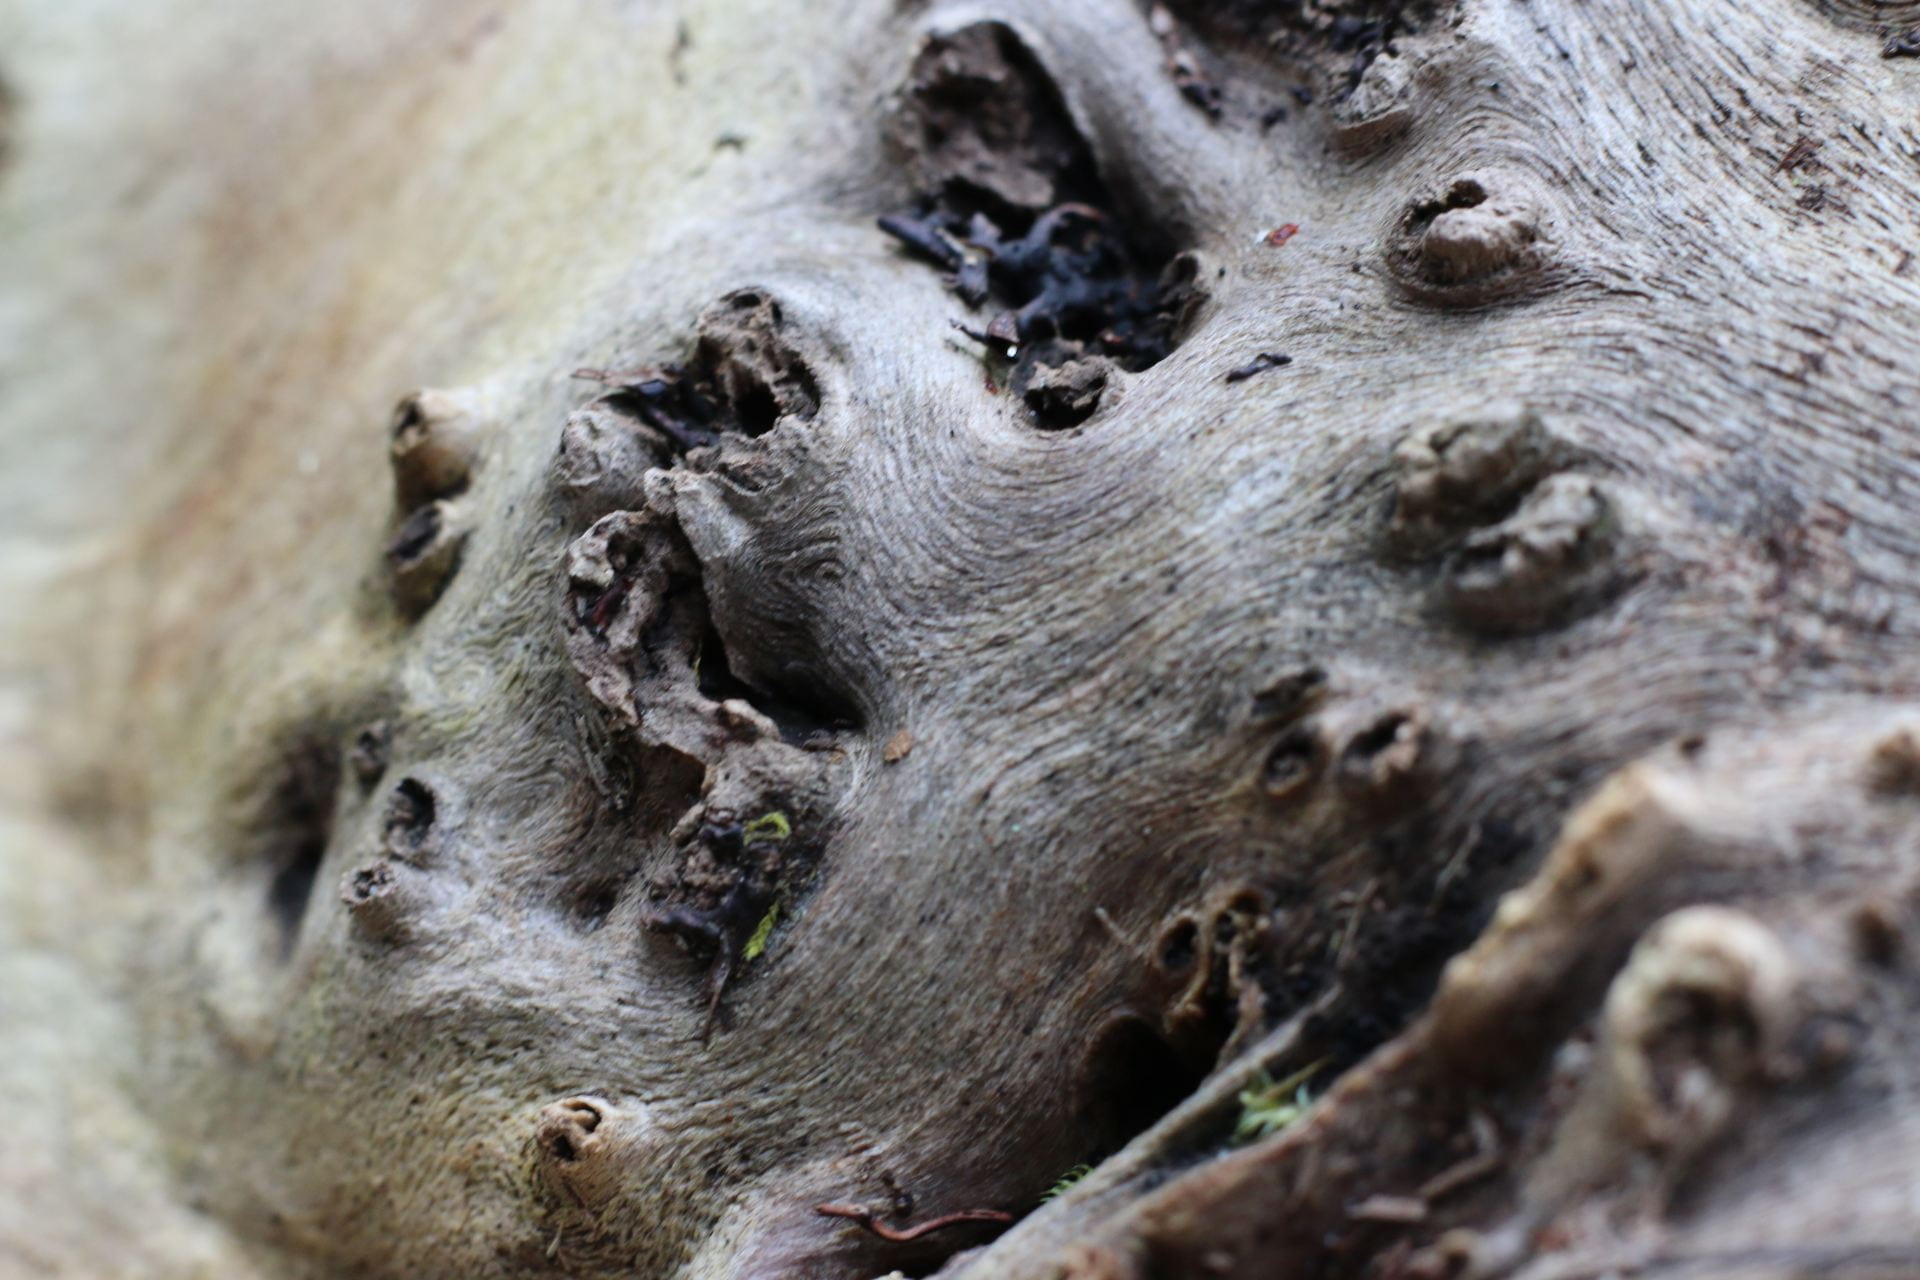
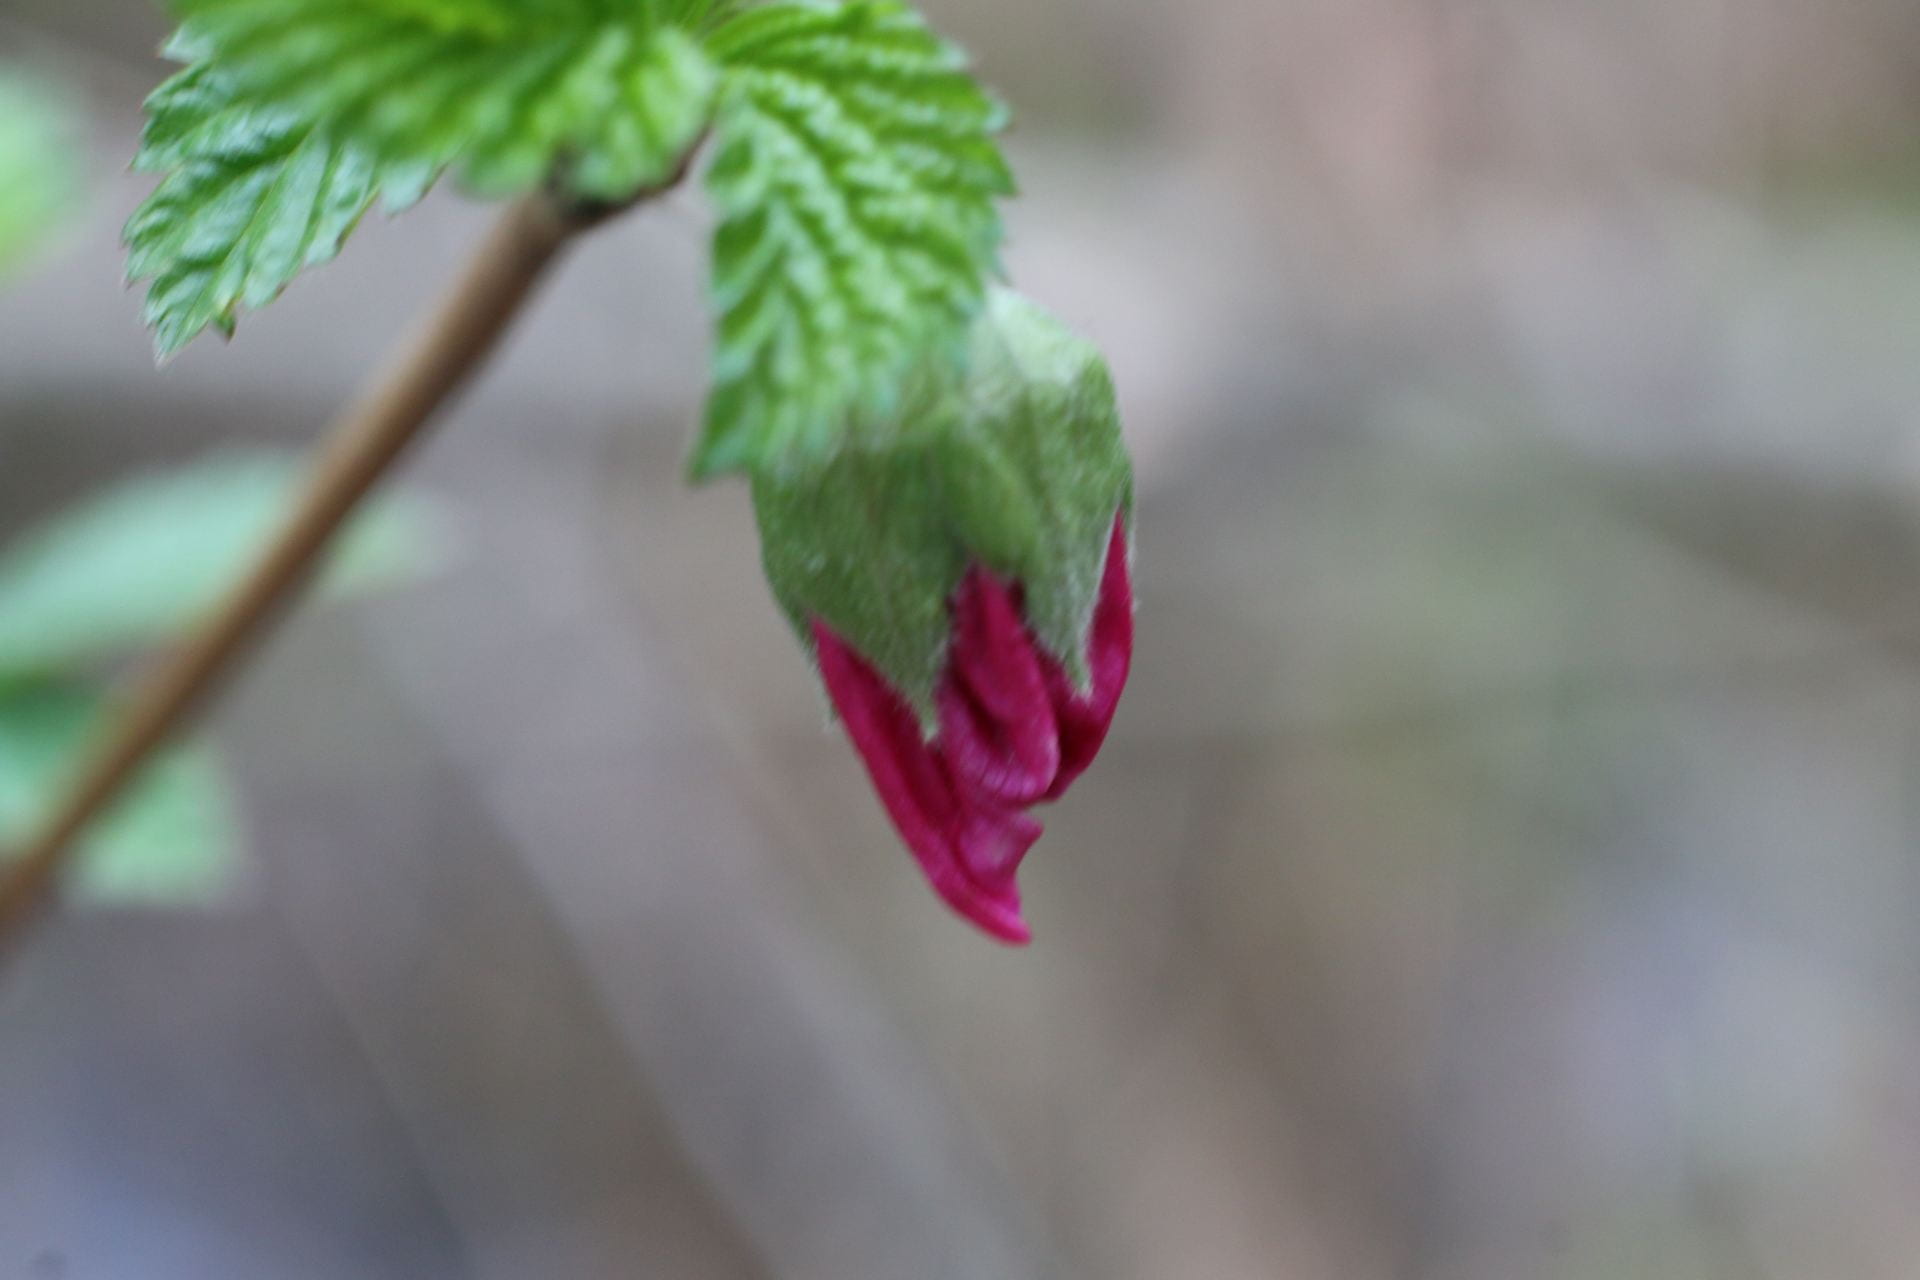
I went on a walk with my mentor and took some photos for my forest-themed collection. I was able to capture a lot of the new spring leaves and flowers! I also tried to take pictures of a live subject (a fly) for the first time, but it was too difficult because my subject could probably sense that I was trying to capture it so it kept flying away. Here are some of the photos: 

  • Concepts 

How to Have a Beautiful Mind stresses the relevance that concepts have on our thinking. On page 121, the author Edward de Bono compares concepts to “parents that breed children” and “road junctions that open up several other roads.” When learning new information, it is important to understand the essence or concept behind the narrative. From a concept, ideas are generated, followed by the importance or usefulness of these ideas. Naturally, the average person doesn’t really think to assign or develop concepts to various topics. For that reason, this practice will become a lot easier once the act of spotting concepts is learnt. According to How to Have a Beautiful Mind, one of the key components of concepts is that they “always seem rather vague” [pg. 112]. This is because a concept must travel through the path  (concept to ideas to uses) I mentioned above to be applied. Although most concepts are vague, concepts can range from broad to narrow. In terms of usefulness, look for concepts that are in the middle of the spectrum. 

List some examples of concepts in your most recent sessions with your mentor.

  • Art: photography falls under the broad field of art 
  • Style: how people artistically portray their subject, style, or vision. When creating collections and doing photography in general, developing a personal style is quite important. 
  • Nature: macro photography, which is the specific form of photography that I’m focusing on, often finds its subject matter in nature
  • Subject: what each photo is depicting. 
  • Story: about what each photo has to tell its audience 
  • Interest: what kinds of photos are more likely to garner attention and admiration?

  • Alternatives 

When it comes to learning something new, what most people typically value or look for is growth and development. Growth is a sign of progression and experience. None of these things can occur without some form of movement or fluidity. How can anything be accomplished without some kind of mental or physical movement? Letting go of rigidity is the best way to accomplish this. How can one do this? Through alternatives. Similar to compromise, finding alternatives requires open-mindedness. Just because you’re used to one way of doing something doesn’t mean that other ways or alternatives aren’t just as good (or even better). In How to Have a Beautiful Mind, three main types of alternatives are highlighted: “alternative perceptions or ways of looking at something…alternative sets of values determined by experience, culture and personality…alternatives of action” [pg. 136].  

What alternatives have your mentor offered you throughout this project? What alternatives may another mentor have offered you? Discuss in detail.

Alternatives my mentor’s offered me: 

  • Tripods: when I’m taking photos outdoors and don’t have as much control over the height of my environment, it can be quite tricky to photograph subjects that are drastically above or below my eye level. This is because I have to hold the camera in very awkward positions, so my hands shake quite a bit when I’m taking the photos and as a result, there’s a higher chance of the photos turning out blurry. As an alternative to trying to take photos using myself alone, my mentor has provided a tripod so I don’t have to worry about shaky hands.  
  • Different locations for photography: When we started our sessions, my mentor and I would often look for places to take practice photos. These locations usually had to be outside, as you might recall from earlier posts that indoor lighting is often trickier to work with. I would often suggest one park, and my mentor would come up with a wealth of alternative places to go. This left me with a lot of diversity in locations and I was able to learn to work with many environments. 

Alternatives another mentor might have offered me: 

  • Opinion on style: Each photographer has an individual opinion on what themes are better than others. My mentor prefers more of a natural theme for his photos. With a different mentor, I might learn to appreciate the beauty of different settings. 
  • Photography approach: A different mentor might have alternative angles or positions to take photographs in that could benefit my ability to hold my camera still. 


Also, give us a brief description of your learning centre. How are you going to present your learning during these past few months? What aspects are you going to focus on, knowing that you cannot share everything you have learned? What do you hope the audience will learn from your experiences? What are you going to need to do to make this learning centre interactive?

For my learning center, I’m thinking of creating a mini art gallery where I can display my favourite photos from my three collections. Each collection would have a different section in my learning center, and there would also be descriptions of each collection and the inspiration/story behind them. As mentioned, I’m going to focus on the theme-building and storytelling aspect of photography, since I feel that that part is often overlooked compared to the more technical aspects. To make my learning center interactive, I might bring in little subjects (dried leaves, rocks, interesting pieces of fabric, etc) that my audience can use to put together little compositions for “photographs.” The key takeaway from my learning center is that everything has a story to tell, whether it be the tallest tree or the tiniest ant.

In-Depth Post #3: How to Have a Beautiful Mind

These past two sessions have focused on preparing me for my three photo collections. Here’s my progress report:

Monday, February 1:

During this session, my mentor and I focused on experimenting with the impact that different colours of light had on the quality and mood of images. We did this by taking several different photographs of a shell, each under a different color of light. Here are the photos: 

Something else my mentor taught me about the relationship between colour and photographs was the concept of dominant and receding colors. In photography, the dominant colors are the warm colors, e.g. red, yellow, and orange. These colors are considered dominant because they reach our eyes before the cooler colors. The cooler colors are the receding colors, e.g. blue, green and purple.

The warm colors are dominant because they demand your attention first, leaving the receding colors to fade into the background more.

Saturday, February 6:

After the session where we experimented with colour, my mentor left me alone to take photos over the next week for us to look at during the next session. Here is a list of everything that I learned while taking photos on my own over the week:

  • The photos that worked all had good composition (the way that objects are placed in a photograph)
  • A lot of my photos captured household objects indoors at dusk, so I had to rely on artificial light. This was harder to work with than natural light. Therefore, photography works better in daylight
  • For portraits/close-up pictures of faces, make sure the camera’s focus is on the subject’s eyes since this will convey the emotion and tell the best story.
  • In general, focus on what’s most important, and don’t be afraid to let the background blur out.

Here are a few of the photos I took:


How to Have a Beautiful Mind Questions:

  • How to be interesting:

After learning how to compensate for any conflict that might occur during our mentorship, for this post, we will focus on maintaining engaging conversations. The key way to be interesting is to be humble. While one’s accomplishments or cleverness might be somewhat interesting, consistently bragging about everything you’ve done is not. To keep both parties in a conversation engaged and interested, the entire conversation should not be self-centered. There are many ways in which one can make a conversation more interesting, a good example being the sharing of interesting facts or funny stories. But if one doesn’t have heaps of facts or stories memorized, one of the best ways of keeping interest in a conversation would be to use “what if” statements. 

Incorporating “what if” statements into a conversation is a surefire way to explore possible ideas, and to see if those ideas are possible. The session where my mentor and I explored photography under different wavelengths of light started with a “what if” statement. In our case, the “what if” statement was “what if we used different colours of light to take the same photo?” This ended up opening an excellent conversation surrounding how different light conveys different moods and also manipulates the camera’s ability to focus in different ways.  

Another aspect of being interesting is exploring, elaborating, and pulling interest out of the subject. If one finds something that is being discussed to be interesting, they should try to explore the topic further, elaborate on the reasons for which they find the topic interesting, and try to pull more interest out of the topic. In my case, when my mentor and I discussed the different themes I wanted to use for my collections, I had to talk about the specific subjects I wanted to photograph (things in the forest, nature in urban areas, etc), as well as why I might find them interesting (mood, passion for nature, the stories that could be conveyed through different camera angles). This brainstorm is helping me with the design process for my photo collections. 

Finally, to be more interesting, find and make connections that link matters together and generate interest. When connections are made between two separate interesting topics, then there is room to learn more about the topic and delve deeper into understanding and learning. When my mentor and I investigated the use of different colours of light in photographs, we were able to draw a connection between colours and moods (blue light = lower, calm, sad). 


  • How to respond: 

In delving deeper into the aspects of a successful conversation, one must first know how to reply or respond to information that’s being put out. There are many different ways that one could respond in a conversation, but the aspects that I’ll be focusing on today include clarification, support, sharing, and modifying. 

One of the main goals for TALONS this year is to improve our communication. While there are many aspects to good communication, one of such is clarification. To be able to understand what is being communicated to you, you must always clarify your understanding before allowing for the conversation to continue. So far, I’ve never been too confused with any of my mentor’s advice or teachings at any point, but if I didn’t understand something right away, I might double-check my understanding with him. 

Support includes not only agreeing with the person you’re talking to but also putting forth an opinion that strengthens the other person’s claim, proposition, or stance. How to Have a Beautiful Mind goes into more depth. “You may support a proposition from your own experience…you may support a proposition from your feelings or emotions…you may support a proposition from a shared set of values or moral principles…you may offer support from facts, figures, and statistics which you happen to know…you may offer stories, examples, anecdotes all of which support the proposition that’s been put forward.” [pg 56]. When I was talking to my mentor about the various themes for my three collections, he mentioned how he liked taking photos in nature, and I said “I agree with you since I find that there’s a lot more to capture while in nature.‘

In the “support” section of this post, I mentioned that the book said one way in which one could agree could be through stories, examples, or anecdotes, and this section will delve deeper into that. Stories, unlike statistics, cannot disprove a statement, but they can slightly alter a statement. The book gives an example that “the generalization that ‘all teenagers are lazy’ can be reduced to ‘some teenagers are lazy’” through an anecdote [pg 58]. To put it more simply, stories “[do not] prove anything but [illustrate] a possibility.” [pg 58] So far, I haven’t really told my mentor any stories/anecdotes in response to his opinions, but it is a useful strategy that I might implement in the future. 

Finally, someone who doesn’t completely agree with a statement being put forth does have the option to modify that statement. This can include reducing a sweeping generalization into a less absolute statement. Again, I haven’t been in a situation where I’ve had to use this particular strategy, but a scenario in which I might be able to would be if my mentor suggested that make all of my photos black and white since it would create moodier photos. My modification would be suggesting to play with different lighting to make the photos moodier or to experiment with making one of the three collections in black and white.

In-Depth Blog Post #2: How to Agree, Disagree, and Differ

As of tonight, I’ve officially had three meetings with my mentor, and have made significant process in learning more about photography techniques, different camera settings, and also the general feeling and requirements for photographing in nature.  In the next few paragraphs, I will detail everything I’ve learned, as well as my own personal opinions on this project so far. 

January 10:

This was my first meeting with my mentor. The topic of this meeting was mostly surrounding basic functions of a camera, including what some camera settings were, and situations in which different settings might be used. Here are the settings that I was introduced to:

  • Shutter speed

Shutter speed is the length of time in which the film/digital center within the camera is exposed to light, as well as when the camera’s shutter is open whenever a photographer takes their photograph. The reason that shutter speed exists is, as the name would suggest, due to the camera’s shutter: a curtain of sorts in front of the camera sensor that will stay closed until someone takes a picture and the camera fires. In simpler terms, shutter speed is the length of time a camera spends taking a photo. 

There are two factors that shutter speed is responsible for controlling: changing the photograph’s brightness and creating interesting effects by either freezing action or blurring motion. Long shutter speed will result in the camera gathering a lot of light and therefore a bright photograph, and a short shutter speed will have the opposite effect. In addition, quicker shutter speeds are used for freezing the motion of the photo’s subject, whereas longer shutter speeds might be utilized for intentionally capturing movement in the subject. 

  • Aperture 

Aperture is the opening of the camera lens through which light is able to pass through in order to enter the camera. It is easier to comprehend aperture if you think about how your pupils work: when you move through light or dark environments, your pupils will enlarge or shrink to accommodate for the amount of light they are exposed to. 

The photography factor that aperture is responsible for controlling is the depth of field for any given photograph. Depth of field can be defined as the sharpness of a photograph from front to back. A thin or shallow depth of field would be describing an image in which the subject is the only part of the photo in focus, while the background is completely blurred and out of focus. A deep depth of field explores photographs in which every aspect of the photograph (foreground and background) are sharp. 

In addition, aperture can also control the exposure in a photograph. When the aperture is adjusted, the amount of light that is able to reach the camera sensor is hence controlled in one way or another, which will adjust the brightness/exposure of the photograph. A large aperture will result in a brighter photograph, while a smaller aperture would result in a much darker photograph. 

  • ISO (Sensitivity)

Finally, the sensitivity or ISO is a camera setting that darkens or brightens an image – a higher ISO setting will result in a brighter image. ISO is also used to take photos in darker environments, and to give more freedom into controlling the aperture and shutter speed of your camera. With that being said, setting ISO to a higher level would result in a lot of noise or grain that could interfere with the clarity of a photograph. 

Once I learned more about the three main components of photography, my mentor put my knowledge to the test by flipping through a magazine with me and then asking me to comment on the degree in which the photographer might’ve set their shutter speed, aperture, and/or ISO. Overall, seeing the photography settings used on print helped contribute to my understanding of the different roles the settings play in photography. It also promoted identification on where certain settings would be more applicable for stylistic purposes (for example, a lot of photos have a high ISO for a stylized amount of grain rather than just on accident). 

January 16:

This session mostly involved applying and further investigating the three main components of a good photograph (shutter speed, aperture, and ISO) through taking several different photos using different settings of specifically shutter speed.  Through this, I found that I had a better understanding of how some shutter speeds could work better for still photographs that have more of a technical/informative aspect to them, whereas others help create a more poetic or artistic image. All of the photographs below depict a round crystal.  

Below are the four photographs that I took, and their corresponding camera settings:

Shutter Speed 1/125, Aperture 5.6, ISO 400

Shutter Speed 1/80, Aperture 4.5, ISO 400

Shutter Speed 1/100, Aperture 5.0, ISO 400

Shutter Speed 1/100, Aperture 5.0, ISO 400

January 23:

Finally, I’d had enough practice with taking photographs at home that I was able to take a few practice photos out in the field. I started off my practice collection by strolling through Inspiration Garden at Lafarge Lake and taking photos whenever I saw something that seemed unique or intriguing. For this session, my mentor wanted me to specifically focus on the story or mood I was conveying through my images, in addition to how different camera angles will result in a completely different image. Below, I will include a few of my favourite images from this session. 


How to Have a Beautiful Mind Questions: 

  • How to Agree

A lot of what the chapters from this post’s topic focus on finding the right amount of balance between being compliant and argumentative. One extreme or the other would incite feelings of irritation, anger, and even hurt, and certainly won’t make it easy for others to talk with you. If you only provide arguments and problems to everything that someone is talking to you about, then communicating with you will become quite difficult. On the other hand, completely agreeing with every single opinion that someone has will make the relationship very one-sided and unpleasant as well. 

For the How to Agree section of How to Have a Beautiful Mind, the main points the author states about agreeing more often include actively trying to find places where you agree with what another person is saying, figuring out where they’re coming from, and acknowledging the value of the person’s individual beliefs, experiences, and knowledge. For the three mentoring sessions I attended, I found lots of places to agree with my mentor. I always acknowledged their expertise and experience in the field, and even if I found a particular tip strange or hard to understand, I would try it out before openly disagreeing or turning the suggestion down. 

  • How to Disagree

Learning how to voice a different opinion or how to argue with someone is not only a skill that should be learned for this year’s In-Depth, but a skill that can and will apply to real life situations. Knowing how to state your points and advocate for what you need without being overtly hurtful to the other person is something that will help many people throughout their whole life. 

Some of How to Have a Beautiful Mind’s points and tips on how to disagree include not disagreeing just to pick out a problem or boost your ego, point out and mentally note any biases, stereotypes, or prejudices that either you or the person you’re disagreeing with might be using, and lastly to note the difference between outright disagreeing and having a different opinion with someone. In my case, for the third meeting with my mentor, we eventually decided on going to Inspiration Garden to take photos. I started to disagree before we left for Inspiration Garden, since I wanted to go to a more forested park, but my mentor used logic to point out that it was getting dark, and the more open space that Inspiration Garden might provide would promote better photographs. I saw my mentor’s point, and ended up having quite a successful first photography session. 

  • How to Differ

Finally, differing refers to two or more people having different opinions. There are scenarios where only one of the differing opinions is the correct one, and situations in which both opinions are equally correct. Differences can arise from a different base road or personal experience, or simply from forming individual preferences or personalities. When differences arise, it’s best to determine the nature of the nature presented by comparing and contrasting the different opinions, exploring the difference, and reconciling the difference. 

Returning to my previous example, when my mentor and I had a differing opinion on the location for my first photography session, the two sides likely stemmed from personal preferences and/or experiences. My mentor had more experience, so it seemed logical for them to pick an easier location for a beginner, and my difference was simply based on a preference, as well as the fact that I thought we wouldn’t be able to find anything too unique to photograph in Inspiration Garden since it is currently winter. Once both opinions were symbolically laid out through a discussion, I was able to see the logic that my mentor was presenting, and ended up agreeing with their opinion and complied to having the photo session at Inspiration Garden.

In-Depth Presentation

Hi everyone!  I’m Brianna and welcome to my in-depth presentation!  Although my final presentation isn’t quite what I thought it would turn out to be, I’m still proud of how far I’ve come since I started this project in January 🙂    

For those of you who are new here, let me give you a quick recap.  For my first in-depth project with the TALONS program, I’ve chosen to learn aerial hoop, a dance apparatus similar to trapeze.  When I chose my project, I’d done other kinds of circus in the past but I never tried aerial hoop as it was never offered with the class that I was previously taking.  Aerial hoop is also a more difficult apparatus than trapeze or aerial silks, so I was always a little scared of trying it.  Now that I’ve done aerial hoop, it’s become one of my favourite apparatuses!  

I met with my mentor Kimmie weekly to learn different poses on the aerial hoop, in order to complete my final goal of mastering 10-15 different poses that I would then use to choreograph a routine.  Unfortunately, due to restrictions that came with social distancing, my meetings with Kimmie were cut short and I couldn’t film my final routine.  However, I was able to learn quite a few poses during the time that I had access to an aerial hoop through my mentorship meetings.  


A description of all the poses I learned:  

  • Pike Through / Pop Onto Sit: This pose is used to mount the hoop.  You grab onto the hoop with your hands, then swing your legs up and in between your arms into a pike position.  When you are ready to mount the hoop, you hook onto the base of the hoop with your knees and sit up onto the hoop.  
  • Mermaid: This is the first pose I learned on the aerial hoop.  This pose is also featured in a lot of my progress videos.  During this pose, you hold onto the hoop with one arm, then lean out until you are in a horizontal position with your legs together and your other arm reaching in the opposite direction.  
  • Man in the Moon: Another basic pose, Man in the Moon involves sitting sideways on the hoop with your legs pressing against the opposite end of the hoop and your arms helping you balance on either side. 
  • Arm Chair: Facing the hoop, you hold onto the top of the hoop with your arms and hold your legs in a pike position at the base of the hoop.  Then, you have to push your feet against the hoop until your legs are straight.  
  • Split Step: From arm chair, let go of one leg to form a split.  
  • Tree Branch: You lean onto one side of the hoop, holding on by one arm and letting your legs dangle.  
  • Amazon: This pose is similar to Tree Branch, except you face the other side of the hoop when you hang instead of the front.  
  • Front Balance: You balance on the hoop with your waist, spreading your arms out and keeping your legs together to hold your balance.  
  • Reverse Angel: This pose is like Mermaid, with the only difference being that you face downwards rather than sideways.  
  • Running Man: I wasn’t able to master this pose completely, but it involves wrapping each leg around the two sides of the hoop and holding on with your hands as well.  You face sideways with this pose.  
  • Birds Nest: For this pose, you hook each leg around their corresponding spots on  the hoop (as in Running Man), except you face forwards, hold onto the hoop with your hands apart from each other, stick out your chest, and look out so you are bending your back.  
  • Back Balance: We only just started working on this pose before we were forced to stop meeting in person, but my understanding is that you lay back onto the hoop so you are looking at the ceiling, push one leg against the hoop, and balance on the small of your back.  


Progress Videos:

To document my learning, I regularly recorded progress videos of myself on the hoop.  Here is a small collection of them:  

January 26 (the first progress video I recorded)

February 16 

March 15 


A brief presentation about aerial hoop and taking aerial hoop classes:

Aerial Hoop Presentation

In-Depth Post #6

Hi everyone!  Since my last post, I had my interview with Kimmie, and will post it below.  Besides the interview, I’ve continued to attend aerial conditioning and flexibility classes and have started to prepare for my final presentation!  The online classes I’ve been taking are a great help for me, as they allow me to exercise the same muscles that I use for aerial hoop, and some of the flexibility classes have focused on areas where my flexibility could’ve been improved such as my back and feet (I have naturally flat feet so it’s hard for me to point them).  The classes also require very little equipment, and the equipment that we do use (yoga blocks, yoga strap, etc) I already have at home.  The only problem that I encountered with the online classes was that I had to do them in my brother’s bedroom as my own bedroom is quite small and narrow (when we had to do a straddle split, for example, I couldn’t open my legs all the way).   

For In-Depth night on May 25th, I plan to present 3-5 of my progress videos to see how my skills have advanced over the past few months of my in-depth project, and also make a poster/presentation about circus and talk about taking circus lessons or pursuing a career in performing or teaching.   


Interview Q & A 

Why did you choose circus?  What’s your favourite circus apparatus? 

I wanted to find a fun activity to do that was fitness related, and I thought that circus was more creative, fun, and interesting than other forms of exercise class.  When I started out with circus, aerial hoop was my favourite apparatus, but presently my favourite apparatus would be either aerial silks or contortion.   

Do you prefer teaching or performing? 

I honestly love both!  With teaching circus classes, you’re more involved and it’s cool to share your knowledge with other people and watch their skills grow.  With performing, the fun is in the moment and the adrenaline rush that comes with sharing your talents in front of an audience.   

What are the best parts about a career in circus?   

The flexibility of a career in circus is the best part for me.  You could choose to be a performer, teacher, or both, and you can take your career into almost any direction you want to. Your career could focus more on the artistic, musical, performance aspects of circus, or you could take your career into a more athletic direction that focuses on training and teaching other people.   

What are the more challenging parts about a career in circus?   

The main challenge I encountered when I was starting out is that circus isn’t very mainstream.  While it is very cool to be part of something unique, it’s not very easy to find a job as there aren’t too many circus schools in the lower mainland and there aren’t really any official certifications you can get for circus like in similar sports like gymnastics.   

How do you usually go about teaching group lessons?   

When I’m teaching group lessons, I normally start up with a quick warmup and then conditioning since everyone is usually more able to do conditioning at the beginning of class.  After conditioning, I teach everyone a few new tricks and at the end of class we work on sequencing (routine-building). 

Did you have any prior volunteering or teaching experience before you started circus? 

I did a lot of horseback riding when I grew up, so I volunteered at the stables a lot.   

What is your advice for when someone isn’t getting a particular trick? What do you do to encourage a student that’s struggling to learn something?  

Practice, practice, practice!  The repetition is very good for your body to get it to understand the position required for a certain trick – you can’t just try to do the trick once and then give up because you didn’t get it right away!  However, it’s still important not to push yourself too hard if you’re tired and take breaks in between trying to learn those tricks.  Something else to try would be filming yourself doing the trick so you can see where you’re going wrong.  When a student is struggling, I remind them that circus isn’t easy, and then break the trick down into little steps so they won’t feel discouraged that they didn’t get the whole trick all in one go.  If flexibility or a lack of strength are preventing the student from getting the trick, I’ll take them aside and work on conditioning or stretching again for a while or allow them to have a break to regain some strength.   

What do you do when someone is scared of a certain trick or apparatus?   

I usually bring the apparatus lower to the ground for the student to practice until they’re comfortable with that height, then slowly raise the height as they grow more comfortable.  To let the student know that they’re safe, I spot them and be encouraging and supportive.   

How do you deal with stage fright when performing?  

When I just started performing, I was always very scared and nervous and would practice my routine repeatedly before the performance until I felt comfortable.  I would be so nervous that sometimes I wouldn’t even remember what happened during the performance!  Nowadays, I still practice a lot but work more on building stamina, so I won’t look exhausted while performing. 

When performing, can you create your own routine or do people create routines for you?   

Both!  When I can pick my routine, I think about the theme for the performance if there is one, then decide on my music and formulate my routine around that.  If my song is more fast-paced, I’ll usually involve a lot of spinning in my routine, and if it’s slower, I’ll use threading a bit more and make sure all the tricks I show transition together seamlessly.  I usually tend to pick tricks that I’m more comfortable with but are still impressive enough for an audience and avoid new tricks that I haven’t completely mastered yet.  I do enjoy the creativity that comes with choreographing my own routine, but it’s also nice to see what other people come up for me.   

What do you do if you mess up during a routine? 

The main idea is to stay calm.  If you couldn’t grab onto your apparatus at one point, for example, add an extra hand flourish to make it seem like you did that on purpose.  Try your best not to look shocked, and if you forget part of your routine, the best that you can do is to continue through the rest of your routine rather than try to start again from the top.   

In-Depth Post #5

From my last blog post, I’ve tried to maximize the continuation of my learning at home.  I have been continuing to stretch and exercise daily, and have signed myself up for some additional aerial conditioning and flexibility classes. Also, Kimmie and I have scheduled an upcoming online meeting where I can ask her questions about her career and why she chose to focus on aerial hoop.  I still don’t have too much that I can talk about, but I will probably provide an additional update to this post once I’ve had my online meeting.  

For my at-home exercises, I’ve been focusing on building up flexibility in my back and splits, and have been working on strengthening my back muscles, abs, and hamstrings. 

Here are the final two parts of the video I uploaded for my fourth blog post:

Post #5 Questions

  1. What kinds of learning opportunities does the mentor provide to expose you to new learning?

When we were still having lessons, Kimmie made sure to move towards my goal of learning 15 different poses at a reasonable pace, while also giving me time to expand on skills surrounding pre-existing poses.  During some of our meetings, we would advance onto new poses, but during others we would work on my style, flexibility, and ability to form a routine from some poses that I knew.  

  1. What kinds of learning opportunities exist to reinforce new learning?

As of now, Kimmie and I haven’t been in contact with each other as much due to quarantine.  However, we have scheduled an online meeting for this Sunday (April 19), where I can update Kimmie on how I’ve been working around not having access to a circus gym.  Our meeting will also serve as a time for me to ask Kimmie more questions on how she discovered aerial hoop and why she chose to teach circus classes.  

  1. What kinds of opportunities exist that might accelerate learning?

Separate from my meetings with Kimmie, I’ve also signed myself up for an online aerial conditioning class and a flexibility/stretching class.  This will help me stay limber and exercise the muscles that I would normally use for aerial hoop. In addition to keeping up my skills, these classes are also a fun way to exercise during quarantine and have taught me many new stretches and exercises that I can use to build an at-home workout.  

  1. When you get together what do you talk about?

There are a handful of topics Kimmie and I discuss when we have a meeting.  We discuss ways to improve on existing skills, and techniques, stretches, and exercises that can be done both on and off the hoop that would allow me to do so.  We also discuss routine-building, and how to fluidly transition between two drastically different poses. During my online meeting with Kimmie, I plan to ask her more about professional jobs that involve circus (performers, instructors).  

  1. What is going particularly well in your mentoring relationship right now?

Prior to this blog entry, I was feeling a little lost with how to continue working on in-depth without Kimmie.  But I will now have a chance to speak with her, so I feel that I can continue a slightly adapted version of my in-depth project.  Additionally, as I’ve mentioned before, Kimmie and I have maintained a good, friendly relationship and she has been very kind and patient towards me throughout this project.  

  1. What are you learning about one another?

I have learned a lot about Kimmie throughout the mentoring process.  For one, I’ve noticed that she seems to have a good eye for detail and has the ability to perfect a pose that I’m doing by pointing out minor mistakes in my form.  I’ve also learned that Kimmie is quite a dog person, as she owns two dogs that she brings to the gym (the dogs are familiar with the other instructors, and seem to enjoy watching everyone or playing tug-of-war with people training at the gym). 

In-Depth Post #4

Unfortunately, I don’t have too much to update everyone on because of recent events.  I haven’t been able to directly practice aerial hoop, or be in contact with my mentor, since March 15.  However, I have been able to learn quite a few new poses and variations of poses since my last blog post.  For our latest few meetings, Kimmie and I have been working on improving my grace and form for pre-existing poses, as well as a few new poses such as Running Man (hanging from the hoop in an upside down V shape and hooking your ankles around the sides) and Half Angel (a variation form Mermaid where you hold onto the hoop with one arm and let one leg down to cross in front of the leg holding onto the hoop).  

In my last meeting with Kimmie, we worked more on routine building.  At the beginning of the lesson, we established a mini-routine of 5-6 different poses and Kimmie had me go through the routine without any pointers, which we did film at the beginning of class.  Then, we refined my movements throughout the routine by making transitions more graceful, filming another version of the routine in the middle of the lesson and a final one at the end. Although the last two versions of the routine do look a bit sloppier, this was because I got a bit tired by the end.  Despite this, I did finish the meeting with better form and grace than I had at the start.  After working on the mini-routine, Kimmie showed me additional ways to stretch my back, which would be important for some of the poses I’ve been learning.  

Presently, I’ve been continuing to work on the exercises and stretches I’ve learned, and reviewing my previous progress videos to see what I should work on once I can get back to the circus gym.


For this post, I’ll upload the first part of the three progress videos I filmed on March 15, but add the next two with my fifth blog post since I won’t be able to film any more as of now.     

Post #4 Questions:

  1. What has been my most difficult mentoring challenge so far? Why?

As of now, my meetings with Kimmie had been going very well.  Our communication was good, and I was progressing towards my goal of learning 15 poses fairly quickly.  The most recent mentoring challenge that has arisen has been keeping in contact with my mentor through social isolation due to COVID-19.  Because of the recent pandemic, we haven’t been able to meet in person, and we’ve had to postpone our private lessons. Due to the nature of aerial hoop, there is currently no way for me to officially practice what we were working on at home. 

  1. What is working well? Why?

As mentioned in previous blog posts, Kimmie and I have maintained a very nice relationship, and get along well together.  Kimmie is very good at coming up with ways to demonstrate or explain poses or tricks that I might be having trouble understanding (to help perfect my mount onto the hoop, for example, Kimmie piled up mats behind me and taught me to lean back onto the mats before mounting the hoop, which helped me understand the proper motion to climb onto the hoop).  In addition, Kimmie has been very religious with showing me exercises and stretches that I can do at home, which has helped me find some kind of way to work on in-depth without our meetings.  

  1. What could be working better? How can you make sure this happens?

The only aspect to my mentorship that could be working better as of now would probably be maintaining communication through quarantine.  As of now, I have been working on some of the stretches and exercises that Kimmie has taught me, but there’s obviously still no way for me to directly practice what I’ve been learning on aerial hoop. To make sure that our communication is maintained, I could contact my mentor and ask her if there is anything else that I could work on at home.  

In-Depth Post #3

As of today, I’ve had four meetings with Kimmie and have been able to make more progress towards my goal of learning 15 different poses!  In the first two sessions, we focused more on laying a basic foundation so I could work on a few poses at the same time.  For my third and fourth mentoring sessions, we continued building on the poses I learned in the beginning, focusing more on my technique than actually executing the pose properly.  For example, I often forget to point my right foot during routines, so we’ve been working on improving my grace in that area.  In addition to this, Kimmie teaches me a few new exercises I can work on at home that will improve my coordination, strength, and flexibility.  We’ve also been working on warm-up exercises I can do on the hoop, such as shoulder shrugs (hanging from the hoop without feet touching the ground and shrugging your shoulders so you lift yourself up and down), and front balance (I believe that I talked about this in my last post, but it’s basically just balancing on the hoop with your stomach).


I’ve also learned several new poses and variations to poses that I’ve learned previously.  For example, Mermaid has a variation where you cross one leg over instead of keeping both legs together.  Since it’s a little hard to describe the poses I’ve learned, I’ve included two new progress videos where I’ll list each pose in order:


Progress Video 2 (February 9):

This video includes Mermaid (single leg variation), Tree Branch, Arm Chair into Split-Step, Man-in-the-Moon, and Amazon.


Progress Video 3 (February 16):

This video includes Mermaid, Arm Chair (with a knee-cross variation), Tree Branch, Man-in-the-Moon into Amazon, and Reverse Angel into Running Man.


Post #3 Questions:

1) What went particularly well during your mentoring sessions?

Overall, Kimmie (my mentor) is a kind, approachable mentor that encourages my growth in a positive manner.  No matter how tired I might be, Kimmie is always patient with me and is willing to let me take breaks to get water if needed.  At the same time, she encourages me to do my best and makes it easy for me to put all my effort in. If I’m having trouble with a particular pose or trick, Kimmie will say something like “You got this!” or “You can do this!” to help me push through.  If a pose needs correcting, Kimmie will give constructive criticism and pointers in a gentle manner that allows me to improve and fix whatever I’d been doing incorrectly. During a mentoring session, I feel comfortable enough to be able to ask for help when I need it (which, me being shy, is quite a big deal), and always feel welcomed by both Kimmie as well as the circus school where I attend my lessons.  


2) What logical challenges affected your communication?  What factors affected your ability to interact effectively?

Most of the time, the communication between Kimmie and I tends to be quite smooth – Kimmie gives clear advice and instructions and if I don’t understand something I usually ask for clarification.  However, due to other classes going on in the background, the circus school we meet at can become quite noisy and it can be hard to hear what Kimmie is saying. It can also become quite hard for my mentor and I to communicate if I am on the hoop.  


3) What three strategies could improve the quality of your mentoring interactions?

  1. I could spend more time asking about Kimmie’s career as a circus instructor/performer. Due to the nature of our mentoring sessions, we tend to focus more on learning new tricks or poses, but we don’t often have time to talk outside of this.  
  2. We could talk more about how to execute poses while I’m not on the hoop.  This would allow me to absorb more information.  
  3. I will continue to ask for clarification if I don’t understand something. 

In-Depth Post #2

I’ve begun the first stages of my aerial hoop lessons, and met with my mentor Kimmie for the first time on January 19th.  Prior to meeting with my mentor, I was quite nervous since I didn’t really know what to expect, but was pleasantly surprised with how well it went!  We met at the circus school where my mentor teaches, and started by introducing ourselves and going over paperwork. Then, Kimmie led me through a basic warm-up where she taught me some exercises that stretched out the muscles I would use the most on the aerial hoop and help me warm up and ease into the lesson.  Then, we moved onto the hoop and my mentor demonstrated two different ways to get up onto the hoop (through pike and through straddle). After I learned how to mount the hoop, we went over two basic poses: Mermaid and Man-on-the-Moon. Both of these poses were ones I’d learned on the trapeze, but I quickly discovered were vastly different on aerial hoop – the hoop was much harder to hang onto, and easier to slip off of!  


Once I felt decently confident with my first two poses, we moved onto other poses such as Push-Out Split (holding onto the top of the hoop with both hands, then using one foot to push the hoop until you’re leaning into it with straight legs and lifting the other leg into a split), and Tree Branch into Cradle (leaning into one side of the hoop and letting one arm and your legs dangle).  Kimmie also taught me exercises on the hoop to strengthen my lower back muscles for a pose called Front Balance, which is when you balance on the bottom of the hoop using your stomach without support from your arms or legs. 


We finished off our first meeting by conditioning and stretching, and I went home.  It didn’t take long for me to discover all the bruises I’d sustained from aerial hoop, not to mention the fact that my hands were torn and blistering since I’d lost all of my callouses from previous circus lessons!  My hands stung so much that I could hardly use them for the rest of the day, but luckily they got better a few days after the first lesson 🙂 


My right hand after aerial hoop


Kimmie and I met for the second time on January 26th, and we followed the same schedule as our first meeting: warm-up, working on hoop poses, then conditioning and stretching.  I found that everything was much easier for my second lesson – the blisters and sores from my first meeting had strengthened my hands so I had more endurance when I was on the hoop.  Another thing that we did during our second lesson was film a progress video – I used five of the poses that I’d learned, and we choreographed a mini routine! I’ve included it below and my form (and hair) is quite messy, but I know that it was only my first time filming a progress video and I’ll improve more throughout our lessons.  The poses in the routine in order are Mermaid, Push-Out Split, Tree Branch into Cradle, and Amazon.  


(PS: There was a flying trapeze class in the background, so there’s probably a lot of shouting from that. Sorry!)


Mentorship Questions

1) How did your mentor gain their experience/ expertise?

After graduating from UBC with a degree in engineering, Kimmie started her journey with circus at the age of 23, with aerial hoop being her first discipline.  Interestingly enough, Kimmie trained at Vancouver Circus School, which is where I also started taking circus lessons. At Vancouver Circus School, Kimmie was a part of the Ring Masters program – a professional program that prepares passionate students for a career in circus arts.  Kimmie is currently a certified artistic gymnastics instructor, and specializes in aerial hoop, aerial silks, and contortion.  


2) What were those experiences like for your mentor?

Ever since meeting her for the first time, it was clear that Kimmie has a deep passion for circus arts.  Kimmie believes that circus is a great way to get exercise and improve strength, balance, flexibility, and coordination in a non-competitive environment that encourages your skill development.  Kimmie also said that circus helped her overcome her fears and become more confident in her abilities.   


3) What wisdom have you gained from your mentor so far?

  1. Always condition and stretch after a training session.  During our first meeting, Kimmie showed me how to stretch and “warm down” so that I wouldn’t injure my muscles.  I can honestly say that this has greatly helped me – previous classes would never leave time to stretch, so I always felt quite stiff and sore afterwards, but Kimmie has shown me how to reduce DOMS (Delayed Onset Muscle Soreness) and relax my body after a lesson.  Kimmie has also taught me that it’s okay to take breaks and return to a resting position on the hoop in between poses so I don’t exert myself when I’m learning something new. 
  2. 2. The second thing that Kimmie taught me during our first meeting was that everything – your endurance, strength and flexibility – usually gets better the second time around.  Kimmie was right too – during our second meeting I found that mounting the hoop and executing poses that I’d learned from the first lesson had become much easier than before!  “Sometimes,” Kimmie said, “letting things percolate a bit really helps.”


4) What have you learned so far, in terms of facilitation strategies, that might contribute to your own development as a mentor?

The facilitation strategy that I noticed most from Kimmie was her patience.  No matter how long it took me to execute a pose or to understand how to properly slide into a position, Kimmie was always patient and encouraging, never losing her temper.  If she ever had a suggestion for me, she was always gentle about it and never put me down for not completely getting a certain trick right away. This is definitely something that I want to apply to myself if I ever have the opportunity to mentor someone.  Another thing Kimmie did to help me feel comfortable was to remain positive and friendly – her upbeat, kind energy helped me become less shy around her and feel less afraid to make mistakes (which, as a perfectionist, is quite a hard thing for me).

In-Depth Intro Blog Post

For my In-Depth project this year, I am going to be learning some basic poses in aerial hoop.  An aerial hoop is a kind of aerial equipment used in circus – it’s basically a large steel hula hoop that is suspended by the ceiling.  The hoop is quite versatile – it can be used static (staying in one place), swinging, or spinning. I plan to learn my skills and acquire a mentor through the individual teaching private lessons at the Circus Lab – a circus school in Langley, BC.  This past Thursday, I have sent an email to the Circus Lab requesting private lessons as well as a mentorship, and I have made two phone calls. I have not gotten a response yet, which is quite frustrating, but if they don’t respond or don’t have private lessons available there are other circus schools that offer private lessons so I do have a backup plan.  My specific goal is to learn 15 beginner poses on the hoop, then film a routine with what I’ve learned. To monitor my progress I will film semi-regular “progress videos” and upload some of them with my regular blog posts. I will have my routine filmed by May 19, and I will present the routine at In-Depth night on May 25. I have chosen aerial hoop for my In-Depth field of study because I am involved with circus but never had the chance to discover hoop.  I also hope to gain confidence by building on existing skills in circus.


An example of a basic pose in aerial hoop.


Resources and articles: 

Some information about the aerial hoop

The Circus Lab’s homepage

A dictionary of basic poses for aerial hoop