In-depth post #6
For the last time with my mentor, I made macarons. Originally, I wanted to save this difficult dessert for my in-depth learning center, however, with in-depth being in-person, a change of plans was caused. Macarons are a classic and elegant dessert. It is considered one of the most difficult desserts to get right because of the meticulous process that it involves. It is also one of the most rewarding desserts in terms of taste.
There were two components to the macarons that I made. The shells, and the buttercream filling. First, the shells. The shells are made with fairly simple ingredients. The only ingredient that stands out is the almond flour, which is used to give the macaron its signature chewy texture and light taste. The rest of the ingredients include egg whites, cream of tartar, powdered sugar, sugar, and vanilla. There are two separate steps to the shell. Combining the dry ingredients, and the wet.
One of the important steps that are done to ensure a smooth-looking macaron was to blend the almond flour and powdered sugar. Since I did not have a food processor, I had to use a blender which a little more challenging, but still worked. I also sifted the mixture several times and set it aside.
Next was creating a meringue. I mixed the egg whites in a bowl and then added the cream of tartar. I used cream of tartar for my first recipe, which was used to hold the texture of the fully whipped egg whites. Next was the sugar. My mentor told me that I should add in the sugar very slowly and incorporate it well so that the sugar would dissolve as continued to whisk the egg whites. My mentor was able to help me by holding the hand mixer while I added in the sugar, as I wanted to be careful and avoid accidentally spilling a bunch of sugar into the whites. Normally, many people add gel food colouring, but since I did not have any, I just decided to emit the food colouring and create a white macaron.
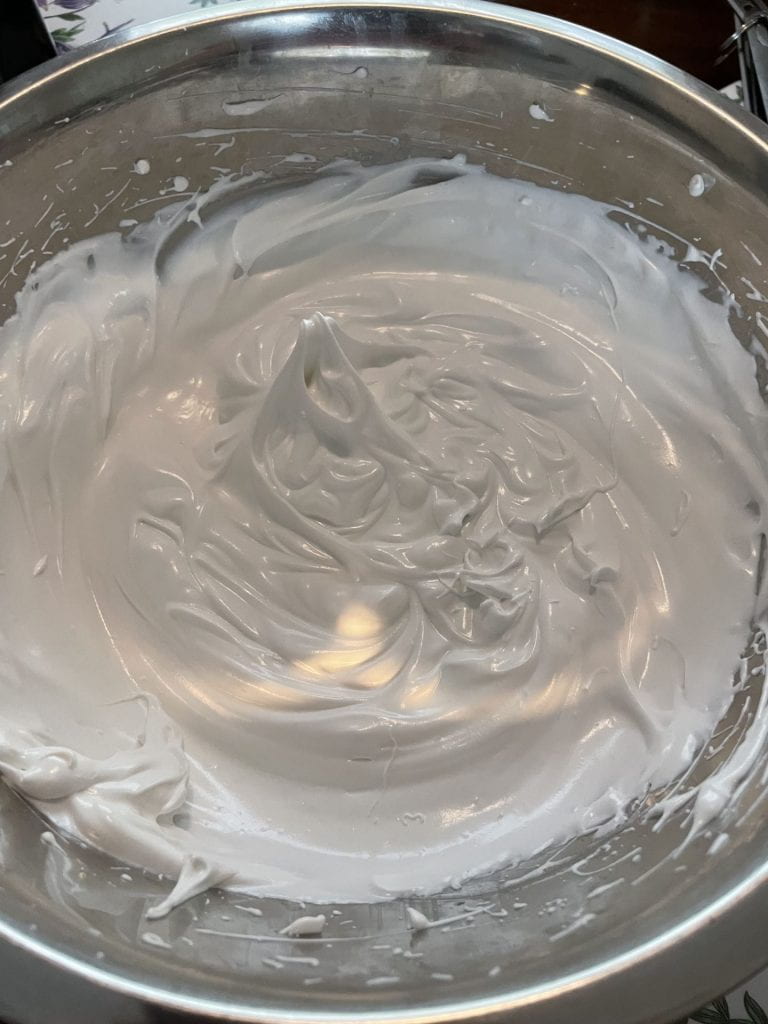
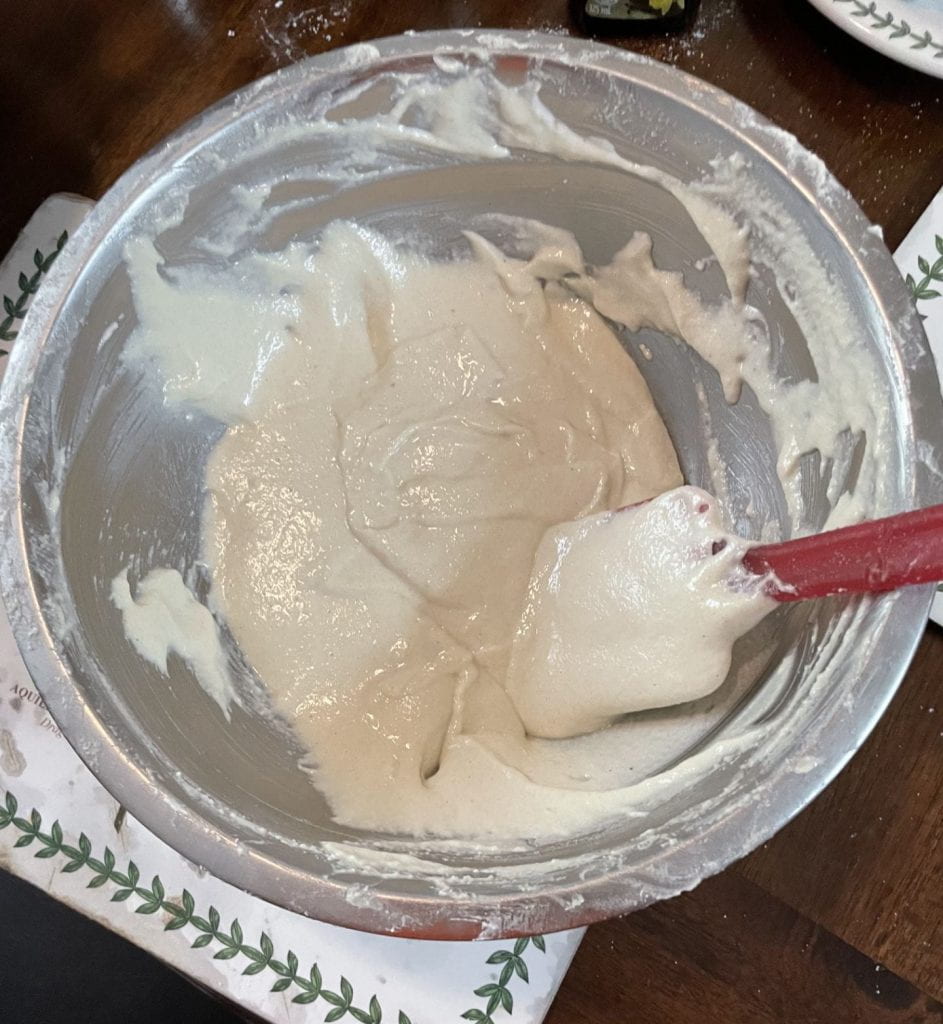
The final step of the macaron was the most difficult. It was combining the meringue with the dry ingredients. The mixture is called a macaronage. My mentor told me that this was the easiest part to mess up and messing it up would completely ruin the macaron. The way to mess it up would be to overmix or undermix the batter. The trick was to mix just until the mixture could drip off of the spatula and form a full figure 8 shape. I tried to be very careful with this and my mentor was also watching carefully to make sure that I stopped when I needed to. Once the batter was a flowing and shiny texture, I stopped mixing and transferred it to a piping bag.
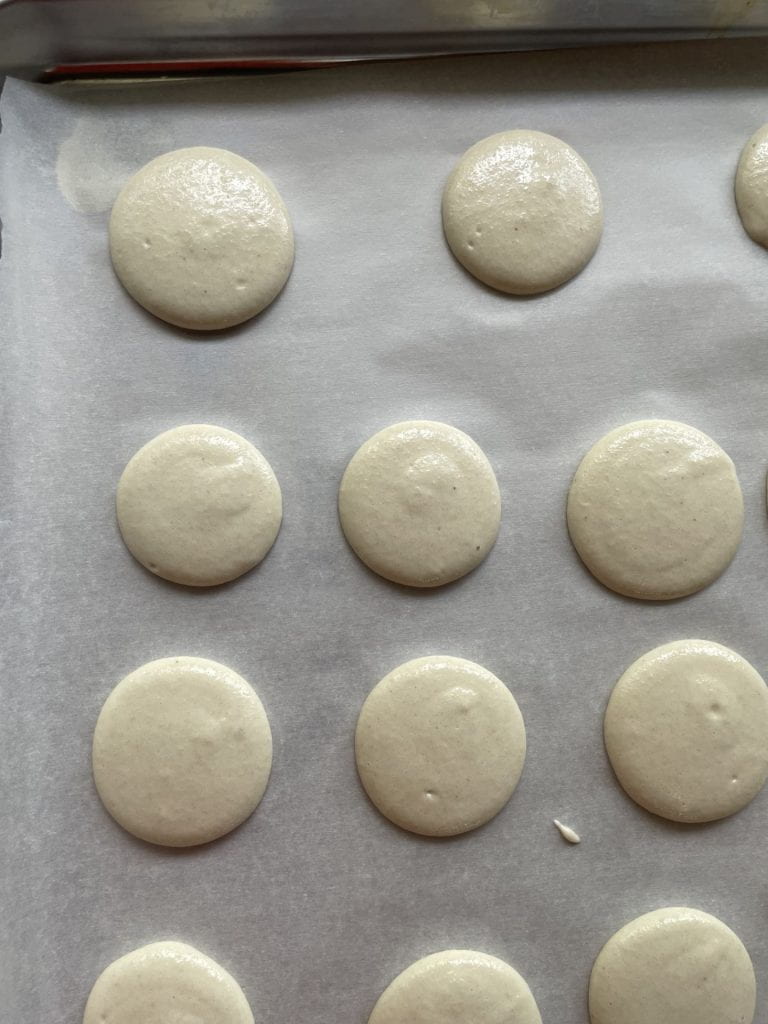
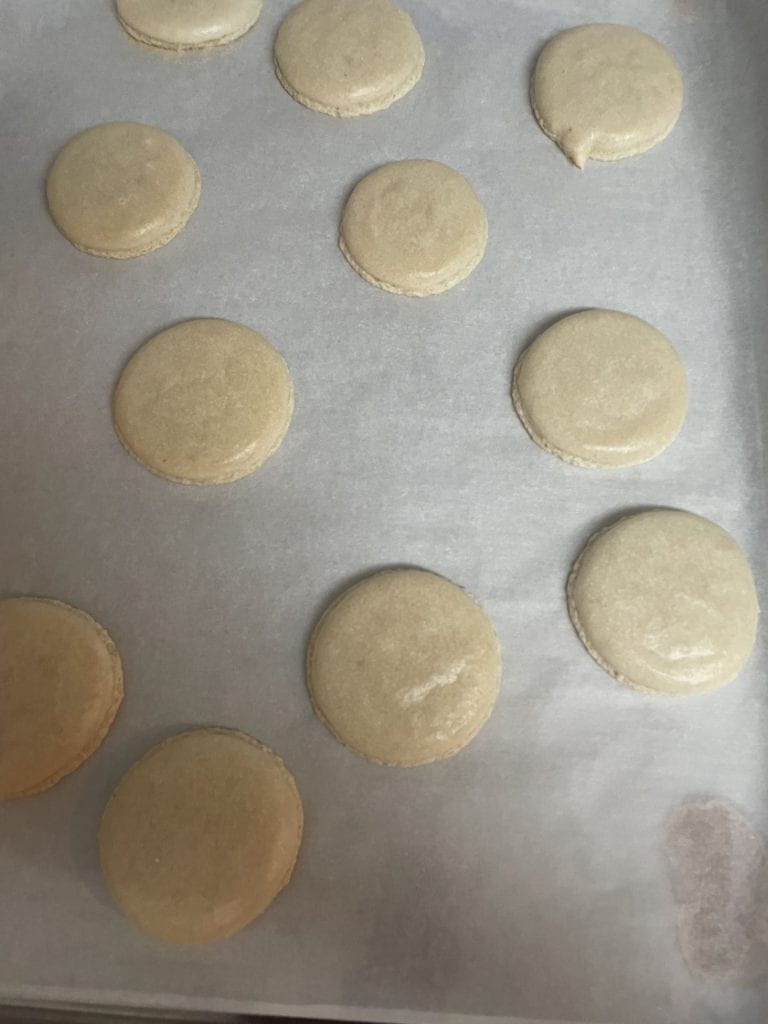
Piping the batter was a lot easier than the other foods that I made that needed piping, like the cream puffs. Since the batter was not very thick, it was easy to transfer to the piping bag and pipe. I did not use a guide for the circles, which I later realized that I should have so that I would have more consistent circle sizes, however, it was not that big of a problem. I had to let the batter sit until it dried out, which took about an hour.
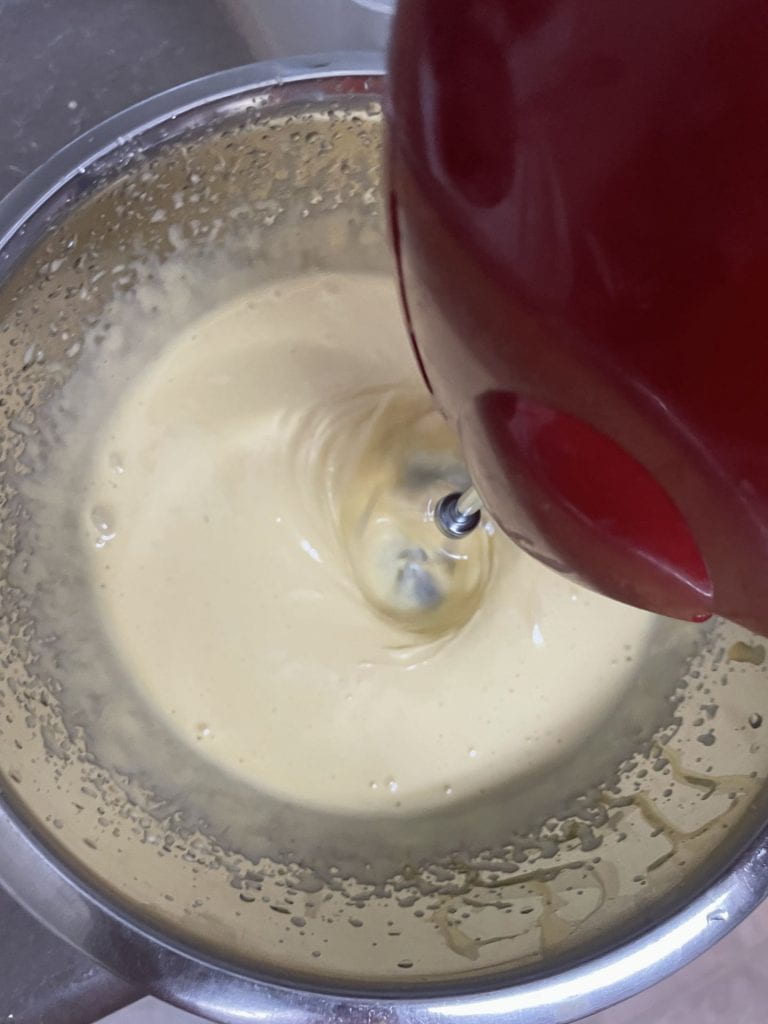
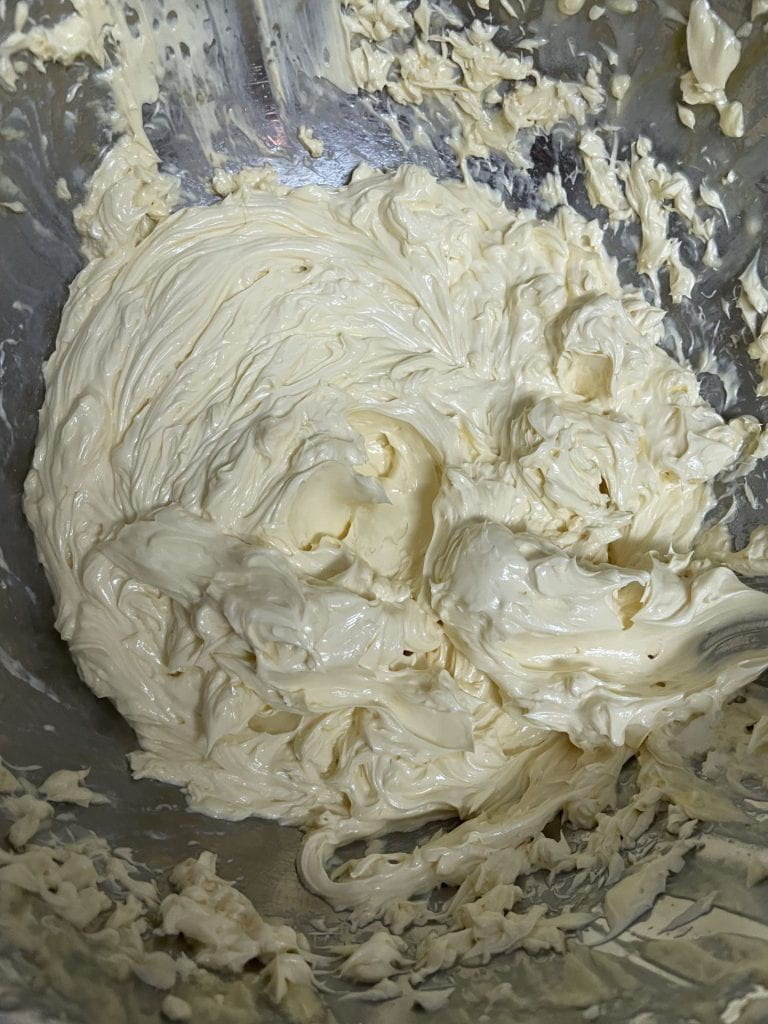
In the meantime, I made the filling. I made a French buttercream to fit the theme of French desserts. This process what quite chaotic, especially with a hand mixer. Since I had to constantly hold the hand mixer, unlike a stand one, I needed some help. The ingredients were butter, sugar, water, and egg yolks. Making the buttercream required many of the techniques that I learned along the way, such as tempering. I created a sugar-water mixture and heated it up to 240 degrees Fahrenheit, and in the meantime beat the egg yolks together until they got thick. Once the sugar water was heated up, I slowly added in the mixture while my mentor was holding the hand mixer and continued to mix. This was to prevent the eggs from cooking and scrambling. This step took a lot of attention and was very quick, so I was not able to take a photo of this step. Lastly, I had to add a lot of butter and mix until emulsified. At first, the butter was not incorporating with the egg yolk mixture, however, I heated up the bowl a little with a double boiler, and that helped the butter combine. I then refrigerated this until it was ready to be used.
I put my dried macaron batter in the oven, and it rose very nicely and cooked very well. The inside was very full and not hollow, which meant that I did a good job mixing the batter to the right texture. Once cooled, I started to pipe the buttercream filling and create a fully assembled macaron. I tried using a fancier piping tip, however that ruined the appearance of the macaron which I later regretted. The best piping tip was just a round one because it could create a perfect layer of filling in-between the shells.
Overall, it was quite time-consuming but turned out very delicious and pretty successful. I am thankful to my mentor who stayed for the entire making of the macarons.
Finished product:
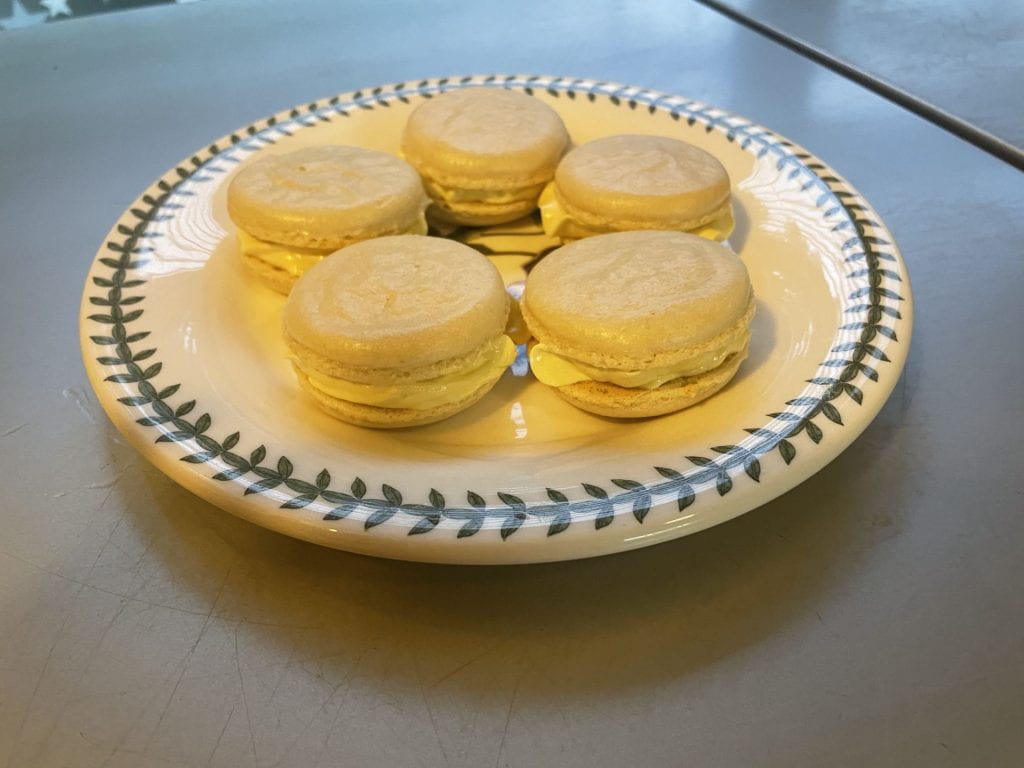
Macaron
Macarons are of Italian origins, which technically does not make this a French dish. However, it was very heavily popularized in France and is associated as a French dessert, so I still decided to make this dessert. It was introduced to France when Italian Queen, Catherine dé Medici married King Henry II of France. Throughout history, macarons have consistently been regarded as an exclusive dessert for royals and the rich.
During the French revolution, Marguerite and Marie-Elisabeth started selling macarons to commoners in 1792 and began to get attention. The filling has changed from many types of filling to a more modern buttercream, however, the recipe for the shells has not changed.
In-depth Prompt
From now until in-depth night, I will prepare to cook French onion soup by making it at home. Since I want to be fully prepared and ready to interact with other people as they pass by my station, I want to memorize the recipe so that I am not constantly looking down at a recipe sheet. I will also test several recipes and adjust portion sizes so that I can make it multiple times rather than just once. My reason for choosing French onion soup was that it was inexpensive to make multiple times and did not require an oven. It does require an oven to melt the cheese on top of the soup, however, I will just be torching it since I will not have access to an oven. With this recipe, I hope to show off some of the techniques that I learned and show my general skill and ability to cook a dish without trouble. I will hopefully be able to engage in conversations with bystanders and explain what I am doing and also talk about what else I have made for the past in-depth blogs.