Progress Report
Since last blog post, I have completed Blender Guru’s chair modelling tutorial. In this tutorial, I learned many valuable pieces of information, such as how useful using a blueprint can be. Before, when working on my own project, the headphones, I did not use a blueprint, and just made them by eye. In blender, blueprints are actual 2D planes that you can orient and scale in a 3D environment. That way, you can model the shape of an object one side at a time. Using a blueprint made modelling the chair so much easier, and with the basic form done quick, I could focus on smaller details, like bevelling.

From watching my mentor Robert’s hard-surface modelling for the CG industry tutorials, I learned that simpler is better; The less unnecessary points used, the better, as that means the render engine doesn’t have to spend as much time rendering, and you don’t have to spend as much time modelling. During the chair tutorial, I think this was driven home and emphasized. On my headphones project, I think I was too ambitious, making every detail I saw a literal change in the geometry of the mesh. However, while making the chair, the tutorial said to just do a darker shade of black for the hole in the screw, rather than actually making a hole. It doesn’t look perfect, but the screws are a very small part of the chair and don’t draw attention a whole lot. I think this attitude of not being afraid to cut corners when you can get away with it is useful for making projects feel more finish-able and like less of an endless task.

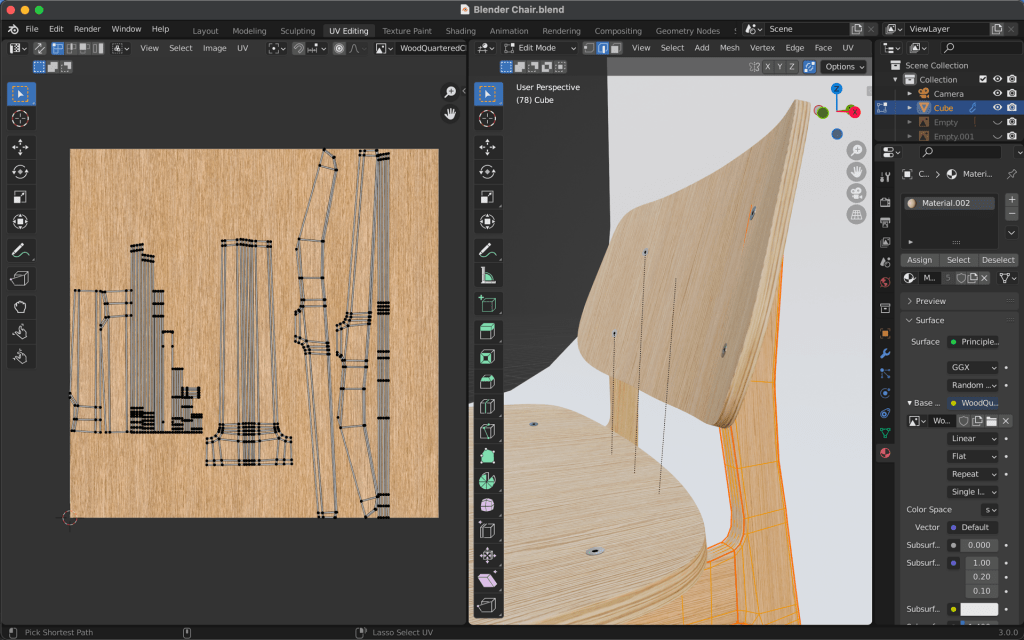
The chair tutorial also just served as extra practice and experience with blender which is very valuable in of itself. I was able to get more comfortable finding and using controls like constraining movement to an axis, moving the origin of an object, applying modifiers, and more. I also was introduced to new modelling techniques, like creating creases on edges to make them hard rather than soft, or shearing to rotate a vertex loop without changing its width. I also briefly learned new concepts, like creating cuts along the edge of the model to unfold it into a UV map, so that an image texture could be applied to it.
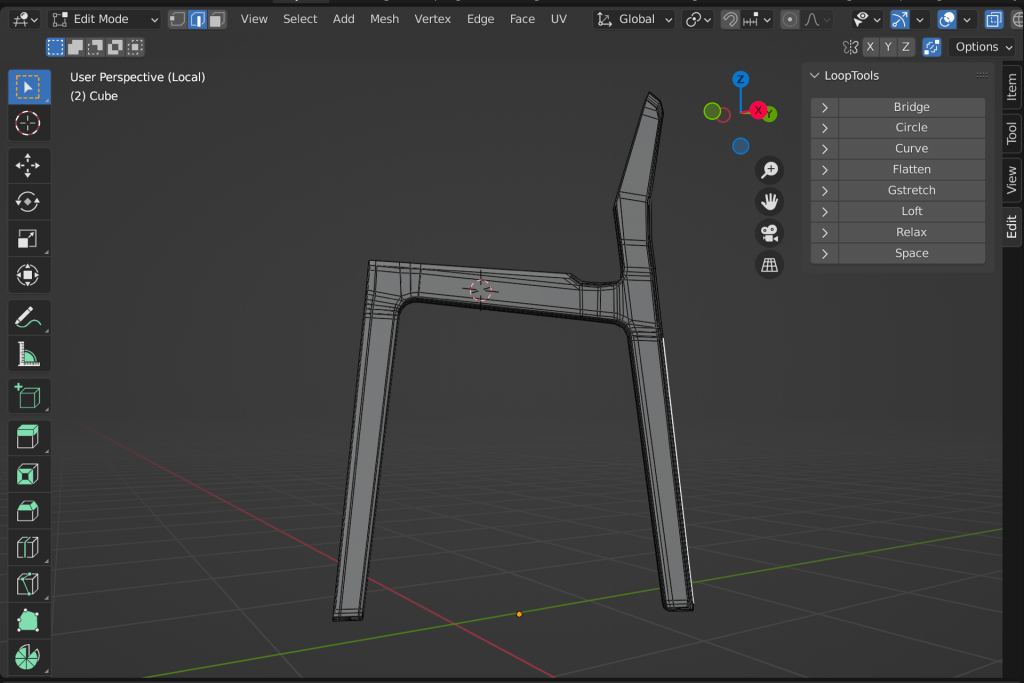
During my meeting with my mentor, we looked over this model I made as part of the chair tutorial and he critiqued and fixed parts of it. I was curious what he thought of different ways of bevelling or sharpening edges, as since I had begun modelling, I had seen it done many ways. First, while making my headphones, I had found I could use the bevel tool to change the object’s geometry to be bevelled. The problem with this, is that it made permanent changes that affected the base geometry of the model. So then he showed me how to bevel by weight with a modifier and weight properties for the edges that need to be affected. During this most recent tutorial, edges were often made hard by adding an edge loop near them, so that the subdivision modifier affected them less. He also adjusted edge softness by adding creases to them, similar to bevelling by weight. During my meeting with Robert, I learned that the most optimal way to do it is to never use edge loops or creases, and just add a bevel by angle or weight before the subdivision. That way, you aren’t relying on subdivision to make the model look how you like, and is used purely just to make more resolution if needed. He also showed me how to clean up the geometry of the model a lot to make it simpler, better for sculpting, and less problematic for the bevel modifier.
Before
After
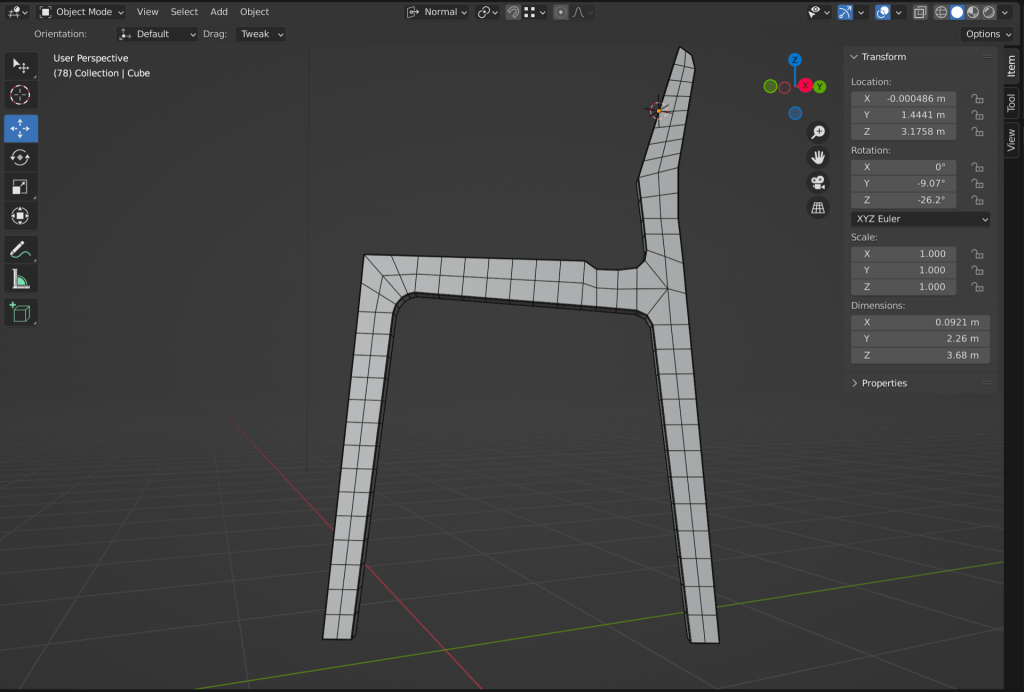
Here is a render of the final model, and a video of the final model will be linked here in a day or so, as the rendering process is quite lengthly.

Mentor
One learning opportunity that Robert provided for me was being able to see a professional hard surface modeller model on object from scratch. While we were talking about the chair I had made, I mentioned something about the screw in it, and he offered to show me how he would model a screw, as well as showing me an add-on that automatically generates screws. Seeing him modelling the screw from scratch was a great way to expose me to some of the thought process that goes behind good modelling. For example, in the very beginning, when he first created added a sphere mesh that he would turn into the round top of the screw, he made sure that it was added with an amount of sides divisible by four, so that later it’s faces could be converted into quads, which are important for sound modelling. He explained it like playing chess. The better of a chess player you are, the more you think ahead and make your moves accordingly. The same goes for modelling.
When making the chair with the tutorial, I learned some new modelling techniques, which I went into detail about above. When I met with my mentor afterwords, he was able to reinforce this increased modelling skill by making sure that I was still making clean meshes with all evenly distributed quads, so as to reinforce what I had learned and keep me on the right track with my advancements in skill.
One opportunity to accelerate my learning is the resources and knowledge that my mentor can refer me to. For example, when I was beginning, and didn’t know many good modelling practices, instead of trying to explain it all to me in one video call, or leaving me to experiment and figure it all out through trial and error, he referred me to all of the videos he had made for this very purpose. That way, I could get all of that knowledge quickly and put it into practice, rather than finding myself stuck with big errors all the time. The same thing goes for all the add-ons that he knows about, that he can show me to save time, like look tools, which arranges a series of vertex into a circle, instead of having to insert a pre-made circle and fuse it to the existing model.
When Robert and I meet, we often look over a model that I have been working on, and he points out changes he thinks should be made. If nothing stands out to him, then I bring up questions I’m wondering about or problems I’m noticing, and we talk about those. I also sometimes ask him questions about his job, like how many people are in his division working on one project at a time, so I can get a sense of what the 3D animator career looks like, to see what types of opportunities my in-depth project is making for me.
Right now, something that has been going particularly well is seeing the difference that years of modelling expertise makes. When watching him make changes to the projects I have been working on, the resulting differences in the original and updated models are very obvious. It’s so helpful, because when I have been modelling for a while, and am starting to wonder if there is any point in trying to make improvements, I then go into a meeting and see how much of a difference good modelling makes. It encourages and reminds me to try and put an effort learning before just doing. My understanding is growing during those calls as I ask questions and he brings up points he finds important. For example, I now understand that there is no right way to model, and it really depends on the finished product you are trying to create. For example, there isn’t a right number of times to subdivide, but it instead depends on how close the camera will come to the object in the finished product. Similarly, there is not right way to bevel edges, as using edge loops and creases might work fine for a casual or indie artist, but in the industry there are standards and needs for compatibility with other programs.
During my calls, I get to see a bit into his life as a hard surface modeller. Like I said before, I get to hear about how many projects he has to work on at once, like how at one point he had ten, and had to start delegating because the emails and communication for each project was getting so hard to keep track of productively. I’ve also learned about the reasons he created his YouTube channel and discord server, like giving back to the community, and correcting modelling practices in other videos that wouldn’t hold up in the industry, like the creases and edge loops in the chair tutorial. He has learned about my other hobbies that led me to be interested in blender, namely stop motion animation.
Moving Forward
Moving forward, I am going to start another project of my own, and will be modelling a kendama. This likely won’t be too hard of a model to make, so I hope to work on shading, texturing, lighting, special effects, and other topics related to making a model look pretty once it is done. I haven’t found blueprints for the one I am modelling, but I have found pictures of the kendama head-on and top-down like this one, and so I will be using those when I model it.
![]()