
You are now going to create your very first post. In a separate tab or browser window, go to your Dashboard on the left and go to Posts -> Add New.
1) Title – Create a title for your blog post. Your title will be: Digital Footprint Assignment
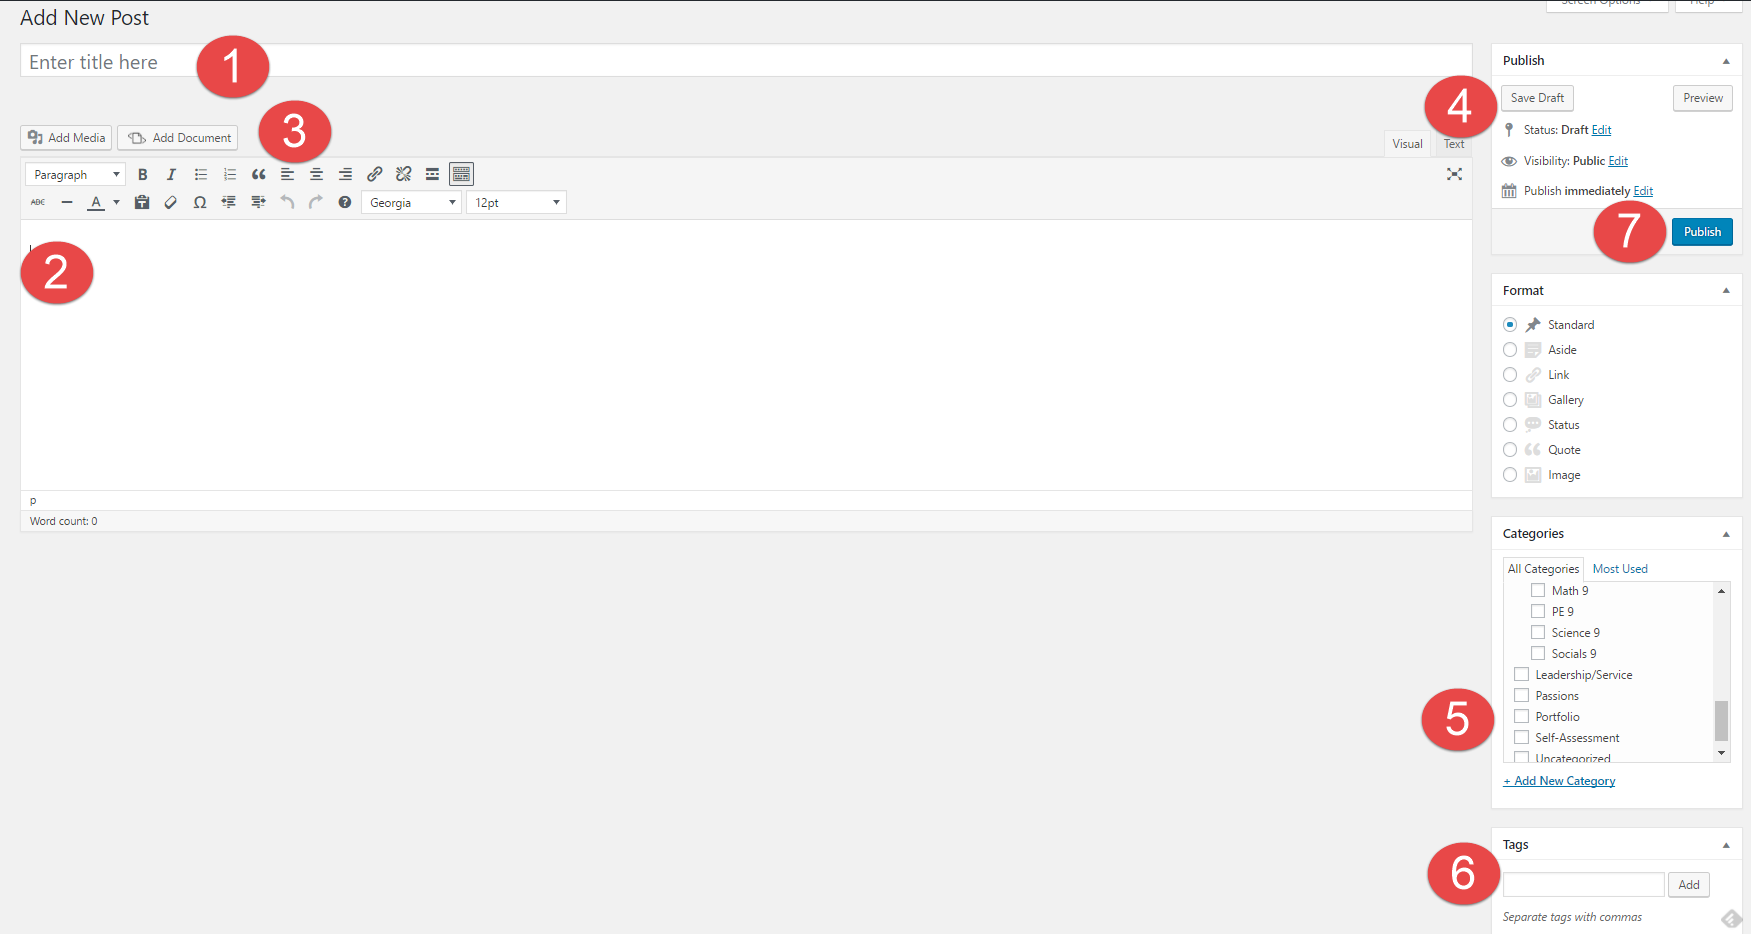
2) Body – This is where you place your content of the post – text, videos, pictures, etc. Follow the instructions on the Digital Footprint Assignment page to see what questions you need to answer here.
3) Tool Bar – In your toolbar you can “Add Media” and “Add Documents” into your posts, this is the best way to create visual representations. You can also change fonts, hyperlink, etc.
4) Publish – Here is where you control what items are public and private. You can also control when they are published to your website.
5) Categories – Here is where you choose where you want your post to go. This is your digital binder with all of your subjects. Make sure to categorize each post with the relevant subject. E.g. Categories -> English
6) Tags – Here is where you tag posts with one or two of the most readily applicable Core Competencies. These tags can help you find things quicker on your blog and help you stay organised. E.g. Tag -> creativethinking
7) Publish – When you are done, simply “Publish” it. If it has been edited, press “Republish” to update with the latest version of the content.
Hi, this is a comment.
To get started with moderating, editing, and deleting comments, please visit the Comments screen in the dashboard.
Commenter avatars come from Gravatar.