In-Depth Final Post: Google, How Do I Learn To Yoyo in 5 Minutes?

Hi, I’m Colby Ng, and this year for In-Depth I explored what professionally yoyoing really is. Enjoy!

Definition Yo-yo/Yoyoing:

  • toy consisting of a flattened spool wound with a string that is spun down from and reeled up to the hand by motions of the wrist. 
  • To move up and down; fluctuate.
  • To manipulate or maneuver (someone or something).

“It does not matter how busy or old we become, we shall always find happiness in playing with a yoyo.”

– Unknown

Step 1: Learn What Types of Yoyo’s There Are

A Beginner's Guide to Yoyo - General Yo-Yo - YoYoExpert Forums

Firstly, there are different shapes to yoyos, different shapes are better for different tricks. As a beginner you want lots of room to work with, so the wider the better. Secondly, there are responsive (flat), and unresponsive (curved) bearings. A responsive yoyo is best for beginners as a simple flick of the wrist brings the yoyo up. However, unresponsive bearings allow for much harder and more complex tricks.

Step 2: Learn What Components Make Up a Yoyo

Strings, bearings, spools, and wings are all the components that make up a yoyo. Combined they create our modern yoyos, just be sure not to break any of them, especially the string. Taking care of your yoyo is important if you want it to work properly. High-end yoyo’s need lubrication, string changing, and under no circumstances do you want to drop your yoyo and risk breaking parts.

Step 3: Learn Some Quick History of Yoyoing

World Champion Gentry Stein (See Above)


While seen widely as a toy, in the late 1900’s yoyo’s spun into mainstream pop culture. Through the years yoyoing has evolved into many different types, but performance yoyoing still remains prevalent. Added with music, a combination of tricks are thrown together to create an alluring performance almost akin to hip-hop dance. A mix of skill, creativity, adaptability, practice, and flow are all you need to put together a great performance.

Step 4: Throw Your Yoyo and Get Started (Add Music for Spice)

See Below. Yoyoing is a throw and a spin away.

Pro-tip, don’t throw your yoyo at anything breakable!

Final Presentation

Feel free to comment below, ask any questions, or take a look at my previous posts for more information.

TALON Talk 2020 “How does oil added to soil affect the growth of bean plants?” Colby Ng

Hi  Everyone,

I chose to do a science inquiry on “How oil added to soil affects the growth of bean plants?“.

Please watch the video attached below and comment!

https://sd43bcca-my.sharepoint.com/:v:/g/personal/125-cng1_sd43_bc_ca/EZteuTQXvBtPhRyxzopP2OsBLBPoEJ8ico5BMHLdcvmNNw?e=kpOqHC

Thanks, Colby Ng

IN-DEPTH JEWELRY MAKING POST #6: The Final

These last few weeks I think I’ve perfected working at home. 

I’ve continued working hard and doing my best, and I’ve done a lot. I’ve continued doing research online using youtube videos and finding helpful websites (best ones have links below). Jewelry making is a fun break from doing normal schoolwork, and I’ve been able to work on projects consistently. I’ve also continued and started some cool new projects along with getting more supplies. I visited Micheals, made some rings, started a mother’s day gift, and so much more. I also ran into some problems along the way, but I’ll get to that in a bit. 

At first, I continued on my old projects. I buffed out all my jewelry and cleaned it so that it was super shiny again. I spent a while doing this and might need to buy more steel wool. In the end, all the jewelry was super shiny and looked brand new again. I also started looking into some cleaner and finish I can use on the jewelry to stop it from losing its lustre, but I’ll look more in-depth for that next time along with getting some advice from my mentor. 

Next, I decided to start on some new projects. I spent time stripping some wires for the copper inside, and I thought it would be good enough for jewelry making. I tried to make a bracelet out of the wire, but the problem was it wasn’t solid copper, it was actually very thin wires bound together and I wasn’t able to use it. In the meantime, I spent time practicing how to flatten metal with an old USB cover I had. This was just a good way to help me practicing flattening out some metal as if it was a project. After this, I knew I had to get some metal to work with and after waiting a few days I was able to go to Micheals. I bought 3 meters of copper wire because I knew I could do countless projects with it. 

At first, I started on a bracelet. I hammered and heated, but then after a while doing this, I got a text from my friend. He had seen the twisted copper ring I made and he wanted me to make one for him. I figured I could continue the bracelet later, so I started on his ring. I took two lengths of copper wire and twisted them together. For this, I got my Mom’s help and I used a drill and pliers to twist the two metal pieces together. After this, I spent a long time heating the wire and hammering it into a flatter shape. When I was happy with how flat it was, I got to sanding the piece down. This always takes the longest and it’s hard work but eventually, I finished. Next, I got my friend to measure his ring size with a measuring tape, and after another round of heating, I bent it into shape. I sanded one final time and after it was all shiny I was done. I did have some problems with this project, but I’ll talk about that in a bit. 

My other project was the start of my Mother’s day gift. My mom doesn’t wear a lot of jewelry so I decided to make her a decoration. using nails, a wooden board, and some copper wire, I bent the copper around the nails to spell the word love. It was my first try so it wasn’t perfect, but I’ll continue doing my best so I have a great gift for her on Mother’s day. 

My mentor has also been there whenever I need it, but I’ve been able to lead my own learning very well. I’m super thankful that I learned all the basic skills with my mentor at the beginning because now I just have to implement them in slightly different ways when I try something new. Sometimes this doesn’t always go right. For example, I learned the hard way why we always heat the metal before twisting, hammering, or bending. I was working on a twisted ring project with my copper wire I bought and I ran out of butane fuel. I thought it wouldn’t be a problem and decided to bend the ring into shape anyways. This was after spending hours twisting and hammering, along with buffing and shining. After using a ton of energy bending the ring into shape, the copper wire actually broke and I had to start from scratch again. I knew that heating was important before, but this taught me how heating the metal makes it MUCH easier to work with. I learned my lesson and didn’t make that mistake again. (I also bought more butane) 

For my final presentation, I am going to be putting together a picture essay/slide show. I’m going to showcase all the different jewelry I’ve made in a slideshow/picture essay. Then, in the end, I’ll show a sped-up video of how I made some of the jewelry. I have a special camera that’s great for macro shots that can show all the detail in my projects. Altogether it’ll be great to show what I’ve learned and people can better understand how jewelry is made. 

Coronavirus is a tough challenge to work through, but I’ve done my best. 

Here are some pictures of my tools and projects: 

  1. My tools 
  2. All my projects 
  3. My newest ring (left) compared to an older ring (right) 
  4. My first attempt at a Mother’s day gift 
  5. Some coating and cleaner I’ve used 
  6. The broken pieces of a twisted ring from trying to bend without heating 

Below I put links to the websites I found most interesting and useful. 

How Cuban Links are Made: https://www.youtube.com/watch?v=yG9ZAkuflP0 

Jewelry Making with Copper Wire: https://www.youtube.com/watch?v=f8umNczpc0c 

Micheals: https://canada.michaels.com/en/shop-categories/beads-and-jewelry/809188121 

Can’t wait until next time… 

IN-DEPTH JEWELRY MAKING POST #5: WORKING FROM HOME

Until next time…

TALONS Digital Literacy Assignment Reflection #4: The Indian Act Socials Presentation

Socials Presentation: The Indian Act

Presentation: https://sd43bcca-my.sharepoint.com/:p:/g/personal/125-cng1_sd43_bc_ca/EV9u6BYWX8NDm45JX2IZyDoBJdOGJ3r-BPqV4lWhIZlrYw?e=5yIvAL

For this project, I was put in a group with some classmates, and we had to research and present an issue surrounding the First Nation’s Peoples of Canada. Our group chose to research the Indian Act and how it has affected Canada. We collaborated in and out of school and split the project up. Then we put it all together and created a class presentation (Powerpoint) that ended on a discussion. We discussed our opinions, and how there are different views on the Indian Act and how it is both a bad and a good thing depending on your perspective.

1. I identify and discuss bias in research sources.

While researching such a controversial topic we knew that there would be different biases. To combat this we researched from both perspectives. We found that not everything was black and white with the Indian Act. In our presentation, we discussed the good and the bad and then we started a class discussion about what everyone else thought. That’s how I identified and discussed bias in my research sources.

2. I go beyond google and use databases to find scholarly research sources.

When researching for this presentation, we didn’t want extremely biased sources, so we used the school’s databases. Certain websites the school had were perfect and in our bibliography, you can see how we used them. We knew that the school’s sources would be less biased than most of the internet so we tried to use as much of the school’s sources as possible. Altogether I used much more than just google when researching for this presentation.

3. I ethically use content that is not created by me by using Creative-Commons licensed audio, video, or images, and by properly citing these resources in my work.

All we did was source content that wasn’t our own, and use creative commons. In our actual PowerPoint, everything is cited to the website we got it from. We put links to all the websites and also created a bibliography. We didn’t want to unethically use content so we also used creative commons for some images. That’s how I cited all the work in the presentation that wasn’t mine, or I used creative commons.

TALONS Digital Literacy Assignment Reflection #3: Electricity Science Lab

Science Electricity Lemon Lab

Lab: https://sd43bcca-my.sharepoint.com/:w:/g/personal/125-cng1_sd43_bc_ca/Eegq42KCGUZPiaSKdV2Yc7MBNYMygWDcIYmM3JcOcqYwZA?e=dSBqJx

This science project was one of our group Science labs. I had to collaborate with 4 other students and organize, design, and carry out a science experiment. We created an experiment to test if liquids or solids produced more electricity (Juice or Fruit). We then researched and designed our experiment both inside and outside of school. After that, we carried out our experiment and wrote up our paper on what we found.

1. I used digital spaces to plan and execute collaborative projects with my peers.

While planning out our lab, we needed more time to work. We had planned and talked in school, but we decided to set up a video call where all of us could continue to work on the lab at home. We started a video chat and planned out what materials to bring, what procedure to do, and everything we could before the actual experiment. This was how I used a digital space to plan and execute part of my science lab.

2. I constructively build upon or synthesize the ideas of my peers.

Since this was a group project we split up the work and did it all evenly. When we were designing the experiment there wasn’t any one way to do it so we ended up brainstorming on facetime. Whenever someone had a good idea like using multiple fruits instead of just lemons, we used the idea and built off it. We even added multiple fruits and multiple juices as a way to build off a previous idea. The whole project was like this and we rolled with whatever good ideas came up.

3. I enhance the impact of my research or presentation through the creative use of technology.

At the end of our experiment when we were doing the lab write up, we used online research as part of our lab. When we were explaining why liquids give off more electricity than solids, we were only given papers and textbooks as sources. However, not all of our findings could be explained with only those sources. So we went online and did research to enhance our lab report even more. We went to explain electrolytes and ions in water with the online research that we couldn’t have done with just the textbook. We ended up using those sources to help ourselves more than we could’ve without them.

TALONS Digital Literacy Assignment Reflection #2: ZIP Project

ZIP Project: Persuasion

Zip Proposal: https://sd43bcca-my.sharepoint.com/:w:/g/personal/125-cng1_sd43_bc_ca/EdaiuZk0bBZImcqVfGLUy6wBvZvmy24Zd1wFUrfyxStybQ?e=cxm9hG

Zip Notes: https://sd43bcca-my.sharepoint.com/:w:/g/personal/125-cng1_sd43_bc_ca/EWOae3n6kR5Ppkt8eWWTfc4BgRSSGJGFitAy9hil-wg6wA?e=6Eg0c6

Zip Final Artifact: https://sd43bcca-my.sharepoint.com/:w:/g/personal/125-cng1_sd43_bc_ca/EXEzQPMMnIBOmBSqtZx8c5cBvnWS97Y190UfwLASyNon5w?e=fCIgJf

Zip Final Artifact Notes: https://sd43bcca-my.sharepoint.com/:w:/g/personal/125-cng1_sd43_bc_ca/EaG_MoPetjZAvnHFfEfrONwBDLGPCci_vpn5q986NGC0JA?e=NYksNI

My ZIP project on persuasion was a passion project. We were given two weeks to research a topic. The topic could be anything as long as you could turn it into any inquiry project. For my topic I chose persuasion, and my question was “What are the key elements that allow you to persuade someone into agreeing with you?”. I spent a week doing research on this question, to get the clearest understanding. After I knew the answer to my inquiry question, I decided to show what I learned about persuasion my writing a persuasive essay on why students should be given less homework. Then I did a presentation one on one with a few different classmates to teach them about what I learned while they evaluated me. Finally, I learned about my classmates passion projects and gave them an evaluation and feedback like they gave me. 

1. I attribute credit to ideas that are not my own by preparing a Bibliography/Works Cited and by using in-text citations.

I credited my research in my bibliography and in my work. I have my bibliography attached above at the bottom of my notes and I used that throughout my research. each section of research has the information from each source and I make sure to credit the sources in that way. I also created a bibliography in my final essay and cited sources throughout my essay as proof.

2. I look at controversial issues or topics from opposed perspectives to gain a more complete understanding.

Through my research I learned that to properly argue or persuade someone, you need to understand the opposing point of view. When I was writing my final essay I research both why homework was good, and why homework is bad. I had to gain a complete understanding and then argue why my idea was better. I make notes of this in my essay research, and also in my actual essay when I have concessions.

3. I respond to the work or ideas of my peers in a way that is compassionate and productive.

At the end of ZIP, we did peer evaluation sessions. At first, I presented all my findings and taught my classmates about persuasion while they gave me critiques and feedback. After I got all my feedback from several people, I watched my peer’s presentations. During this time I also helped critique what was good and bad about their presentation and gave them ways that they could improve. Through this, I responded to the work of my peers in a compassionate and productive way.

4. I determine and use the most effective medium to present my work.

After my first week of research on persuasion, I had to choose a way to show my learning. I decided to do a persuasive essay because it could help me show all the skills I learned and it was easy for other people to understand. Basically I had to decide what way I wanted to present my learning, and I chose a simple and effective persuasive essay.

TALONS Digital Literacy Assignment Reflection #1: Eminent Project

Eminent Person Project: Douglas Jung

Eminent Speech: https://sd43bcca-my.sharepoint.com/:w:/g/personal/125-cng1_sd43_bc_ca/EQp2UdEQBqZJrIv5PHdmBW8BtVHGTb59-iHz8tUIb4k2-g?e=f7zlc5

Eminent Research: https://mygleneagle.sd43.bc.ca/colbyn2019/2019/12/04/annotated-bibliography-eminent-2019/

Eminent Blog Post: https://mygleneagle.sd43.bc.ca/colbyn2019/2019/10/28/when-asians-werent-canadians/

The basics of my Eminent person project was to find an “Eminent” person and complete a project about that person. An “Eminent” person is someone who has made a significant and positive impact on society, and my “Eminent” person was Douglas Jung. Douglas Jung was the first Chinese Member of Parliament in Canadian history, who was also a veteran, and also a lawyer. He fought for Asian-Canadian rights and helped lead Canada towards the diverse nation it is today. I had to research why Douglas Jung was “Eminent” and find out as much information about him as I could. I put together weeks of research and created a blog post about Douglas Jung. After that, I wrote and presented a speech in class, and also participated in “The Night of The Notables” where I had a presentation station about Douglas Jung. Those were the basics of my “Eminent” person project on Douglas Jung.

1) I tailor my work to appeal to my intended audience and use language and visual design elements appropriate for them.

I did this by condensing all my research into understandable, and interesting formats. I spent weeks collecting all my research, and I had to find ways to shorten that research down and present it in appealing ways. For my speech, I took the most important and interesting things that Douglas Jung did, like his time in World war Two and his work for Canada and created a story with my speech. Then with my learning center, I used the poster board and the locker bay to set up a visually appealing area for me to talk about Douglas Jung. (See pictures) 

2) I design my work with consideration given to aesthetics, and design, such as consistent colour schemes, symmetry, or organization of visual elements, and overall layout.

The best example of this is my learning center. I used a poster board as my centrepiece and designed everything around it. I used the lockers to hang up photos, and people could walk into my station and be surrounded by different things. They could look around while I talked and ask questions when they saw something interesting. All the pictures were spaced evenly, and my actual poster board was set up in three sections. World war two on the left, Parliament in the middle, and his work as a lawyer on the right. Each section had lots of photos and a quote with small amounts of information.  

3) I critically assess research sources for Currency, Reliability, Authority, and Purpose.

Throughout my research, I used both databases and googled websites. I CRAP tested the google websites to make sure they came from reliable websites, whether that was the Candian Encyclopedia or news articles, I checked through each resource to make sure it was reliable. If you look at my bibliography you can see that I cited my research sources and that they are CRAP tested. Some of the resources I found weren’t good enough so I didn’t include them in my research. 

4) My work demonstrates a positive, productive, and empathetic worldview.

This entire project was all about showcasing a person made a positive impact on the world. In my research around Douglas Jung, I learned how he helped change Canada from racism and discrimination, into the diverse nation it is today. He helped in war, he helped refugees, he helped immigrants, and he helped all Canadians as a member of Parliament. I then took all the information I learned and helped teach the people around me how one person was able to do so much good. Douglas Jung promoted a positive, productive, and empathetic worldview, and I was able to show that throughout my project. 

IN-DEPTH JEWELRY MAKING POST #4: Starting New Projects

The past few weeks have been some of the strangest for my in-depth project. 

My jewelry making went from hands-on and working hard, to research and theory. This major change was due to Coronavirus, and I’ve tried my best to work around it and continue learning about jewelry making as best as possible. Overall, I still think I did a lot of great research and learned lots about jewelry making. Nothing ever runs perfectly, and I’ll continue to try my best to accomplish as much as I can. 

At first, my project started off as usual. I was able to meet with my mentor and continue to work and learn about jewelry making. In the time that I met with Mme. Toure, I was able to finish a project, start a project, and continue a project. 

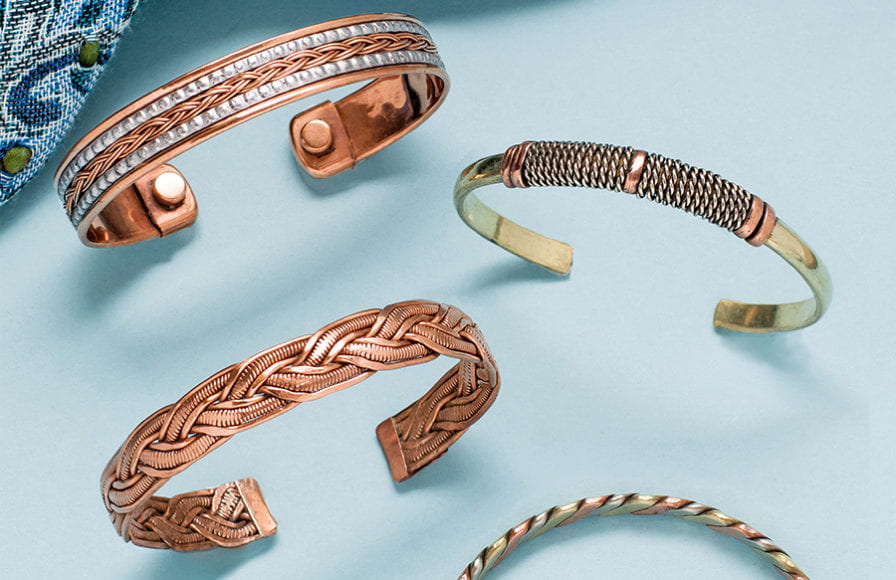
My bracelet is now completely finished and polished up. I think it turned out really great and I want to make another bracelet the next time I can so that I can see how my skills have improved. Handmade jewelry isn’t supposed to be perfect, the imperfections are what make the jewelry stand out and I really learned to take that into consideration with my projects after my bracelet. 

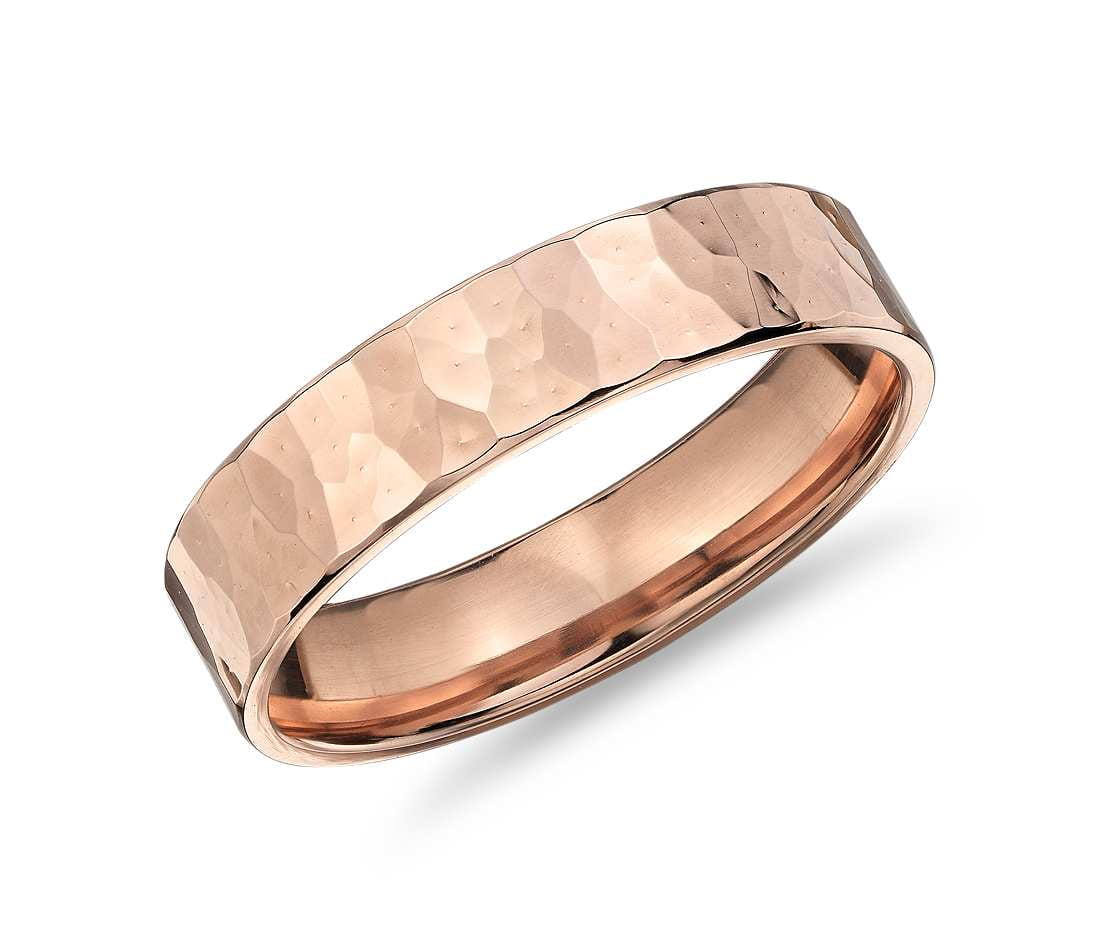
The second project I started was my silver ring. At the time of my last post, I had barely started and only stamped and cut my ring out. Now the ring is almost finished. First, I learned how to shape my ring with a ring shaper. Basically I had to heat up the metal, cool the metal, and then use a pair of pliers with curved silicon ends to shape the metal strip into a ring. Then after that, I was able to use a piece of silver solder to connect my ring completely. After that, I had to leave it to sit in a type of citric acid to get the fire scale off. Finally, I started to sand and polish using steel wool and a real jewelry polisher, but I need to continue doing that. 

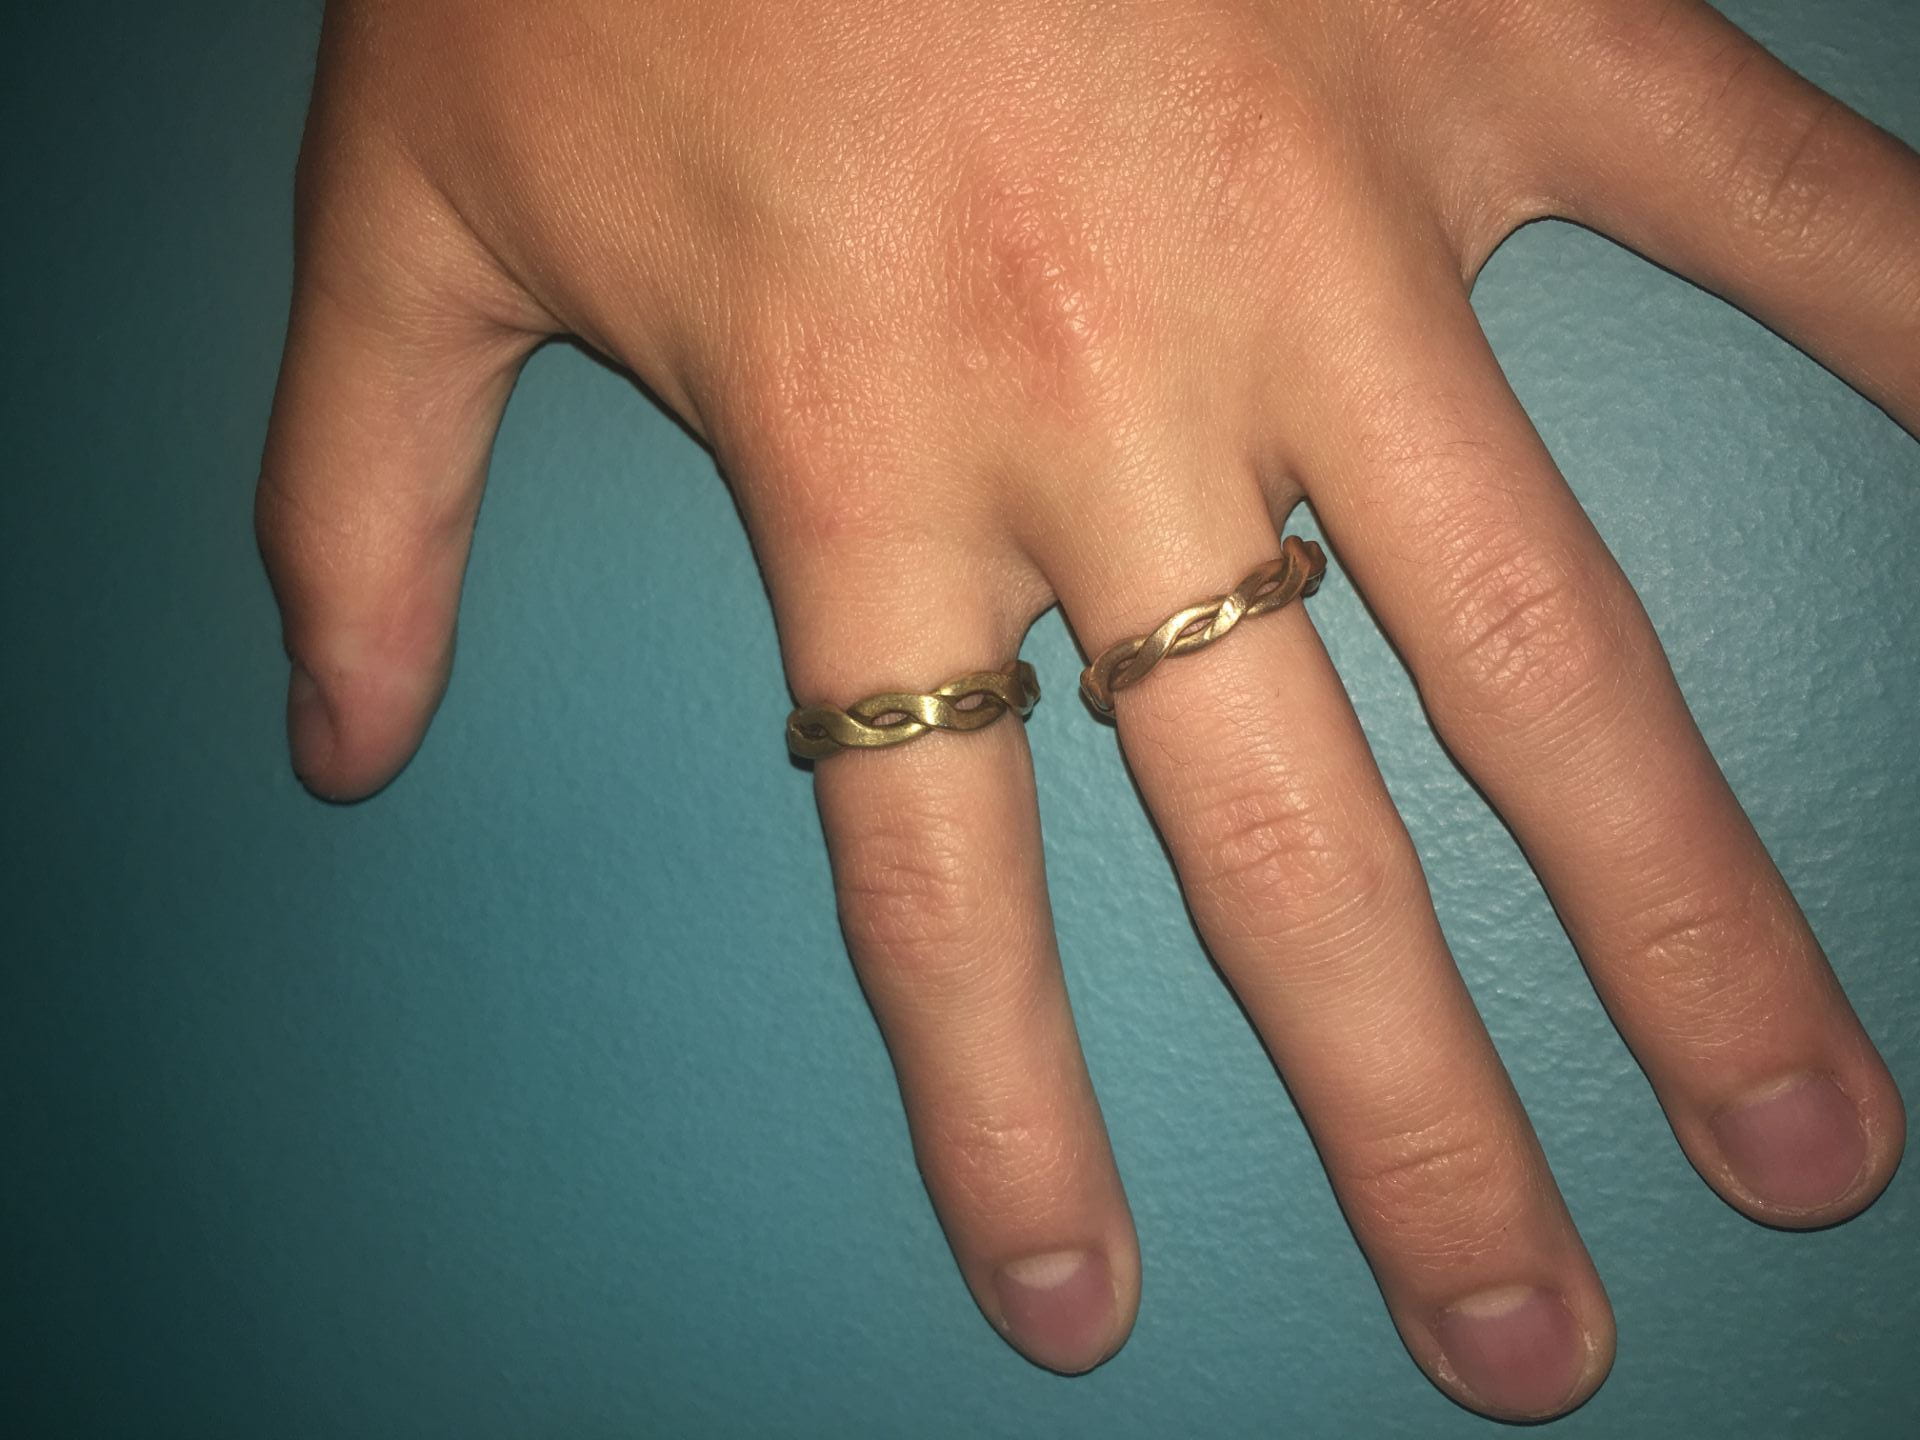
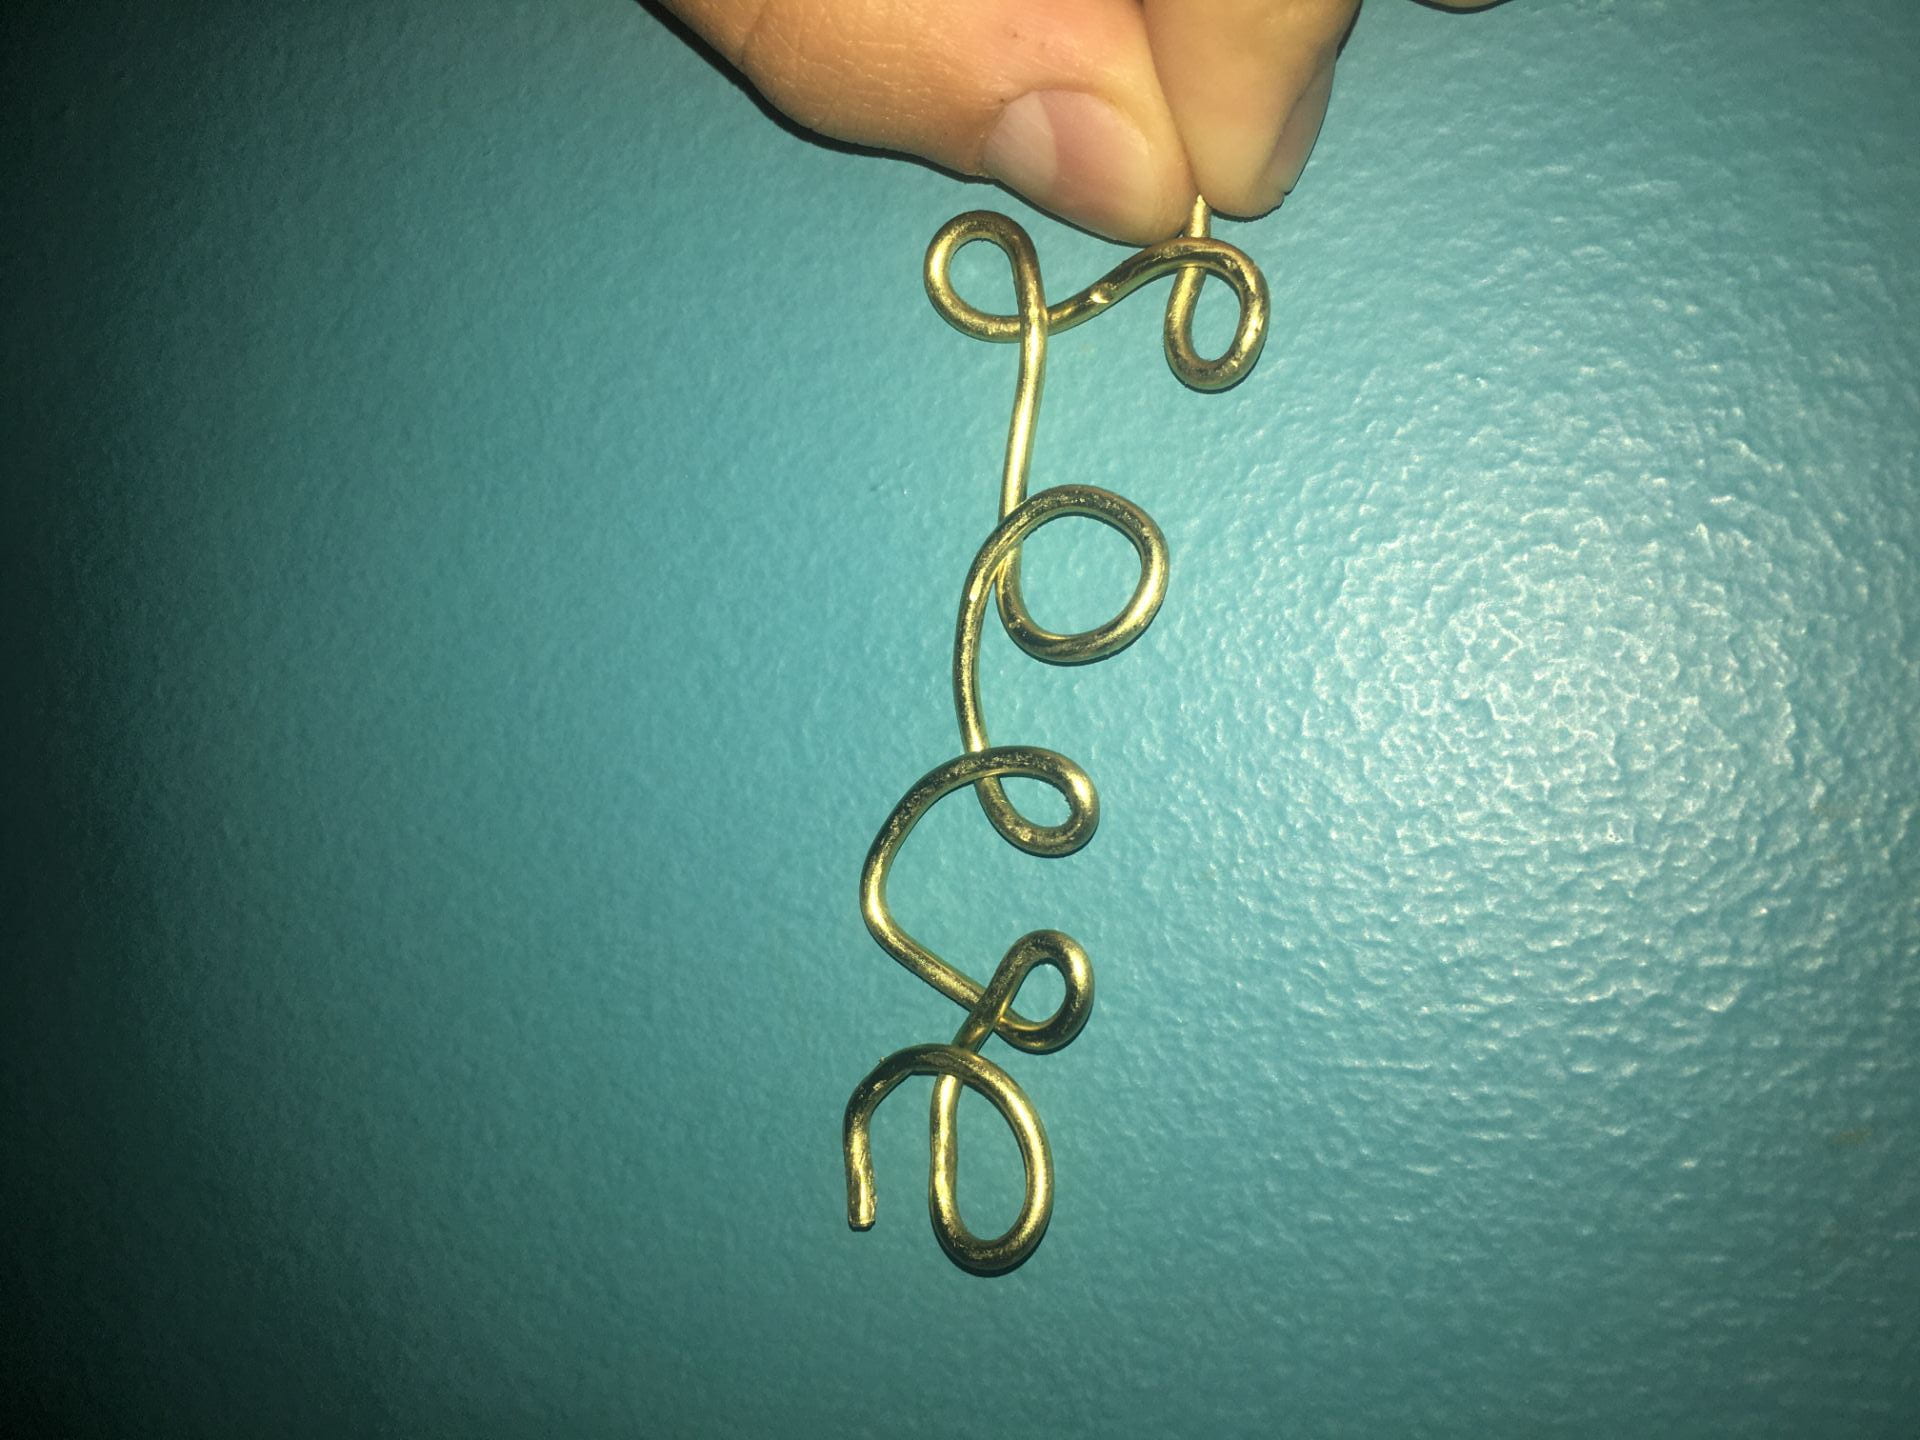
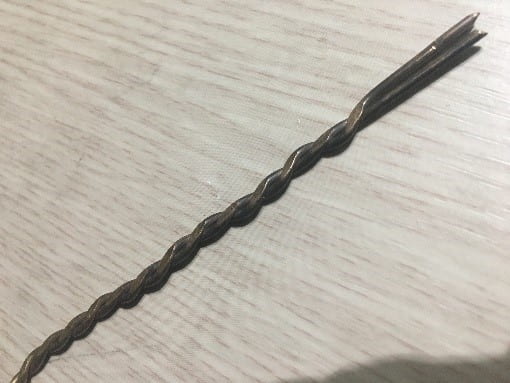
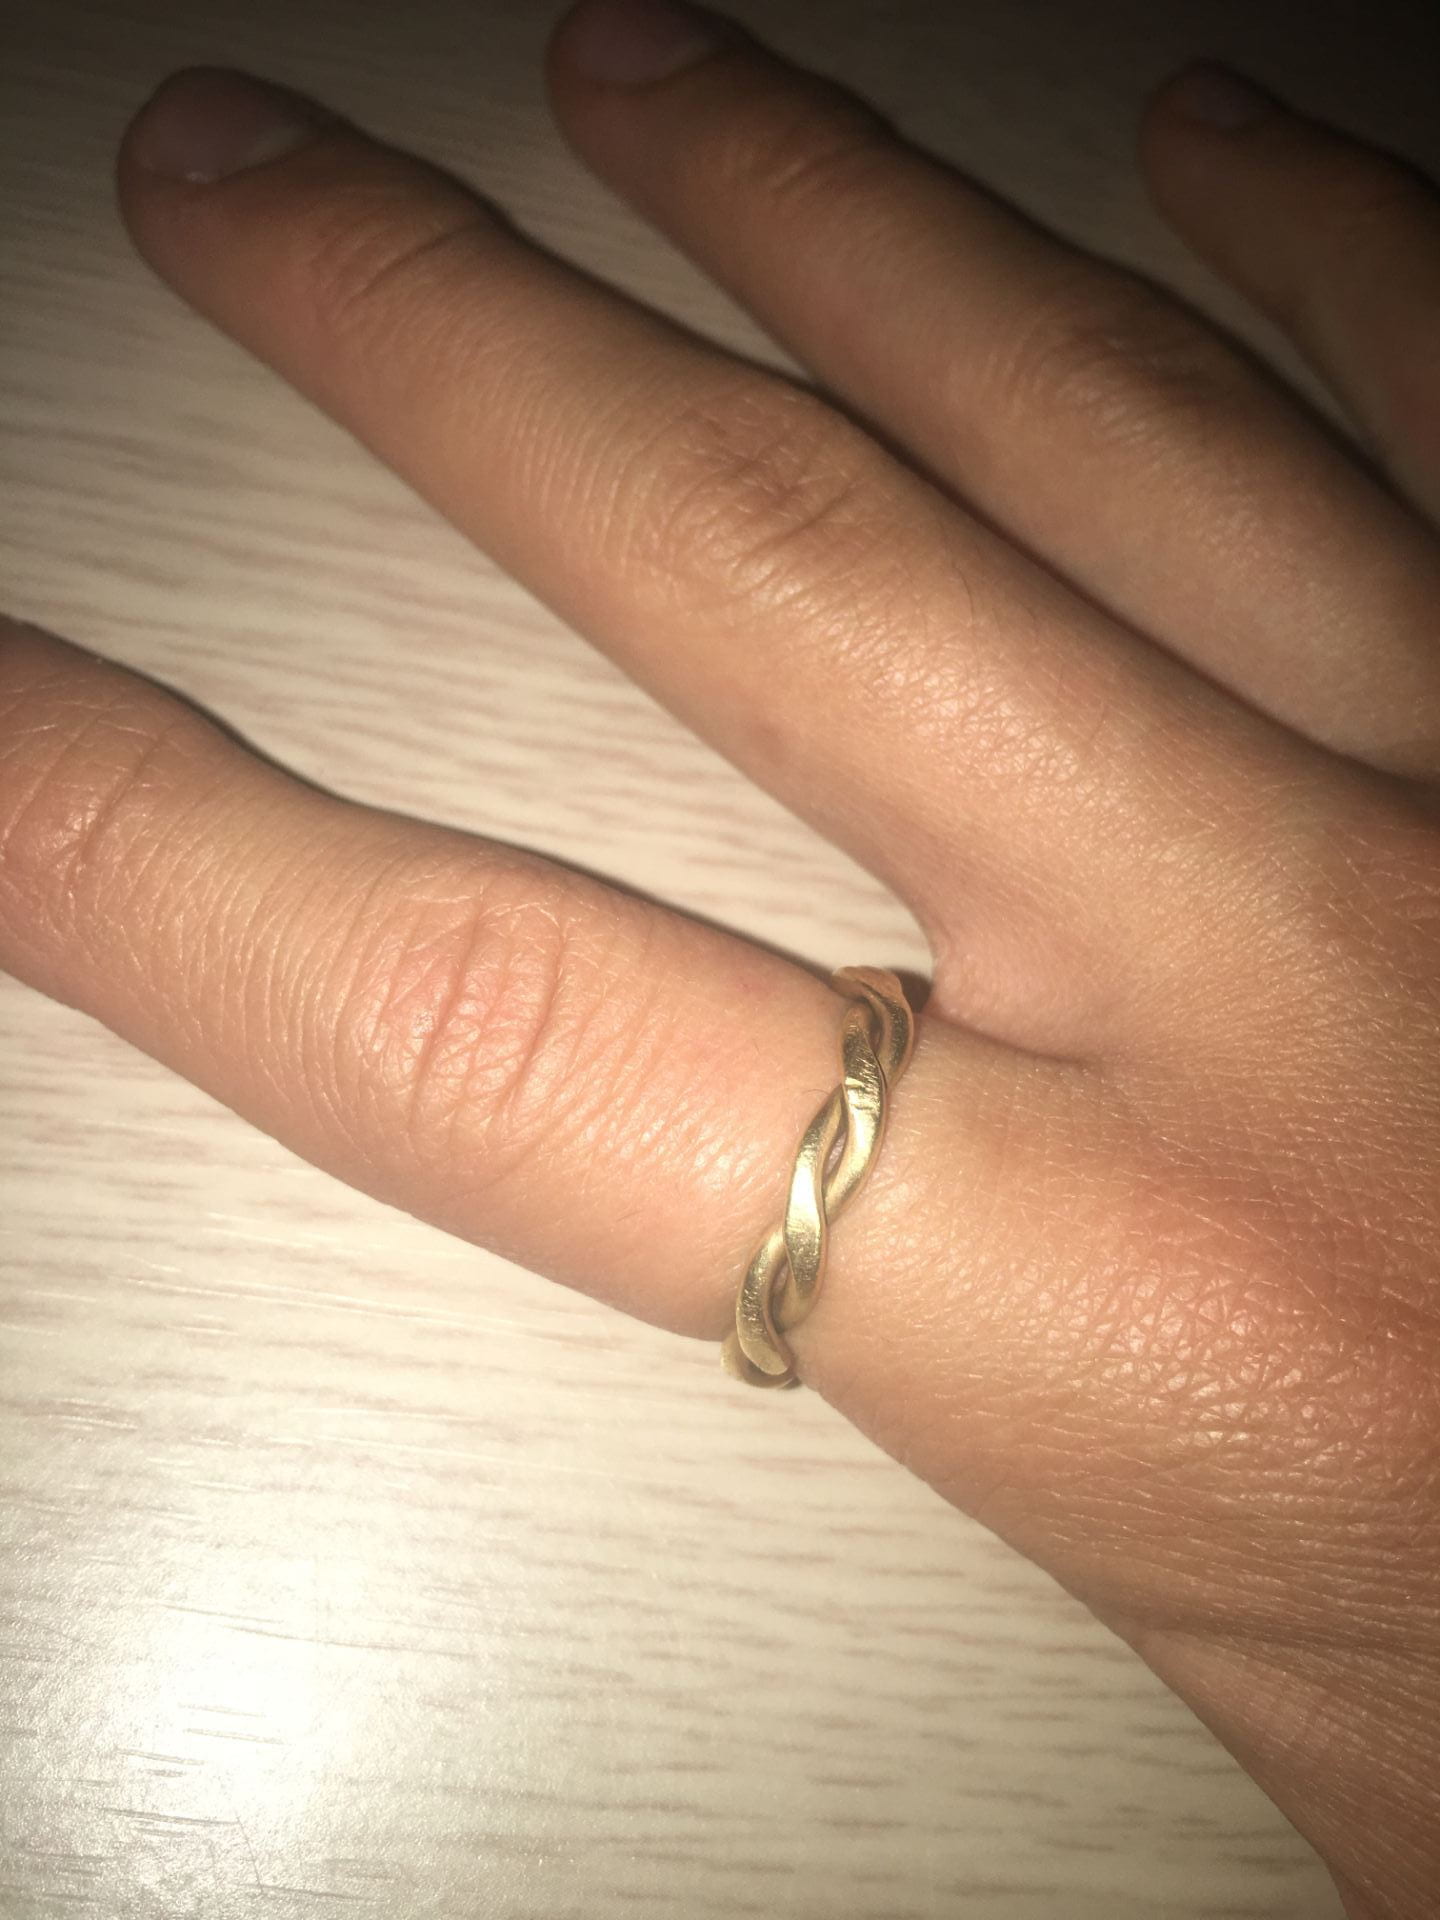
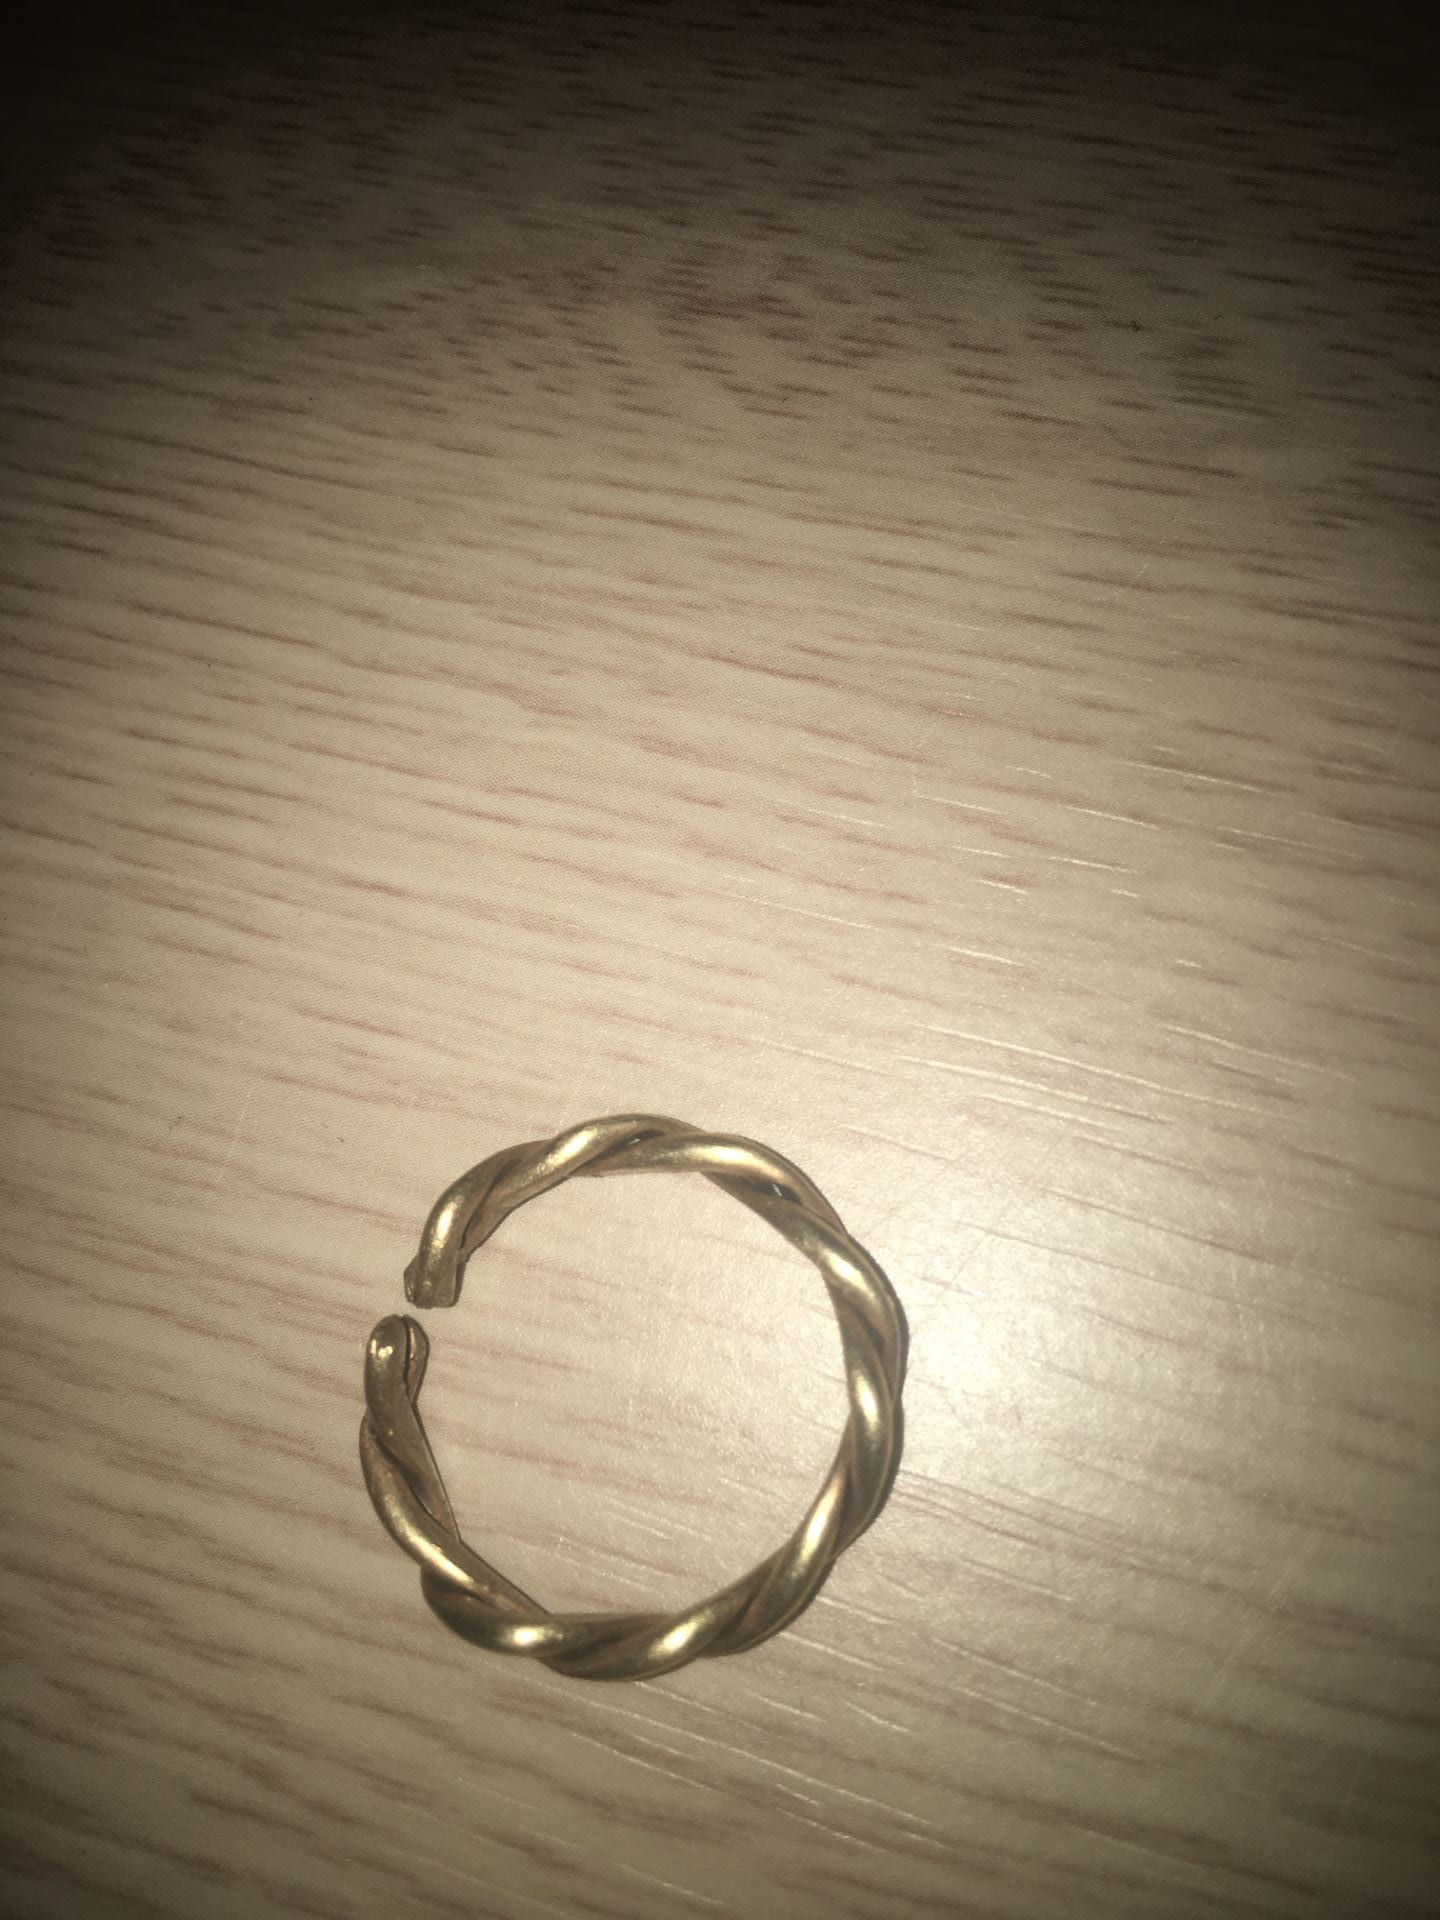
I also had some time while my silver ring was in the citric acid, so I started on a twisted ring. I took two pieces of copper wire that had been heated and cooled, then using a drill and pliers, I twisted them around each other. After that, I hammered them on one side creating a cool twisted flat ring effect. I hope to be able to continue this as I go along with my in-depth. 

Meeting with my mentor was the big roadblock of these past weeks. Due to Coronavirus, I’m not able to meet with my mentor until further notice, so I’ve been doing a lot of research on my own. Jewelry making has become tougher with not being able to meet with my mentor, but she gave me a book about jewelry making that I have also been reading along with doing online research. Altogether, I went to many websites and watched Youtube videos so that my In-Depth continued at a good pace.  


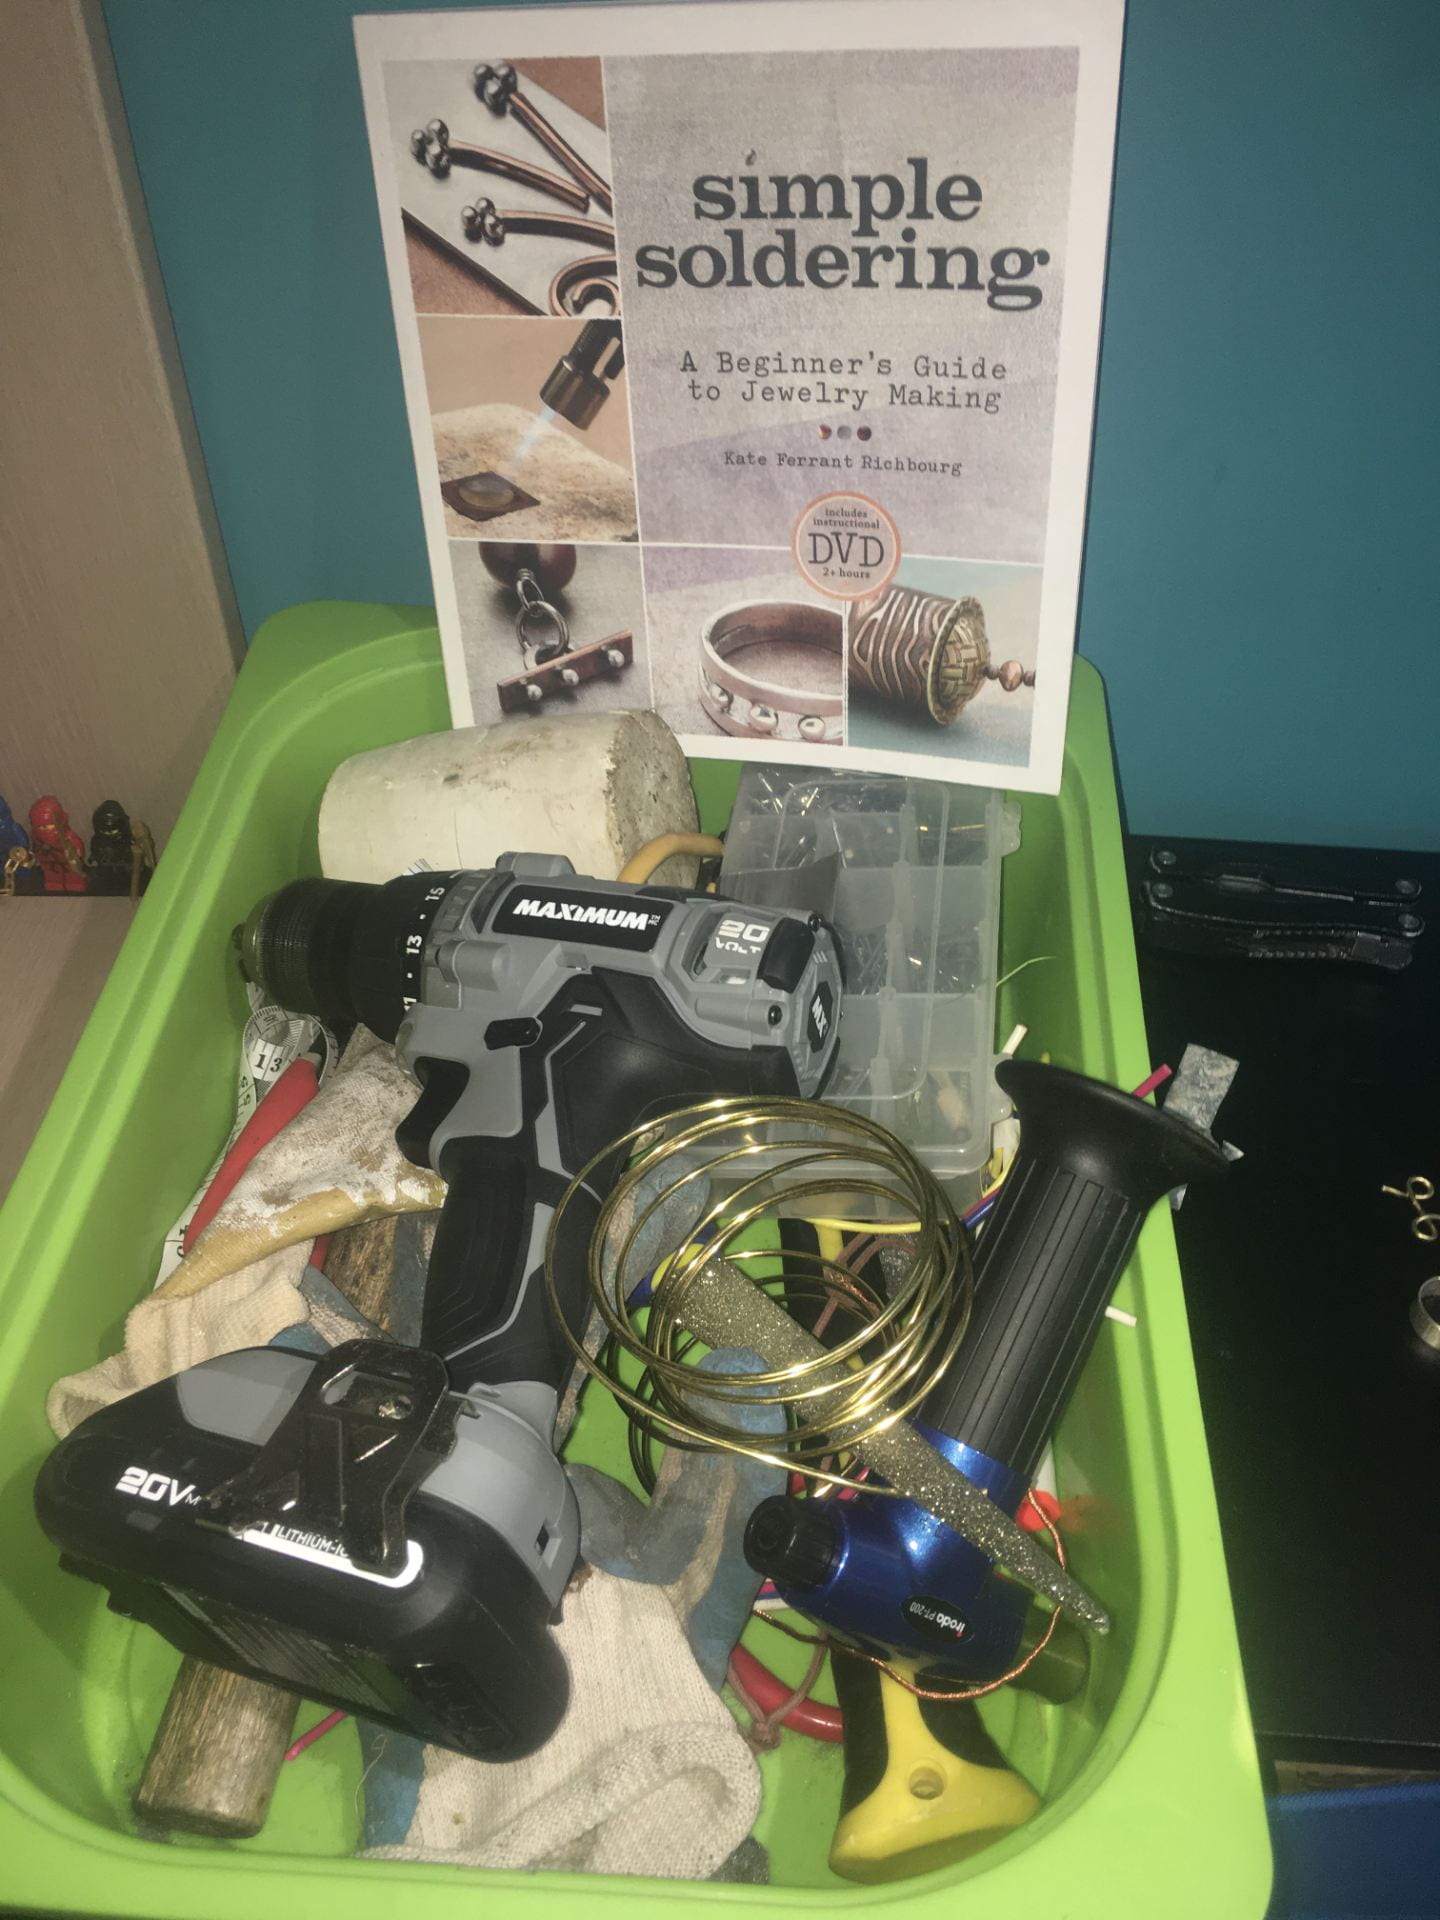
Since I don’t think I’ll be able to meet my mentor again I’ve also been looking into buying some simple tools that I could use for making jewelry. I have a lot of the tools I need from hammers to files and even a butane torch, along with the projects I have and some copper and brass. If I buy a few tools then I might be able to do some jewelry making at my house. 

Coronavirus is a challenge to work around, but I’ll continue doing my best. 

Word Document with Photos: https://sd43bcca-my.sharepoint.com/:w:/g/personal/125-cng1_sd43_bc_ca/EX1MOk2E53ZOkf6DWG9ZPq0BvV3oP0RzRh__ptT0rrRl7A?e=AVi1qJ

Above are some pictures I took to show how my current projects are going, and you can view them in the word document. The first pictures are my silver ring, the second my copper bracelet, and the third my twisted ring.  

I did a lot of research leading up to this post. I’m reading the book my mentor gave me which is helping me understand the basics better, and if I keep reading a little each day, then I won’t have a problem learning plenty. I also watched Youtube videos about making jewelry and visited websites about essentials to jewelry making, African jewelry, and why homemade jewelry is a great skill. Below I put links to the websites I found most interesting and useful. 

How to Hammer Wire: https://www.youtube.com/watch?v=eSVJqTqrb8U 

DIY Stamped Wire Bangle Tutorial: https://www.youtube.com/watch?v=0-gTk2UhofM 

How to Make a Bracelet Out of Copper Tubing: https://www.youtube.com/watch?v=eZvPYGX9Tbk 

Essential Parts of Jewelry Making: https://www.mybluprint.com/article/want-to-start-making-jewelry-these-10-tips-will-launch-you 

African Jewelry:  https://artsandculture.google.com/exhibit/the-history-of-african-heritage-jewelry-african-heritage-house/MQJiNWW15_JnJw?hl=en 

Homemade Jewelry: https://www.halsteadbead.com/articles/handmade-jewelry-types-and-techniques 

What has been my most difficult mentoring challenge so far? 

The most difficult challenge so far has been continuing in-depth and using jewelry making skills during the Coronavirus Pandemic. I can’t leave my house unless it is absolutely necessary, so I’ve had lots of problems from not being able to talk to my mentor, to not being able to use tools, to not being able to be shown new jewelry-making techniques. This has been a difficult challenge, and I’ve been working to try and do my best to combat this roadblock. I’ve looked into getting some tools, and I hope I’ll be able to do some jewelry making at home.  

What is working well? Why? 

Right now my research is going better than ever. I have plenty of online supports along with the book that my mentor gave me, and those have kept me occupied. I’ve started reading the book and haven’t even finished yet, and there are countless online sources that I can go to. My research is the one thing I can do during this quarantine, and because I’m trying my best and have the tools to succeed. My research is working well and I hope it continues too. 

What could be working better? How can you make sure this happens? 

My actual jewelry making could improve. Due to Coronavirus, I haven’t been able to use many of the tools or actually make jewelry, and this is slowing my in-depth down. I’m going to continue working and try to buy some of the basic tools. If I do this I increase my chances of learning all the hands-on skills I need to know for jewelry making. I’ll try my best but nothing is certain.  

Nothing is certain, but I’ll continue doing my best.  

P.S. Wash your hands 


Shark Tank Project (M&E 9)

https://sd43bcca-my.sharepoint.com/:p:/r/personal/125-ymudaffer_sd43_bc_ca/_layouts/15/Doc.aspx?sourcedoc=%7B610EBE0C-D4FB-4251-B7F1-C902413C0375%7D&file=Shark%20Tank%20Big%20Project.pptx&action=edit&mobileredirect

This assignment was my final project for Marketing and Entrepreneurship 9. I worked in a group with two other people, and together we deigned, created, and presented a business idea to our class; The Unmove-A-Bowl, the bowl that never spills. The presentation was set up like a Shark Tank pitch and we used props, a PowerPoint, and a display in our presentation.

This assignment took a lot of previous knowledge as it was very open ended. First of all, we had to understand how Shark Tank worked so that we would be ready for any and all questions. Secondly, we had to know how to use editors and PowerPoint so that we could make our presentation and our advertisement. Lastly, we needed creativity skills as we had to bring in a functioning prototype as part of the presentation.

This final assignment created many challenges due to how big and important it was. One of the main challenges we faced was work distribution. There were three of us, so splitting everything up was tough. Secondly, we had winter break right in the middle of the project, so we couldn’t collaborate during that. Besides that our presentation went very well and we ended up getting a 97% on the project.